
While indulging myself in some analysis of games by the legendary Italian grandmaster Sergio Mariotti, I came across an extraordinary positional episode in some engine games I ran as part of my analysis. It’s one of those engine recommendations that make you question everything you thought you knew, as well as awakening feelings of guilt for all the times you’ve criticised amateur players for making this “mistake”! As always (thankfully) the reality is richer than both your long-held beliefs and your emotional reaction to this discovery! Let’s start off by seeing what shocked me so much!
Mariotti-Beliavsky Leningrad 1977
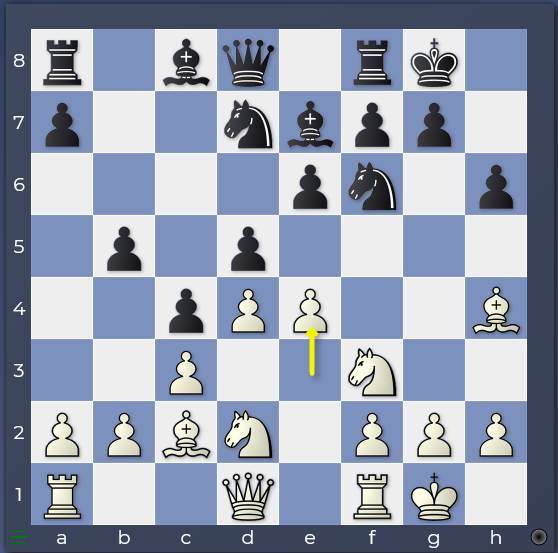
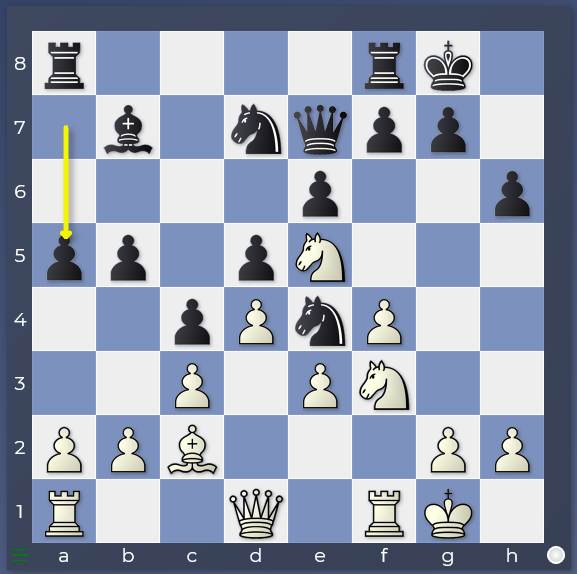
1.d4 Nf6 2.Bg5 d5 3.Nd2 Nbd7 4.Ngf3 h6 5.Bh4 e6 6.e3 c5 7.Bd3
Via a Trompovsky Opening (2.Bg5), we have emerged into a position typical of the Torre Attack (characterised by the first 3 moves 1.d4 2.Nf3 3.Bg5). Mariotti’s last move is provocative as White normally meets …c5 automatically with c3. c3 ensures that, after a subsequent Bd3, …c4 can be met by Bc2 keeping the bishop on the aggressive b1-h7 diagonal from where it points at a castled black king while supporting the e3-e4 central break. After 7.Bd3, 7…c4 would force the bishop off the b1-h7 diagonal and back to a more passive square on e2 with gain of tempo. So why would White want so badly to elicit …c4 from Black that he would offer up a tempo for it? Because …c4 is a BAD move, as in lock-away-in-prison-and-throw-away-the-key-bad!
Maintaining the central tension for as long as possible – here in other words, leaving the c-pawn where it is and playing neither 7…c4 nor 7…cxd4 – is an approach that players develop as they become stronger. This approach has 2 facets:
- Keeping your options open until you are sure which is best
If you play 7…c4 now, you lose the opportunity to play …cxd4 later. If you leave the pawn on c5, you keep both possibilities available until a later stage. At a later stage, you will have more information to decide which continuation is best suited to the struggle ahead.
- Restraining your opponent’s ambitions and increasing the options he needs to consider
Typical ideas for White include pushing in the centre with e3-e4. If the black pawn is still on c5, White also has to calculate Black’s …cxd4 as a response every time he analyses the e4 break. If Black has played …c4, White’s calculation is much reduced and his task in evaluating the push is much simpler.
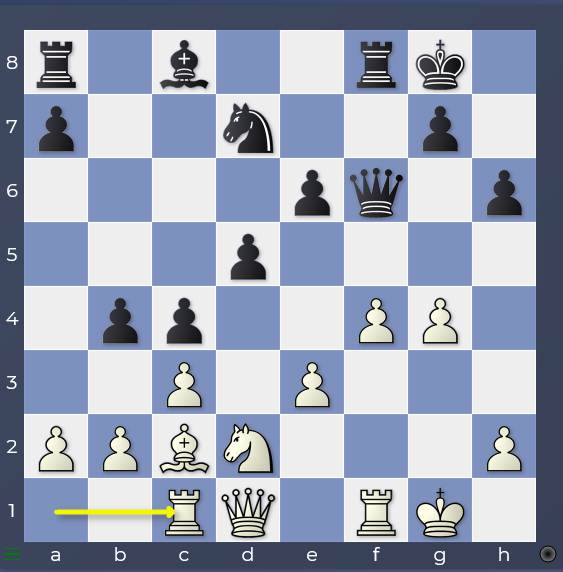
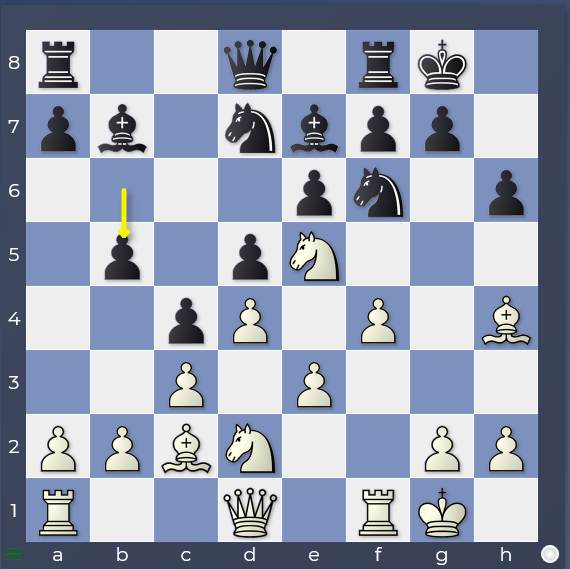
However, in this specific case, after 7…c4 8.Be2 b5
the engines see this position as no problem at all for Black: in fact, this is their recommended solution.
When I saw this, I wasn’t too shocked. In this form, 7…c4 knocks away White’s support of the e4-break and gains a lot of space on the queenside with gain of tempo – space which Black is poised to expand still further with …b4. Moreover, since his king is not yet castled, Black has a lot of flexibility in when and where he commits his king. Typically, a lack of pressure on the opponent’s centre translates into an opponent’s ability to throw pawns and pieces forward on a wing freely without needing to worry about disruptive central counterplay. Here the black king could even still decide to step out to the queenside if White threw his f- and g-pawns forward!
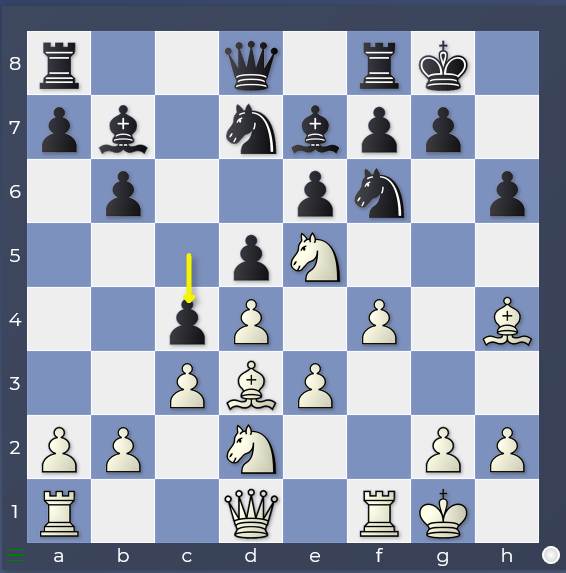
So I could understand the engine evaluation of 7…c4 in this specific position but what I did know was that after something like 7…Be7 8.c3 0–0 9.0–0
then 9…c4 10.Bc2 b5 would definitely be bad for Black, right?
After all,
- White’s light-squared bishop has managed to remain pointing at Black’s king along the b1-h7 diagonal by retreating to c2. From that point of view, 9…c4 seems like an empty shot.
- The break e3-e4 is now very close (it can be played immediately in fact) and now White doesn’t need to worry about any capture on d4.
- Black’s king has castled which means there’s no escaping from a furious assault on the wing!
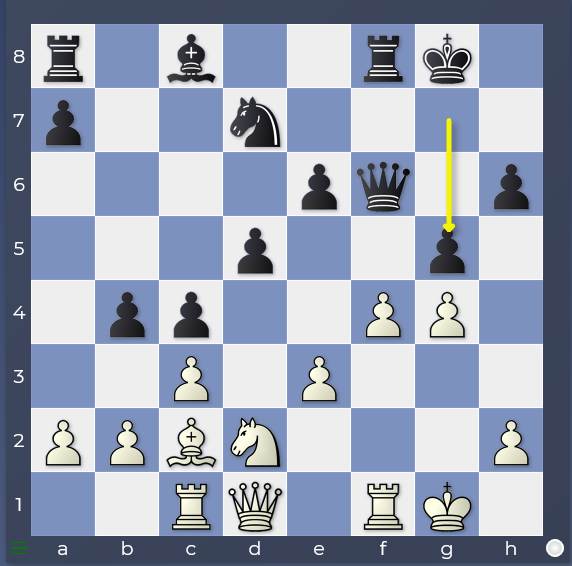
And yet, the engines see this as equal too! Now I’m angry! This can’t be true! First of all, why not simply 11.e4? Come on engines, you’ve just given White this break for free!
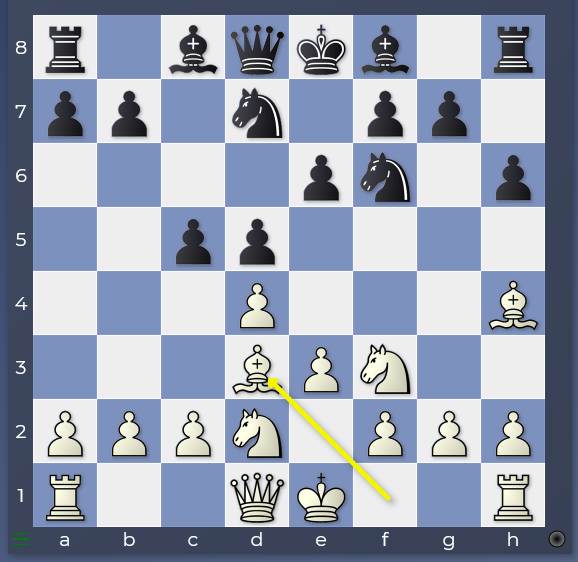
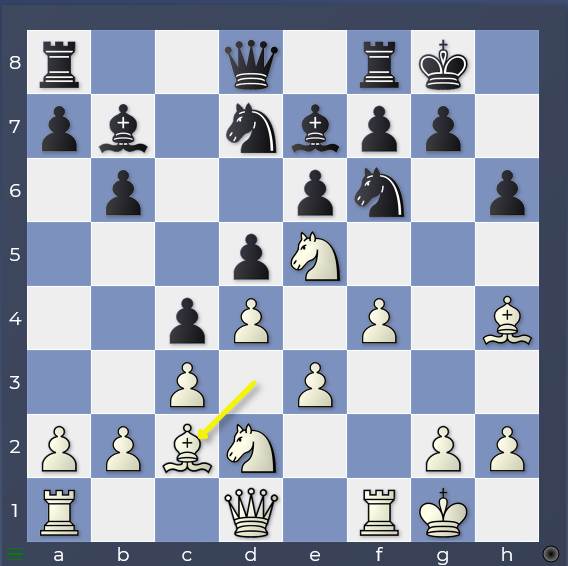
Well the engines merely shrug their shoulders and say a line like 11…dxe4 12.Nxe4 Bb7 13.Re1 Bxe4 14.Bxe4 Nxe4 15.Rxe4 a5 16.Bxe7 Qxe7 17.Re3 Nf6
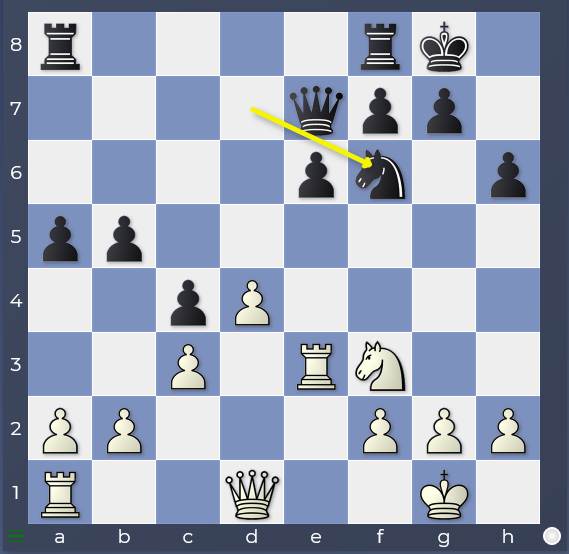
is just fine for Black. And I want to argue, but there really is no point because it does just look pretty nice for Black! In this setting, 9…c4 made White’s d4-pawn invulnerable but it both secured a great central square for the black knight on d5 (protecting it against c4 from White) and fixed the c3-pawn which will endure combined attack from …b4 and …Nd5. Meanwhile, the exchange of multiple minor pieces has dissipated White’s attacking force so it’s not easy to imagine Black’s king getting into trouble now. It’s an example in fact of the many ways that threats can be dealt with: sometimes you try and prevent threats and sometimes – like here – you simply absorb them and roll with the punches!
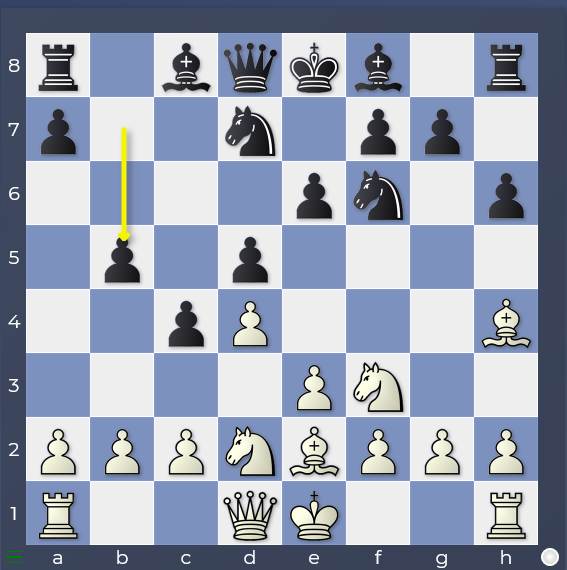
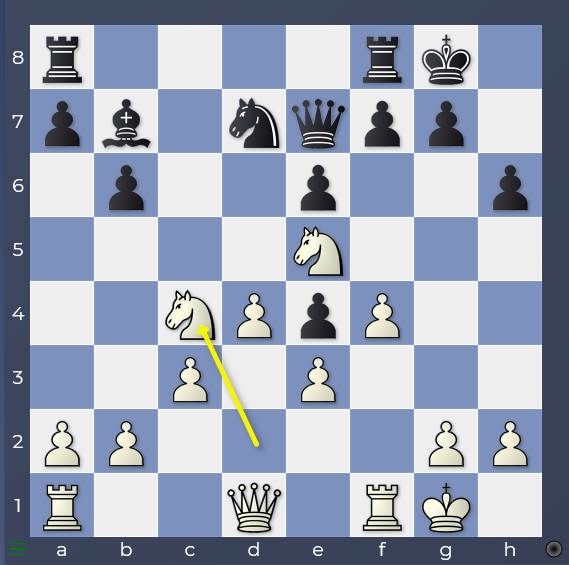
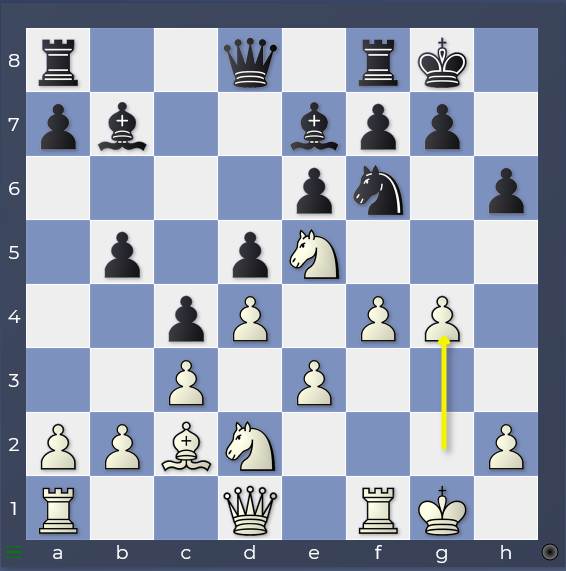
Ok, but I’m still angry and I’m not finished! Let’s switch to White’s other main plan: 11.Ne5
This is a favourite White stratagem in many Queen’s Pawn openings, particularly those where White avoids playing c4 such as the London System (1.d4 d5 2.Nf3 Nf6 3.Bf4) and the Colle (1.d4 d5 2.Nf3 Nf6 3.e3). White uses his solid reinforced central chain (c3-d4-e3) as a launching pad for a kingside attack. The knight on f3 is played to the central outpost e5, then the f-pawn is moved to f4 and kingside mayhem ensues with Rf3-h3, Qf3-h3 or g4-g5. Once the f-pawn is played to f4, then a future …Nxe5 will be met by fxe5 opening the f-file as an additional attacking channel for White while driving away a defensive knight from f6.
The interesting part to this plan is that Black mostly can’t really stop it: he has to allow it and react appropriately and there are 2 main ways.
- The immediate capture on e5 before White achieves f4.
Here the engines suggest 11…Nxe5 12.dxe5 Nd7 13.Bxe7 Nxe7 14.f4 b4
A very unbalanced position has arisen. White hasn’t got his ideal central pawn structure: capturing with the d-pawn leaves a path for the black knight to the d3-outpost created by the pawn on c4 via c5… though on the other hand it does provide an outpost on d4 for a white knight! Note also that thanks to Black’s early choice for queenside expansion with …c4 and …b5, Black is already knocking (softly for now) at the White queenside’s door with his counterplay.
As they used to say in the old Russian books, this is a position that will repay study! I don’t want to overwhelm you with variations so for now I will keep myself to just a sample line from Stockfish’s analysis which I think conveys well the complexity of the play for both sides.
15.g4
Going for it! The centre is fairly static so White feels able to throw his g-pawn forwards.
15…f6
This always confused me when I played such positions as Black: am I freeing myself from the shackles of the e5-pawn or am I loosening my kingside for White to exploit. To which the only answer is: yes!
16.exf6 Qxf6
Hitting the pawn on c3: Black’s queenside counterplay is already hurting!
17.Rc1
Defending the c3-pawn indirectly (17…bxc3 18.bxc3 Qxc3 19.Bh7+) And now the engines advocate the sort of move that makes a huge difference to Black’s prospects but that is so difficult to imagine yourself!
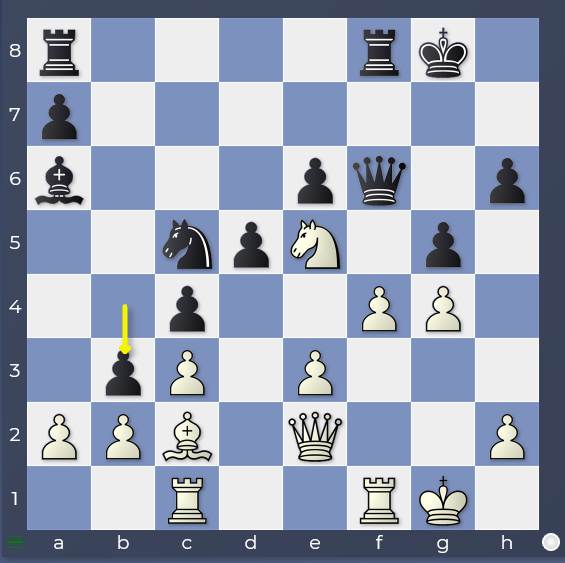
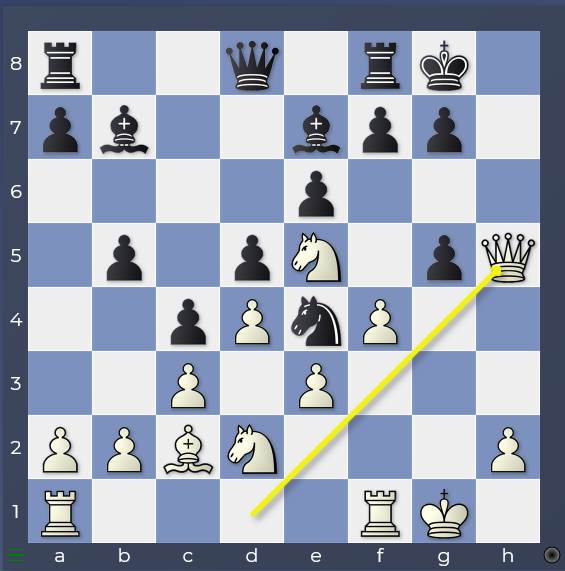
17…g5
Wow! Let me say that again: WOW! The possibility of g5 from White was pretty worrying, freeing once again the white queen’s access to g4 and h5. In fact, the fact that White played 15.g4 made 17…g5 possible. Black hammers in that pawn on g4 and blocks all sorts of attacking channels towards the black king. I’ll just show you a few moves of craziness to give you a sense of the type of game you can expect!
18.Qe2 Ba6 19.Nf3 Nc5
Heading for d3
20.Ne5 b3
Using the advanced b-pawn in another way, as 21.axb3 cxb3 opens the a6-f1 diagonal
with crazy complications.
There is however even another way of playing for Black.
- Plugging the hole on e4 without capturing on e5.
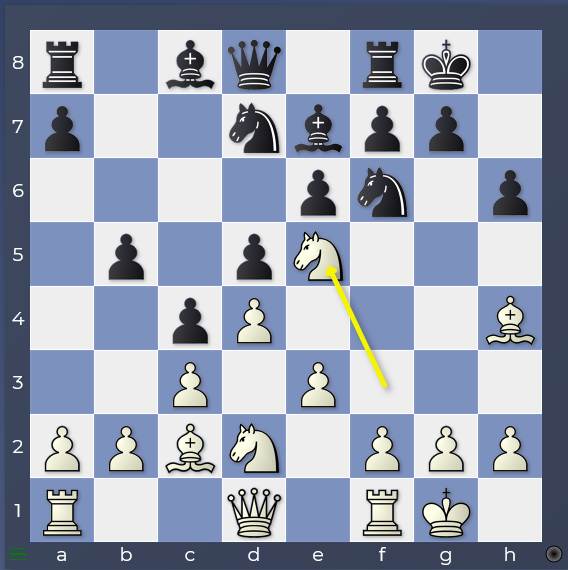
11…Bb7 12.f4 Ne4
Although Black relinquished pressure against the d4-pawn by playing …c4, he still maintained some control of the centre, in particular the e4-square. Placing a knight on e4 blocks White’s kingside play in many ways.
- An exchange of dark-squared bishops is offered. After Bxe7, …Qxe7 the black queen is excellently-placed both to offer protection to Black’s kingside and to support Black’s queenside counterplay with …b4
- The knight on e4 attacks the knight on d2, which prevents the white queen from moving forwards to f3, g4 or h5.
- If White captures on e4, then …dxe4 takes away the f3 square from the white major pieces which makes it much more difficult to involve them in kingside operations.
- The knight on e4 blocks the b1-h7 diagonal, removing an important channel of attack for White.
- Now the knight is no longer on f6, …Nxe5 will not cost Black a tempo after fxe5. This makes it easier for Black to nibble at the topmost point of White’s centre with …f6.
This option is much less sharp than the immediate 11…Nxe5 as Black essentially concentrates on exchanging pieces and blocking White attacking channels rather than developing counterplay of his own. A typical engine continuation is 13.Bxe7 Qxe7 14.Ndf3 a5 with more or less balanced chances.
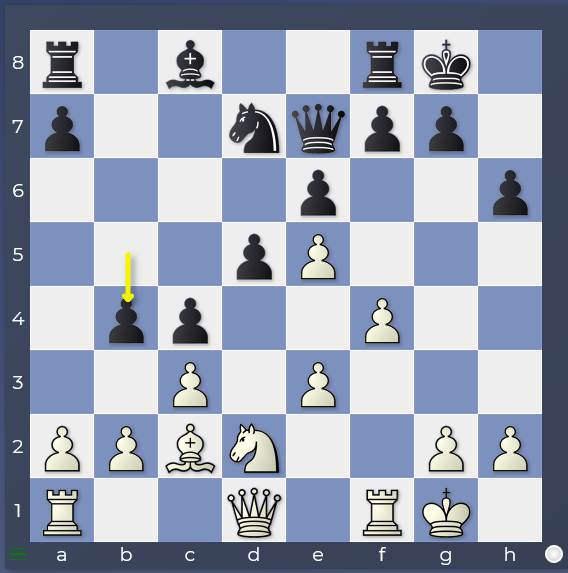
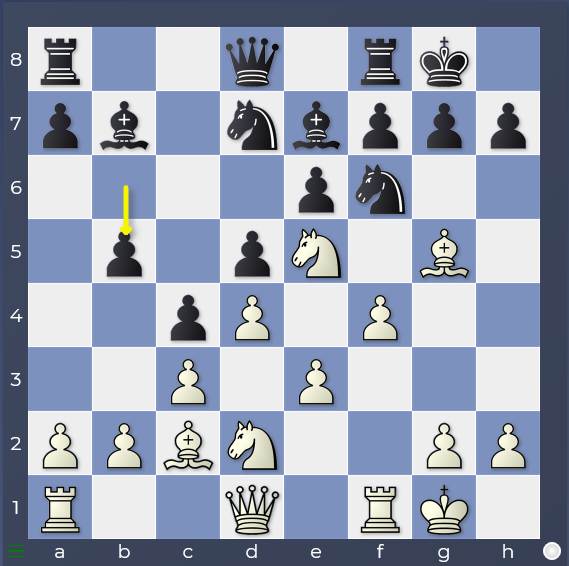
By now you may be wondering whether there are ANY positions where …c4 is bad. Yes of course they are, but now I think we will understand better why! After 7…Be7 8.c3 0–0 9.0–0 instead of 9…c4, Black might simply develop quietly with 9…b6 and only after 10.Ne5 Bb7 11.f4 decide to play 11…c4.
So what is the position after 12.Bc2?
I think you may notice 1 detail that’s different compared to 9…c4 10.Bc2 b5: the c4-pawn is undefended. That sounds tiny, but in fact it’s a huge difference because that means that 12…Ne4 now loses a pawn to 13.Bxe7 Qxe7 14.Bxe4 dxe4 15.Ndxc4
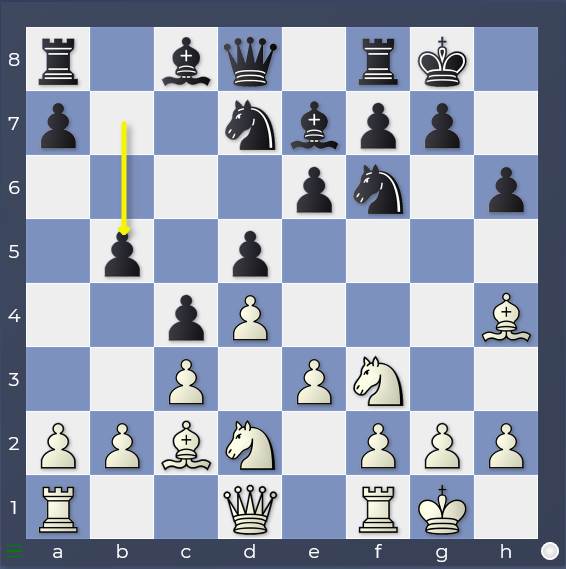
Ok, you may think, let’s protect the c4-pawn with 12…b5 and then follow-up next move with …Ne4.
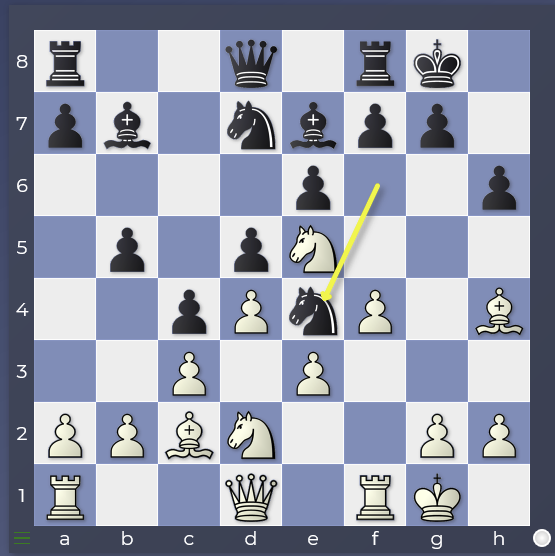
In this position, the engines surprise you with 13.Bxf6 Nxf6 14.g4
This is a very specific exploitation of the inclusion of 4…h6 5.Bh4 all those moves ago in the opening. The pawn on h6 provides a “hook” with which to rip open the black kingside. Again, I don’t want to overwhelm you with variations in this article, but the continuation 14…Ne4 15.g5! hxg5 16.Qh5
with Rf3-h3 to follow (16…Nxd2 allows 17.Qh7+ mate) is terribly difficult for Black to defend.
Note by the way, that if Black had played in the same way but without inserting 4…h6 5.Bh4 in the opening like this: 1.d4 Nf6 2.Bg5 d5 3.Nd2 Nbd7 4.Ngf3 e6 5.e3 c5 6.Bd3 Be7 7.c3 0–0 8.0–0 b6 9.Ne5 Bb7 10.f4 c4 11.Bc2 b5
Then White would have simply played 12.Qf3
and Black is too late to play …Ne4! The engines give White an advantage of +1.5 which for an engine is already decisive!
So what are the conclusions about the move …c4 in these lines? It’s clear that it’s by no means as generally bad as I thought. However, it’s also clear that Black needs to have maintained some central control (the light-squared bishop must be able to come to b7 quickly) to make this move work. In particular, the ability to play …Ne4 in response to White’s plan of Ne5 and f4 (a response which also demands the prior protection of the c4-pawn with …b5) is absolutely crucial.
Hope you enjoyed this article and it just remains to say that if you fancy a look at Mariotti’s games, then look no further than this playlist (https://youtube.com/playlist?list=PLxhvNMc95Uo_t9LDjtHx8s1EfTMEv62rh&si=iDaKESiefo5daOFc) of 24 videos for a full overview of this wonderful player!
Very clear and instructive.
Thanks Javier! Hoping to follow up with a bit more stuff on this! Best Wishes, Matthew
I had no doubt you would shed considerable light on the …c4 push. You didn’t disappoint. Very insightful. Thank you
Thanks Blair! Glad you enjoyed the article!