
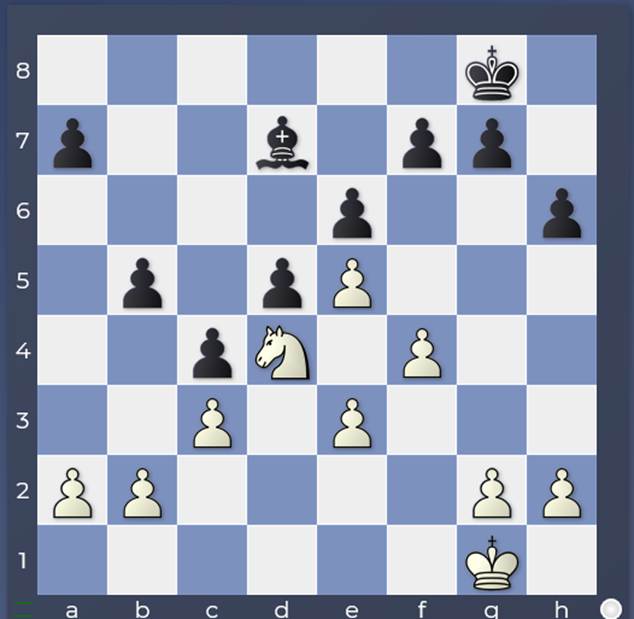
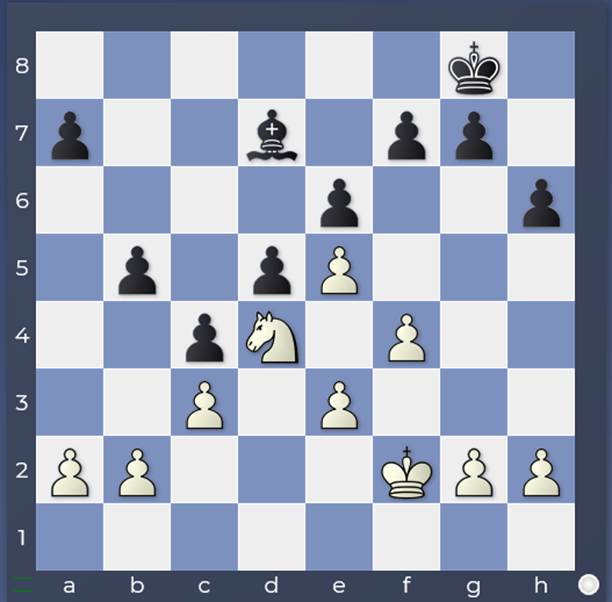
This blog post continues my slight obsession with the intricacies of the …c4 move in a Trompovsky / Torre Attack structure. This time we focus on one of the engine’s best lines for Black:
1.d4 Nf6 2.Bg5 d5 3.Nd2 Nbd7 4.Ngf3 h6 5.Bh4 e6 6.e3 c5 7.Bd3 Be7 8.c3 0–0 9.0–0
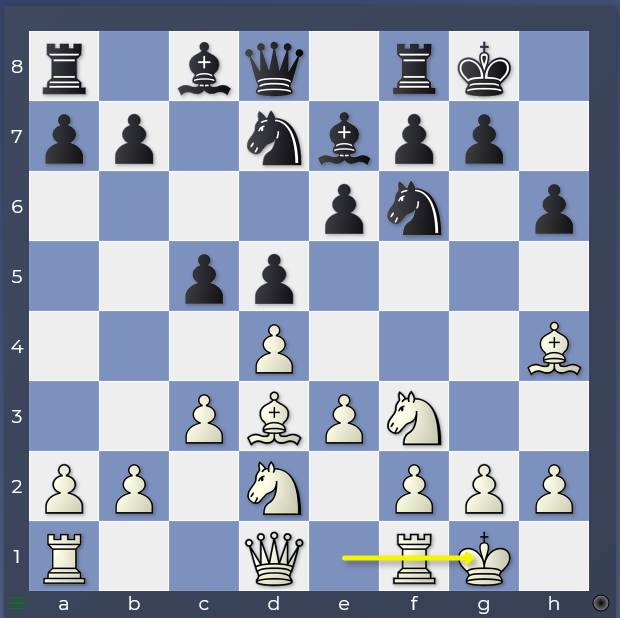
and now instead of Beliavsky’s solid and restrained 9…b6, the engines quite liked the more committal
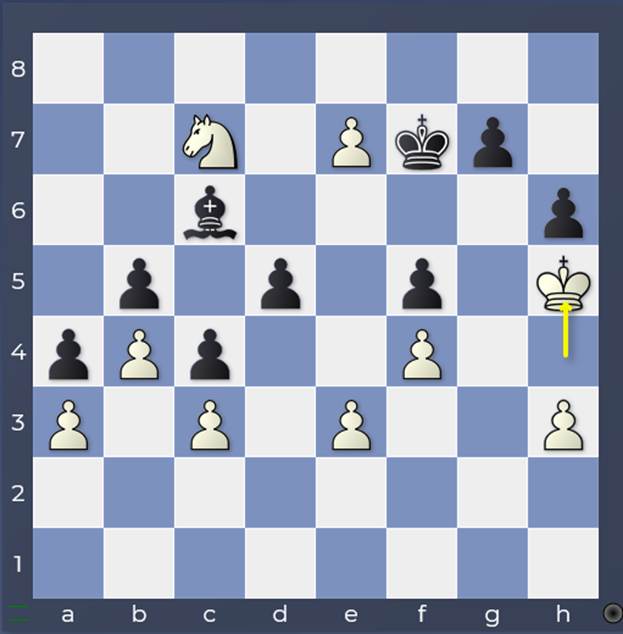
9…c4 10.Bc2 b5
Against the natural human idea
11.Ne5
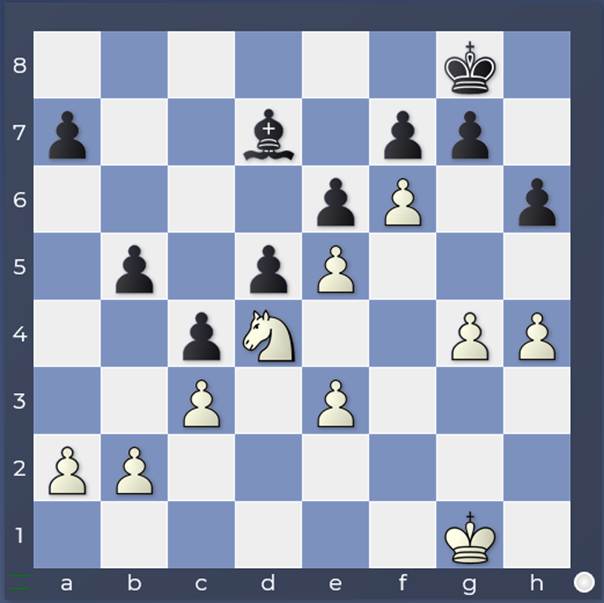
the engines wanted 11…Nxe5 12.dxe5 Nd7 13.Bxe7 Qxe7 and now 14.f4
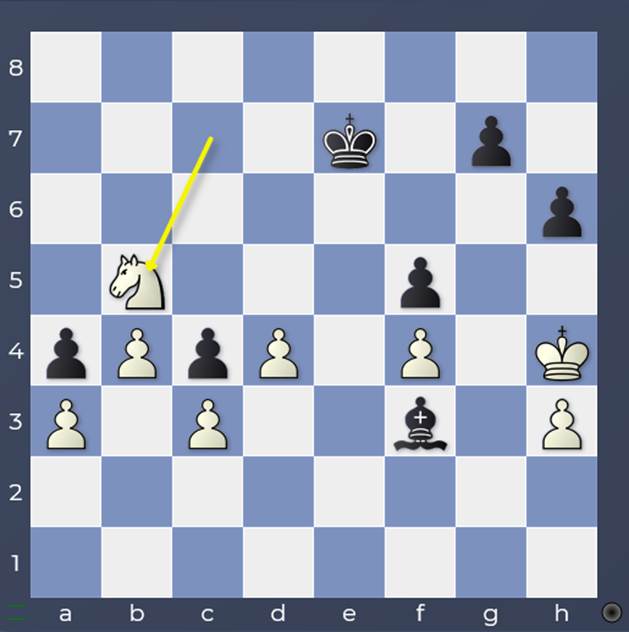
I mentioned that the line would repay further study, and I’ve decided to take my own advice!
I was somewhat ambivalent about this way of playing for Black. On the one hand, the engines like it – Stockfish assesses it as near-equality – on the other hand some things made me nervous! I’m certainly not going to doubt the accuracy of that evaluation but I definitely looked at the Black position with a somewhat sour expression! As always when an engine evaluation diverges from your own, it’s worth searching your feelings to discover the reason for the disconnect.
What’s the first thing you see when you look at the position? I see a great square on d4 for the white knight and Black’s light-squared bishop on c8 restricted by the f7-e6-d5-c4-b5 pawn chain. In essence, the first thing I notice about the position is an unshakeable outpost for a white knight and a potential long-term problem piece. To me, something is screaming “long-term danger” in my head. I start to see scenarios where I end up in a joyless, passive situation with a passive bishop against a happy knight! Now of course those scenarios don’t have to occur, but I am already feeling the pressure of needing accurate and dynamic play as Black to prevent them from happening.
On top of that, there is some confusion in my mind as to what I should be doing. Do I want to play …f6 or not?
On the one hand, it challenges a strong white pawn on e5 that takes away the f6-square from my knight and creates an outpost on d6 for a white knight. On the other hand, it definitely loosens my kingside light squares (such as g6) which might be bad news with White’s light-squared bishop on the b1-h7 diagonal already.
Also, how much do believe in my counterplay with …b4 on the queenside? With a strong knight on d4, isn’t White able to hold everything together very easily? And won’t he start hitting me on the kingside while I’m struggling to squeeze into White’s queenside? Essentially, I’m worrying about a complex struggle in which my king is in danger and White’s isn’t!
If I was looking at this as a result from my opening preparation, I would shy away from it. I generally assume that if such a situation has arisen – a long-term risk requiring strong, accurate and decisive play in the transition from opening to middlegame with only my king in potential danger – then I have already done something slightly wrong. I would typically start to look for alternatives at an earlier stage.
Note that this desire to look elsewhere isn’t based on any analysis at all. It’s also not based on a negative evaluation of the position. I am open to accepting that the position is balanced. No this desire to look elsewhere stems from the suspicion that the position is too complex for me to grasp properly within a practical timeframe of analysis. I’m afraid that I may put together a complex concrete line that works by one tempo, and then be confronted in a practical game with a slightly different move order and not know what to do!
However, let’s put all that fear aside and work through some of these aspects and turn ourselves into a better person!
One of the beauties of modern chess is the ability to use engines to increase your certainty about the assessment of a position type (as well as getting some good plan suggestions as well). I am confident that my assessment of long-term difficulties for Black – if he fails to play decisively enough – is correct. However, it always helps to have something concrete to refer to.
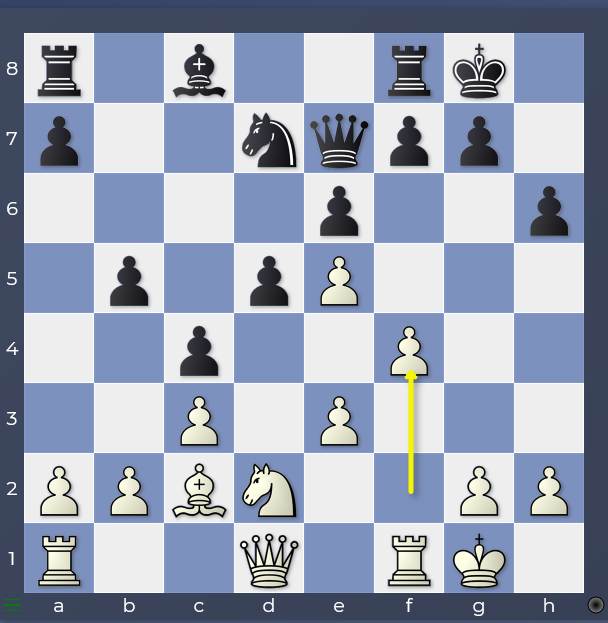
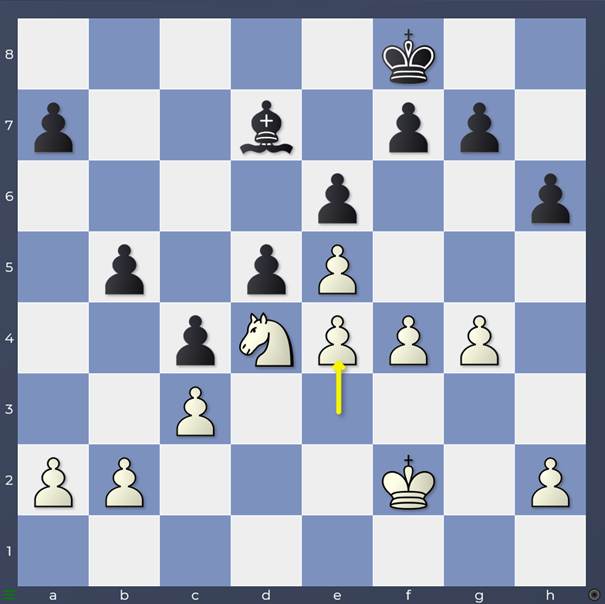
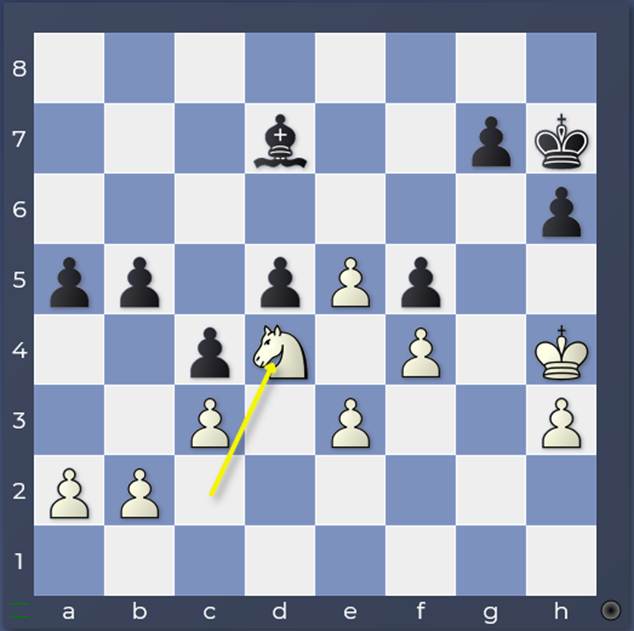
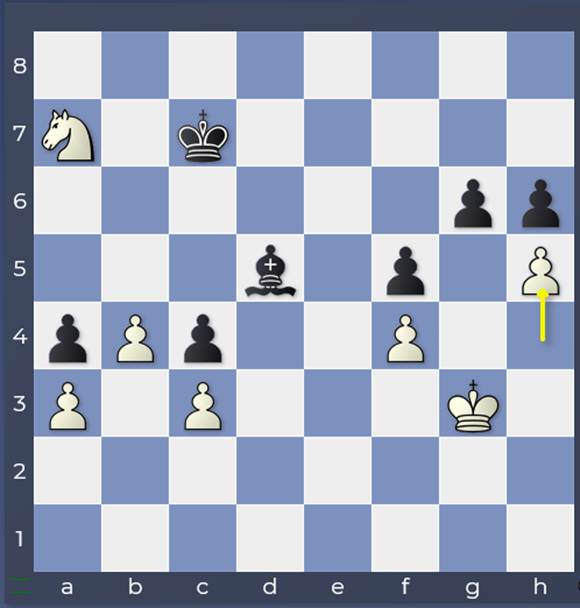
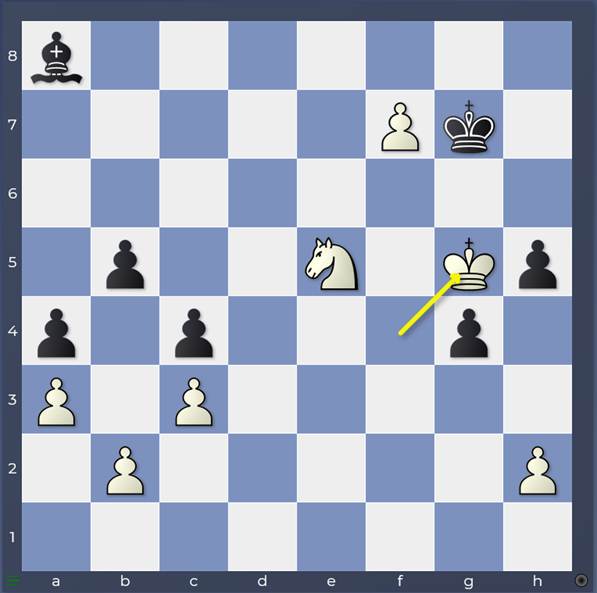
For that reason, I composed the following position to demonstrate a good knight against passive bishop scenario (which is the one I’m most concerned about) and let my engines analyse it and play out some engine games with it. Before we start, I realise that this specific position is unlikely to occur: how would the major pieces have been exchanged? I wondered about adding an open a- or b-file to make it more realistic but decided that for our purposes this position was perfectly fine.
It’s clear that only White can play for a win as Black’s light-squared bishop is not going to be entering into White’s position any time soon, and would barely have any targets to attack if it could . For White you can think of 3 main plans:
- A huge expansion of White’s kingside space advantage by pushing the kingside pawns. Something like this:
- A central break with e4, freeing the white king’s path into the black position via f2–e3–d4–c5, just like this:
- (Less likely) An invasion by the white king via the queenside path a3–b4–a5 after a preliminary b3
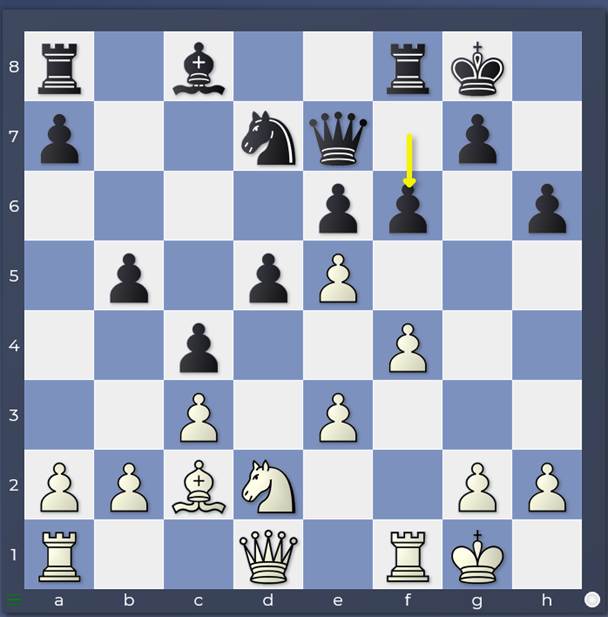
I played a couple of games between Stockfish and Torch at a long time control (2 hours + 15 seconds a move) and it turned out to be one of those positions that Stockfish holds but anyone else doesn’t! Just let me show you the game that Stockfish won with brief comments because it is quite something!
1.g4 f6 2.Kf2 Kf7 3.Kf3 f5

This is an important point: the engines don’t want to allow White to achieve the e4 break so they set up a barrier with …f5 and wait for eternity!
4.gxf5 exf5 5.Kg3 a6 6.Kh3 Kf8 7.Kh4 Kg8 8.Nc2 Bc8 9.Nd4 Bd7 10.Nc2 Bc6 11.Nb4 Bb7 12.Kh5 Kh7 13.Nc2 Bc8 14.Kh4 Kg8 15.Nb4 Bb7 16.Kh5 Kh7 17.h3
It’s all very subtle, but nothing is really happening yet]
17…a5
You’re always suspicious about such pawn moves, but Stockfish did the same in its black game, pushing the a-pawn to a4 to steady the queenside structure to the maximum so it can’t be disastrous yet.
18.Nc2 Bc8 19.Kh4 Bd7 20.Nd4
After this move, Stockfish’s evaluation jumps to 2.66 (from 1.08 previously). I am unsure whether this is because 19…Bd7 was a mistake or because Stockfish has suddenly gained enough depth on my machine to see a clear path!
20…Kg6 21.b3 Kh7 22.Kg3 Kg6 23.b4
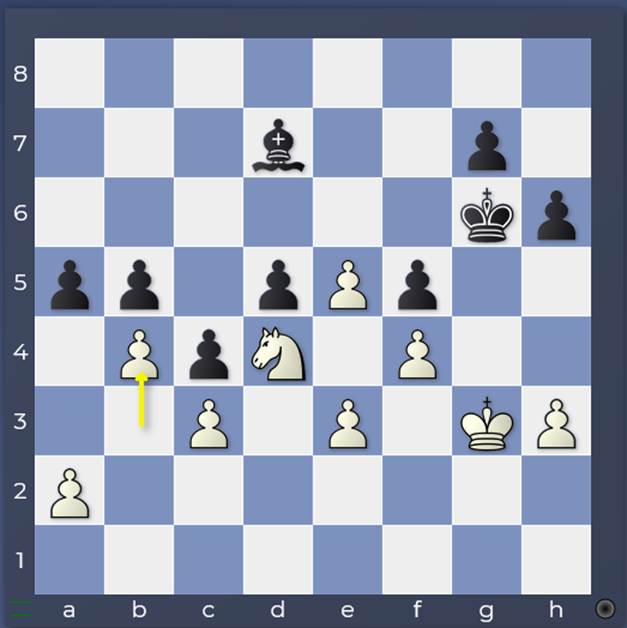
Fixing a weakness on b5, though blocking the queenside for invasion by the white king. It’s important that the b2–pawn is already advanced to b4: once the b5–pawn goes, it is passed and closer to the queening square already.
23…a4 24.Kf3 Be8 25.Kf2 Bd7 26.Kg3 Be8 27.a3 Bd7 28.Kh4
Stockfish at 5.76! By now Torch has realised it too!]
28…Be8 29.Ne6 Kh7 30.Nc7 Bc6 31.e6
The key break to distract the light-squared bishop from the defence of its flock! It’s still a puzzle to me at this point however how exactly this is going to work out!
31…Kg6 32.e7 Kf7 33.Kh5
A wonderful move threatening to invade on g6 if Black captures on e7, or after trades on e8 after e8(Q).
33…d4
A necessary sacrifice to drive black the white king.
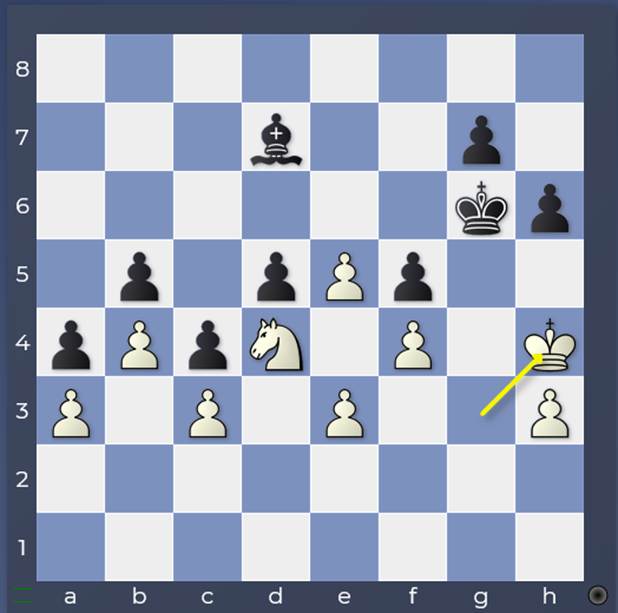
34.exd4 Bf3+ 35.Kh4 Kxe7 36.Nxb5
White has won a pawn but there is a problem: where’s the knight going? 33…d4 blocked its retreat to d4!
36…Bb7 37.Na7
with one possible idea of b5 and Nc6!
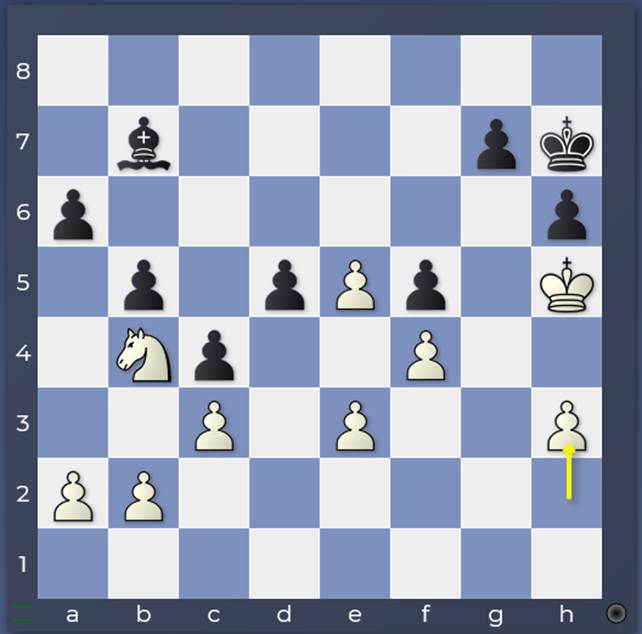
37…g6 38.Kg3 Kd7 39.h4 Kc7 40.d5 Bxd5 41.h5
A double pawn sacrifice to free the knight and open up invasion channels through Black’s kingside!
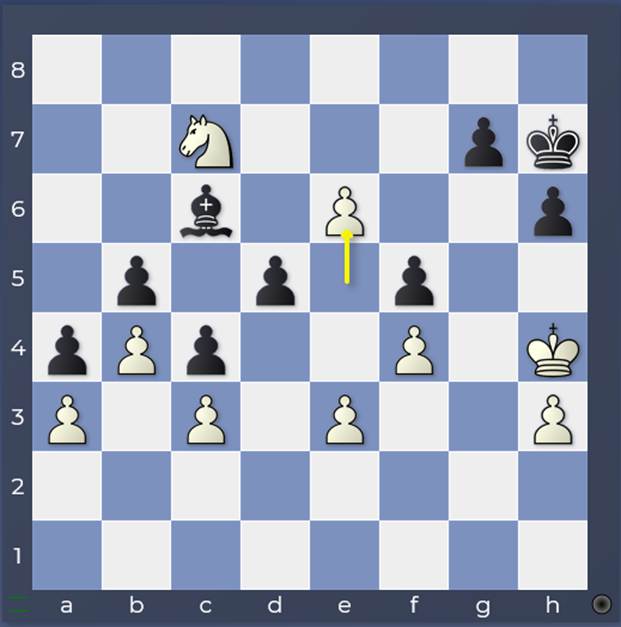
41…Bf7 42.Nb5+ Kd7 43.Nd4 Kc7 44.b5 Kb6 45.hxg6 Bxg6 46.Kh3 Be8 47.Kh4 Bg6
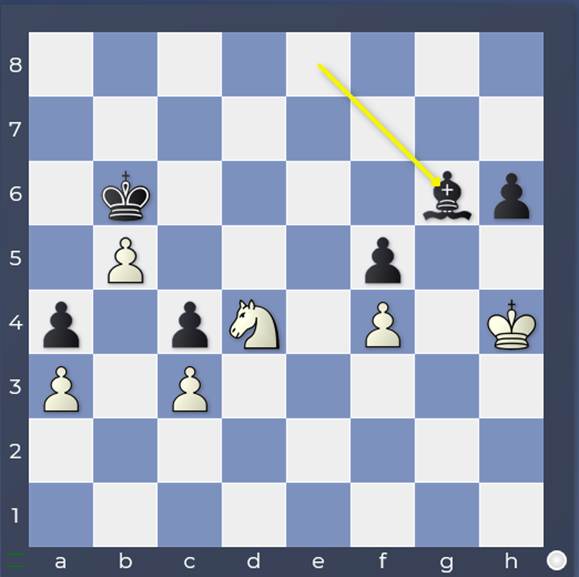
48.Nc6
Yet another pawn sacrifice for knight mobility!
48…Kxb5 49.Ne7 Be8 50.Nxf5 Kc6 51.Nxh6 Kd5 52.Ng4 Bc6 53.Nf2 Bb5 54.Kg5 Ke6 55.f5+ Ke5 56.Nd1 Bd7 57.f6 Be8 58.Nb2 Ke6 59.Nxc4 And the rest is trivial, even for us!
Well that required some pretty nifty endgame play! But what would happen if we gave White just a little extra endgame tempo like this?
1.g4
The same position except White already has a king on f2. Just one tempo, but it makes a huge difference!
1…Kf8
1…f5 2.gxf5 exf5 3.e6;
1…f6 2.Kf3 preparing e4
2.e4
Black is not in time to play …f5 and stop White from realising this break. Now the white king has a clear sight on the black queenside!
2…dxe4 3.Ke3 g5 4.Kxe4 Ke7 5.Ke3 f6 6.Ke4 Kf7 7.f5 exf5+ 8.gxf5 fxe5 9.Kxe5 a5 10.a3 h5

11.Nf3 g4 12.Ng5+ Kg7 13.Ne4 Kh6 14.Nf6 Bc8 15.Kf4 Bb7 16.Nd7 Bd5 17.Ne5 a4 18.f6 Ba8 19.f7 Kg7 20.Kg5
Lovely technique again from Stockfish! Now the kingside falls!
20…Be4 21.Kxh5 Bf5 22.Kg5 Be6 23.Kf4 Kf8 24.Nxg4 Kxf7 25.Nf2 Kg6 26.Ne4 Kh5 27.Ke5 Bh3 28.Kd4 and the queenside soon fell.
I’m not trying to prove an enormous amount with this apart from giving myself even more conviction that I have to be bold as Black and prosecute my counterplay decisively! As a bonus, I’ve also seen a couple of great endgames!
Now armed with a desire to create counterplay as Black as powerfully as possible, we’ll see how we can do that in the next blog!