
After a little digression highlighting games from the wonderful 3rd Cambridge Invitational, it’s time to dive further into my obsession with the …c4 plan in Trompovsky / Torre Attack positions and to examine an all-in plan of counterplay for Black!
We start here 1.d4 Nf6 2.Bg5 d5 3.Nd2 Nbd7 4.Ngf3 h6 5.Bh4 e6 6.e3 c5 7.Bd3 Be7 8.c3 0–0 9.0–0 c4 10.Bc2 b5 11.Ne5 Nxe5 12.dxe5 Nd7 13.Bxe7 Qxe7 14.f4
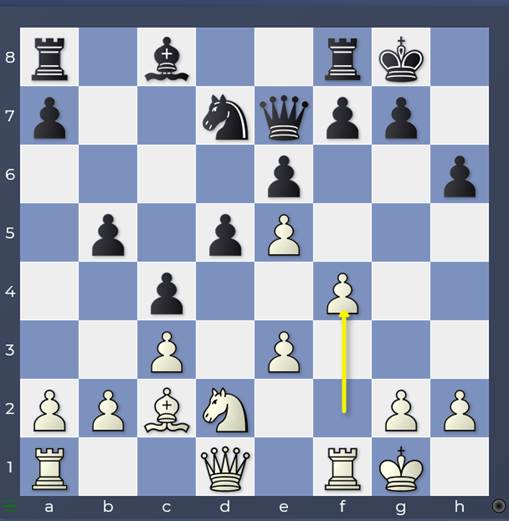
Both sides decide to pursue their attacking and counterplay options with extreme rigour!
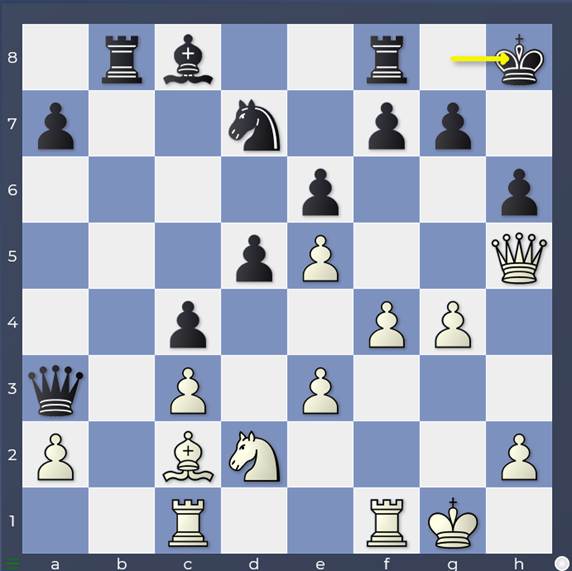
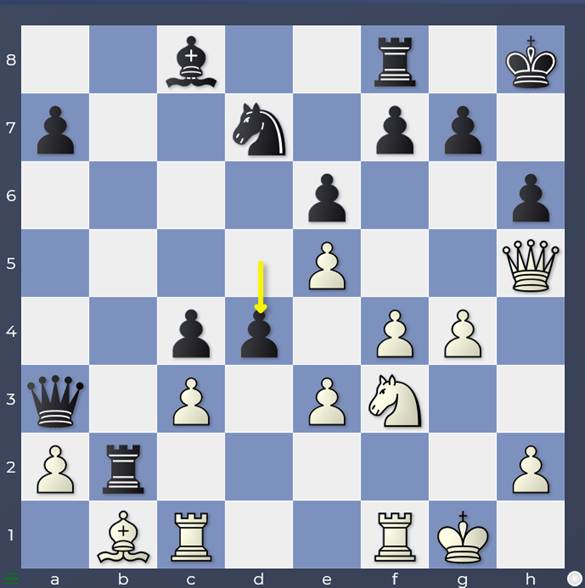
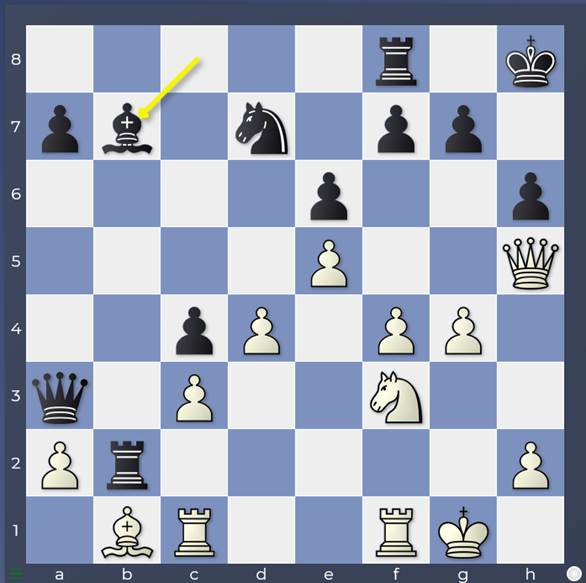
14…b4 15.Qh5 bxc3 16.bxc3 Qa3
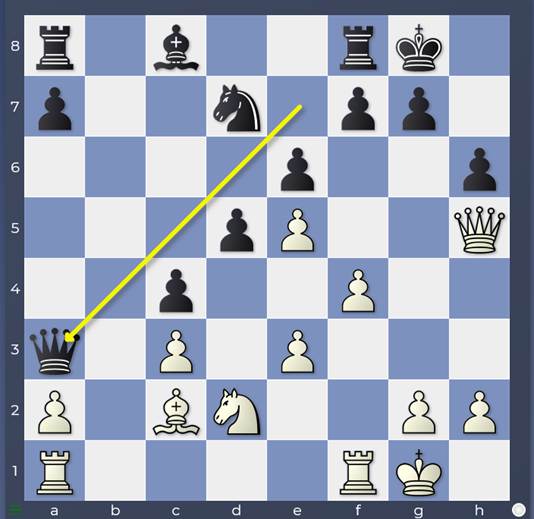
Battle is joined! White’s queen moves towards the kingside and Black attempts to exploit the white queen’s absence from the queenside to cause chaos there. Obviously, moving the black queen away from the kingside at this time entails risk, but this first strike demands a reaction from White: …Qxc3 is too big a threat for White to allow.
17.Rac1
is obvious, parrying 17…Qxc3 with 18.Bh7+ winning the queen. Now Black brings in more firepower to the queenside and it’s White’s turn to ponder his next move.
17…Rb8
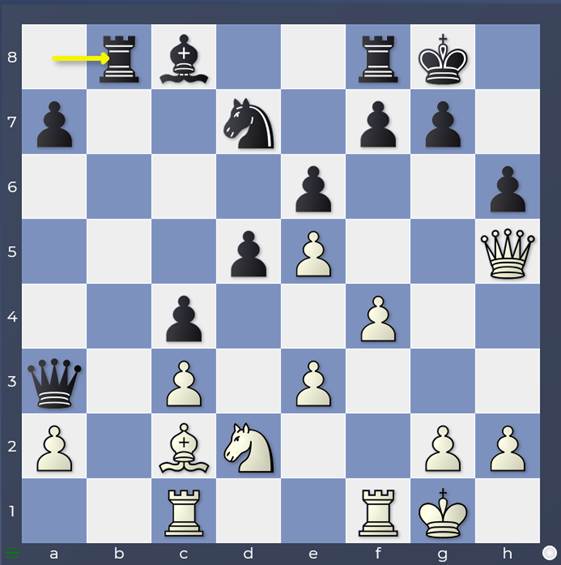
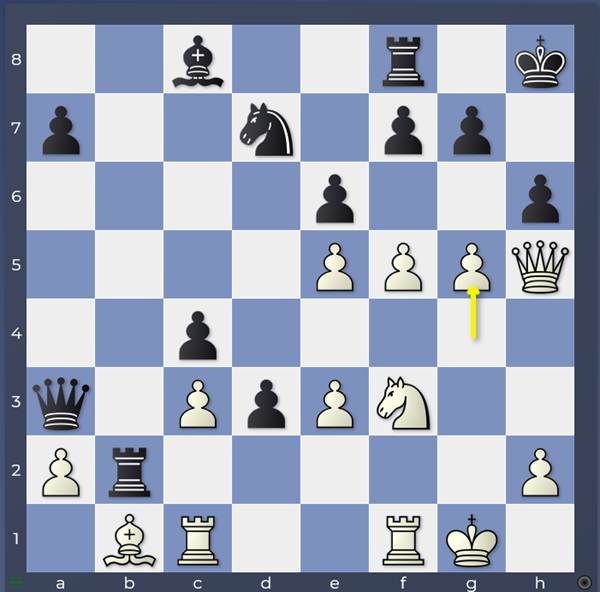
The nice point about 16…Qa3 more or less forcing 17.Rac1 is that a number of White attacking plans have already been taken out of the equation. For example, Rf3-g3 is impossible because the rook on c1 hangs. When evaluating committal counterattacking plans like 16…Qa3, it’s important that as well as creating threats, they also restrict the opponent’s room for manoeuvre. White is basically compelled to attack with his pawns rather than his pieces and my favourite approach now was 18.g4
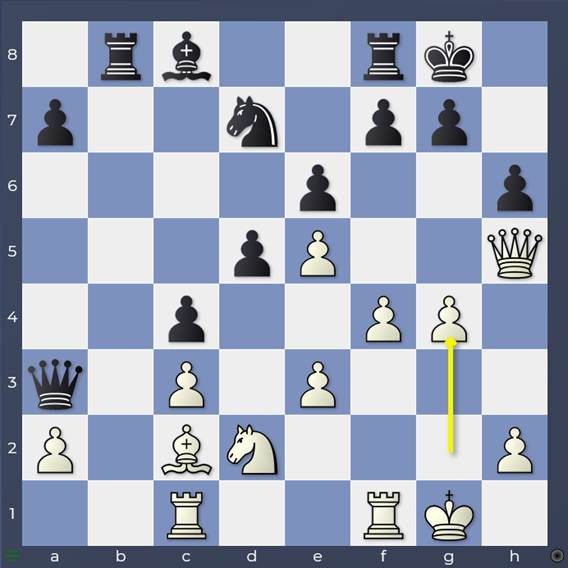
At first sight, this looks incredibly dangerous. Both g5 – hitting the “hook” on …h6 – and f5 look extremely powerful. Here it really helps to have some insight about Black’s defensive possibilities in such structures. The engines’ next move give us a hint!
18…Kh8
We understand that this move threatens …Qxc3 by sidestepping the discovered attack check with Bh7. But isn’t it really strange to put the king to h8 when White is planning to open the h-file with g5xh6? Well, the point is that White doesn’t have the power to open the h-file. White simply ignores 19.g5 with 19…Qxc3 and 20.gxh6 is met by 20…Qxe3+ 21.Rf2 g6!
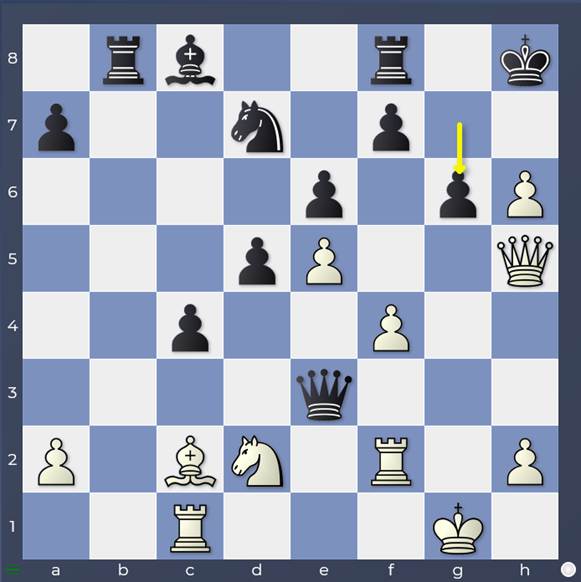
This is a critical defensive resource for Black and ups significantly the work that White has to do to open the kingside… which therefore gives Black more time to get his queenside counterplay going. Note how crucial the knight’s presence is on d7, keeping the f6-square from the invasion of the white queen after Black has played …g6.
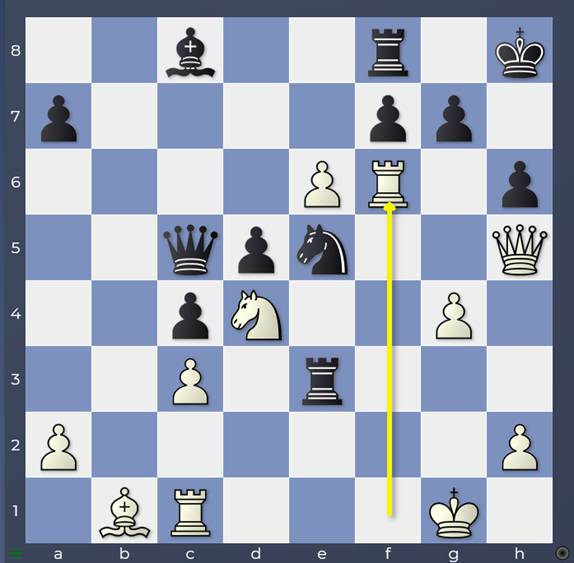
White therefore has to take a timeout to defend the c3-pawn with 19.Bb1 and now Black has done all he can with his queen and needs to involve the black rook with 19…Rb2
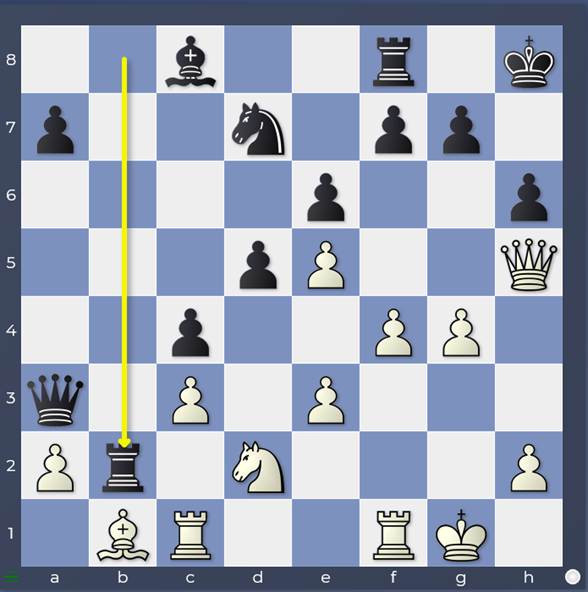
And the white knight has to move away to f3: 20.Nf3
These are often difficult situations for Black to assess from afar when considering an aggressive plan such as 16…Qa3. Black has got his queen and rook involved via the queenside but it’s not clear how to get more pieces involved: the knight clearly has to stay on d7 to compensate for the queen’s absence so what can Black achieve with a queen and rook with limited mobility inside White’s position? Well, we have 2 possible plans: a more human-like plan and an engine plan! We’ll have a look at both in turn starting with the human-like plan which is 20…d4
I call this the human-like plan because it answers the human imperative to get as many pieces involved in the attack as possible, allowing the light-squared bishop to join in Black’s counter-assault by opening the a8-h1 diagonal. White has to answer because the threat is …d3 shutting out White’s light-squared bishop on b1 from the attacking party! Black needs a measure of sang-froid because many options still appear somewhat scary for Black but spotting one key resource should put your mind at ease! For example, after the caveman 21.f5 d3 22.g5
Black has 22…Qc5!
The queen is brought back into contact with the black kingside with tempo and moves like 23.Rce1 (necessary to defend e3) are dealt with ease by 23…exf5.
So White must capture the pawn after 20…d4. 21.Nxd4 Bb7 is too loose for White
As after 22.e4 blocking the a8-h1 diagonal, Black has either 22…Nc5 with a threatened follow-up of 23…Rxb1 24.Rxb1 Qxc3 with chaos in White’s position and even the immediate 22…Rxb1 is much better for Black already.
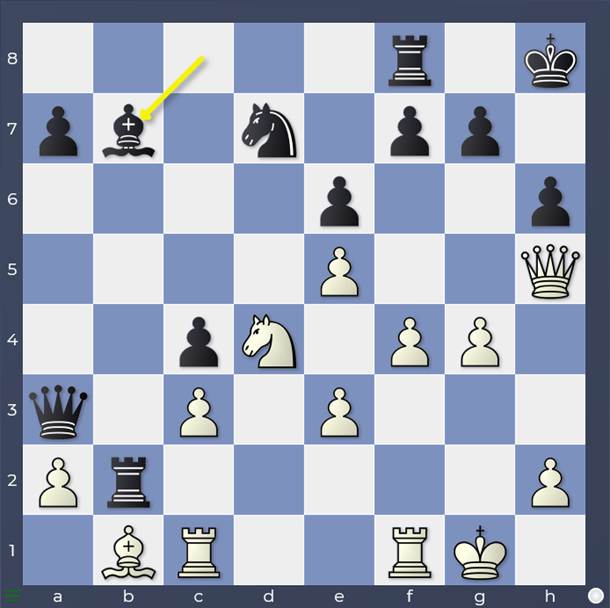
So 21.exd4 is necessary and now 21…Bb7 is again the natural human move.
I think any human player would intuitively believe that Black has decent counterplay here. Follow-up ideas include …Re2 and …Qb2, or even …Nb6-d5 hitting f4 and e3 if you judge you can get away with it! You would be even more convinced if you spotted 22.f5 Nxe5!

The point is that 23.dxe5 Qc5+ (that move again!) 24.Kh1 Rf2 is catastrophic for White.
That means that once again, White is thwarted in his desire to prosecute his attack with optimal speed!
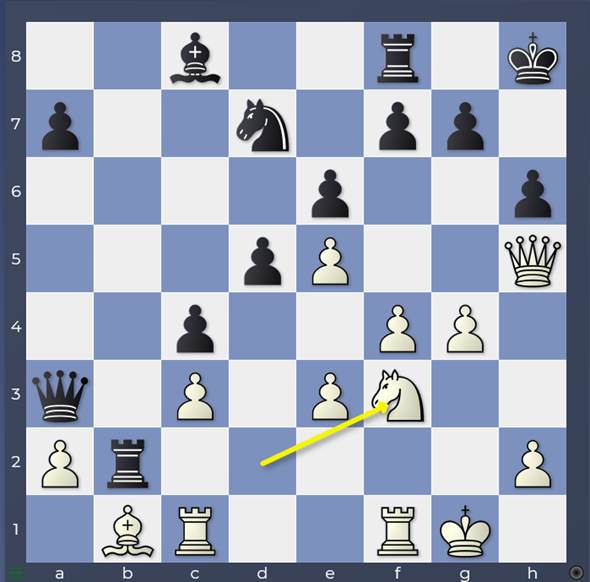
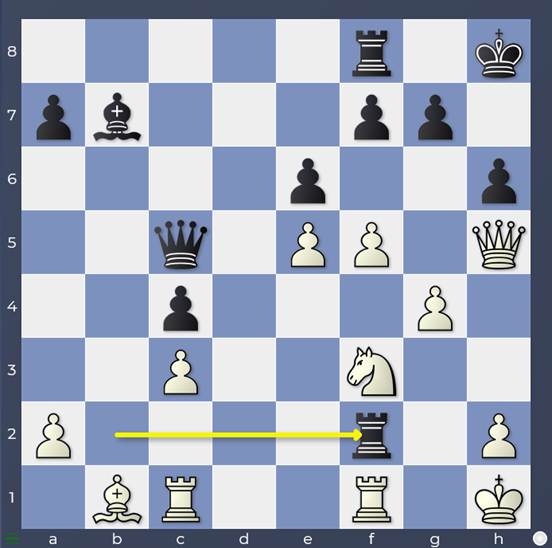
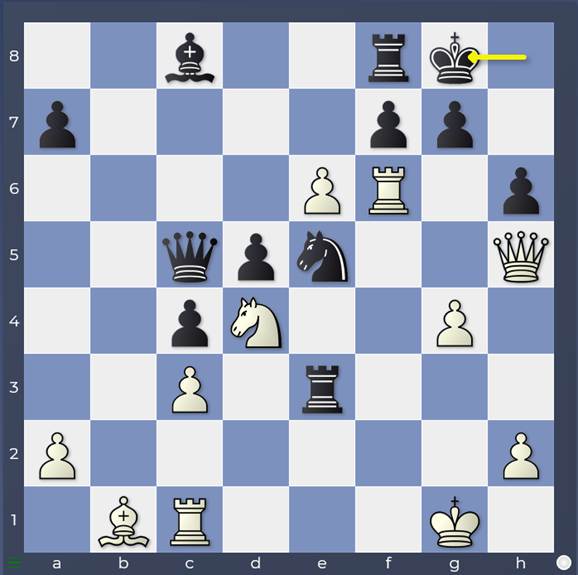
The engine preference instead of 20…d4 is however 20…Re2

In “Game Changer” and “The Silicon Road to Chess Improvement” I described Stockfish’s defence as akin to awing off the legs of your ladder as you attempt to scale the ramparts and this is another good example! …Rxe3 and then …Rxc3 at various moments might erode all the solidity of White’s centre while Black retains other counterplay options like …Qb2 and even …d4 followed by …Bb7. However, it’s not easy to judge right first of all which approach to choose and second whether you ‘ll make it or not! Let’s have a look at the main line:
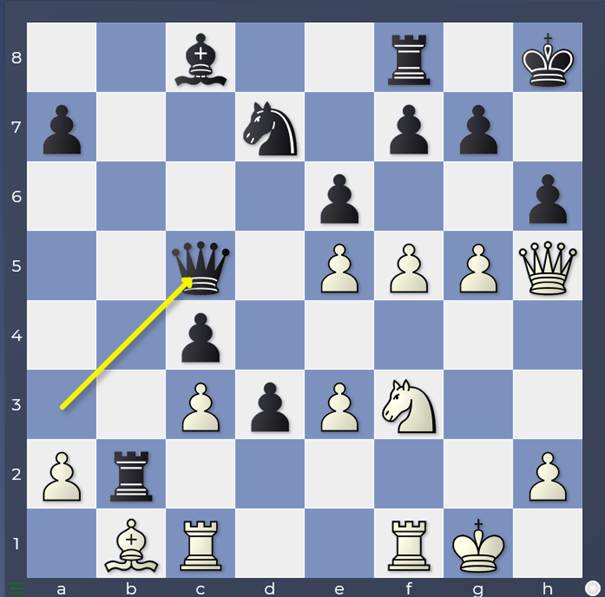
21.f5 Qc5!
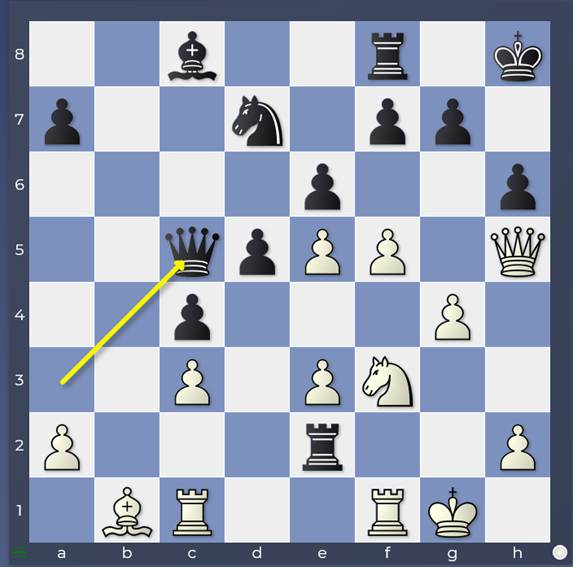
A very difficult idea to spot: it’s so unnatural to renounce the possibility of …Qb2 lining up on the 7th rank in order to use a different angle of invasion. It also feels strange to drag the knight to d4 where it really wants to go!
22.Nd4 Rxe3
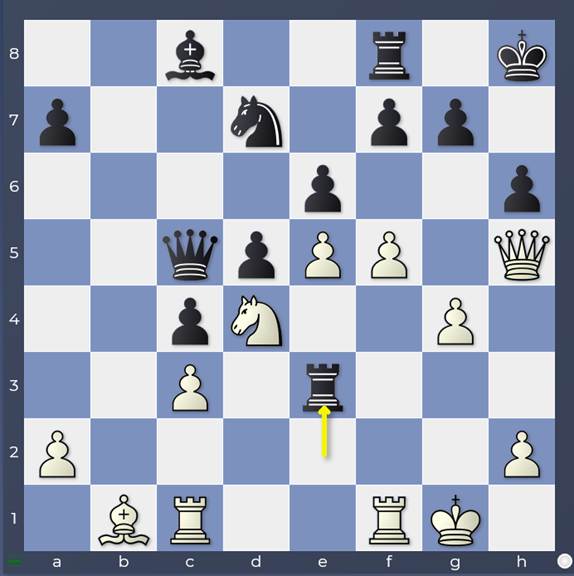
This is engine defence! …Rxc3 is threatened now, knocking away the support of the white knight on d4! But there is a moment of respite before that threat hits and it’s White’s turn to strike!
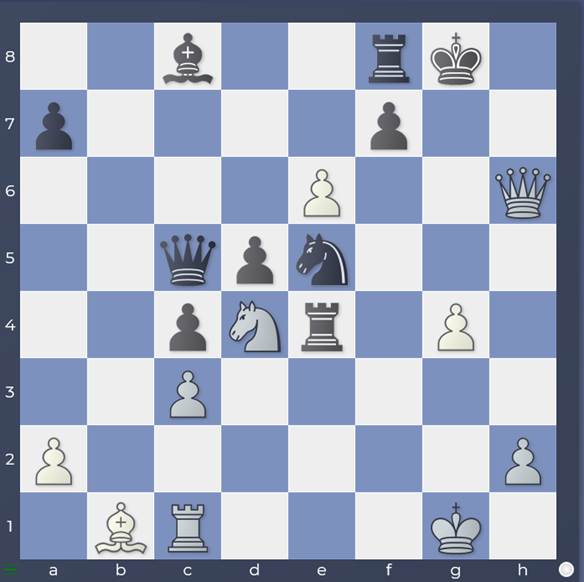
23.fxe6 Nxe5 24.Rf6!
Ooh! Threatening Rxh6+. I’m not sure you’d really think you were surviving as Black if you were calculating this as a human player, but the engines know what to do!
24…Kg8
For the second time, Black moves his king to parry the white attack! There are many ways to proceed from here, but none of them get over the magic 0.00!
Let’s pick a simple one:
25.Rxh6 gxh6 26.Qxh6 Re4!
That engine move 20…Re2 comes in handy again, allowing Black to block the b1-h7 diagonal! White’s best is to take perpetual with
27.Qg5+ Kh8 28.Qh6+
I hope this series of articles has given you some fresh insights into the engine plan of …c4 in structures that can arise from a variety of systems like the Trompovsky, the Torre Attack and the London system.
Great as most of the time from you, Matthew. As we all know it is way more complicated to defend and it seems this whole line is quiet balanced in terms of defence/offence. I think the line might be basic for a prep line against a Tromp player. Thanks.
Thanks Thorsten! Yes I’ve just found it really interesting because it challenges some assumptions I’ve held for a very long time! Always fun when that happens! Glad you enjoyed it and hope it helps in your games! Best Wishes, Matthew