
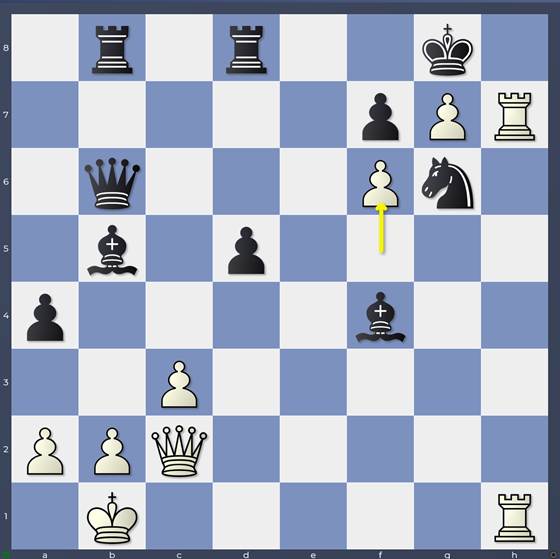
We round off our examination of the amazing tactics from the game Stockfish-Torch with White’s second alternative on the 27th move.
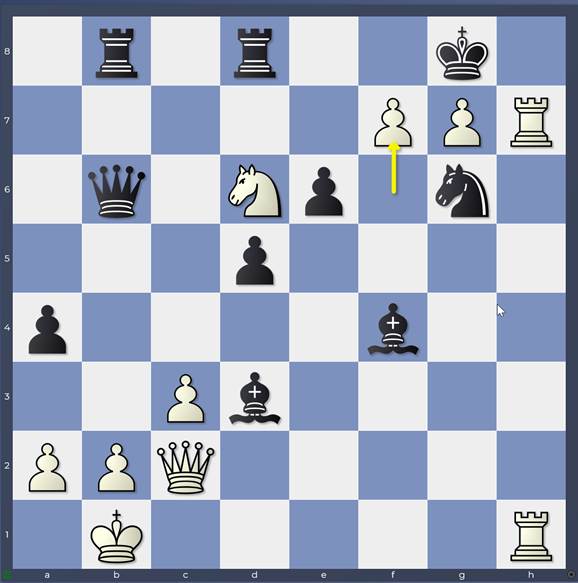
1. e4 e6 2. d4 d5 3. Nc3 Nf6 4. e5 Nfd7 5. f4 c5 6. Nf3 Nc6 7. Be3 a6 8. Ne2 Be7 9. c3 a5 10. dxc5 a4 11. Qc2 O-O 12. O-O-O b6 13. cxb6 Nc5 14. h4 Qxb6 15. Bxc5 Bxc5 16. Ng5 g6 17. h5 Be3+ 18. Kb1 Nxe5 19. Nd4 Bxf4 20. Nxh7 Kxh7 21. hxg6+ Kg7 22. Rh7+ Kg8 23. g7 Rd8 24. Bb5 Ng6 25. Rdh1 Rb8 26. g4 Bd7

Game: 26…Bd7
I mentioned in the last blog post that White had 2 ideas… We’ve looked at one…Can you think what the other is?
27. Nf5
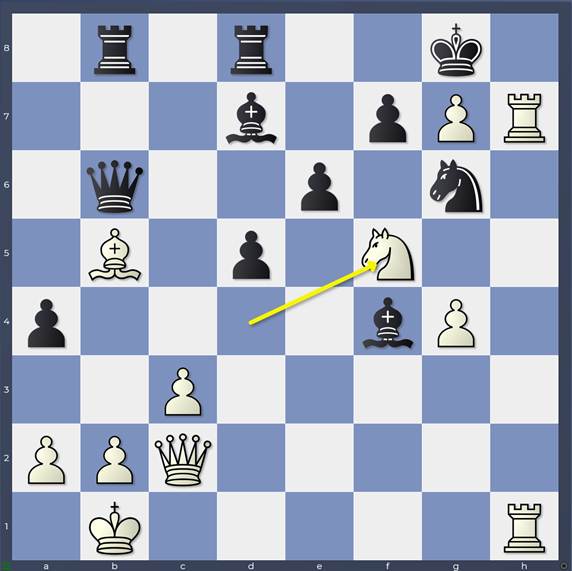
No need for 27.Bxd7! White throws in Nf5 at once, threatening Rh8+ with mate, leaving the bishop on b5 as a – temporary and very wobbly – blockade on the b-file!
27…exf5
is obvious of course, but what if Black plays 27…f6? in analogy with the best defence against 27.Bxd7 Rxd7 28.Nf5)
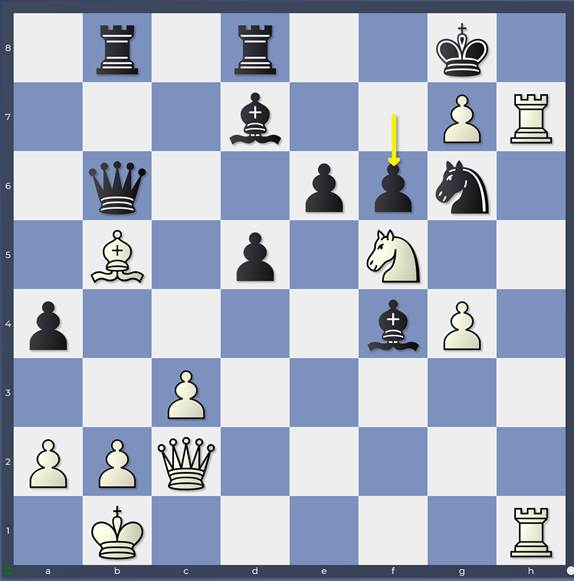
Variation: 27…f6
The win is there but not so obvious! 28. Nd6 Clearing the path of the white queen to g6 while stopping Black from developing pressure against b2 with …Qxb5! 28…f5 was the move I wondered about. It looks crushing, but Black’s king has lot of little holes on the dark squares he can escape to. The line is really nice! 29. gxf5 Bxb5 Clearing the b-file and threatening …Bd3!
Variation: 29…Bb5
30. f6!
Variation: 30.f6
Now some cool lines!
30… Bd3 31. f7# is a very beautiful mate!
Variation: 31.f7+mate
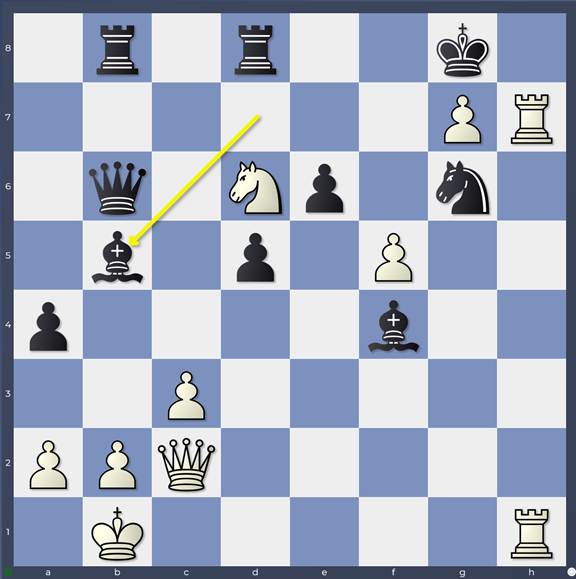
30…Rxd6 looks sensible as it still isn’t obvious how White breaks through without getting hit by …Bd3! 31. f7+ (31. Qxg6 Bd3+ 32. Qxd3 Qxb2#) 31… Kxf7
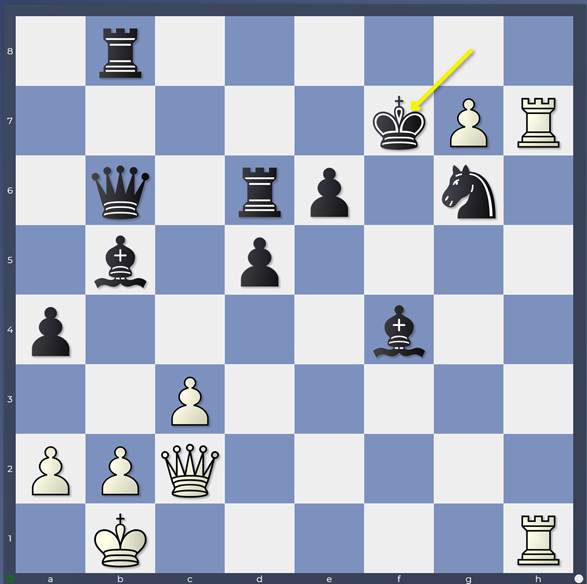
Variation: 31…Kxf7
32. g8=Q+ Really cool: White gives up all his trumps to get his queen into the attack with check! 32…Kxg8 33. Qxg6+ Kf8 34. Qf7#
Back to 27…exf5 now!
Game: 27…exf5
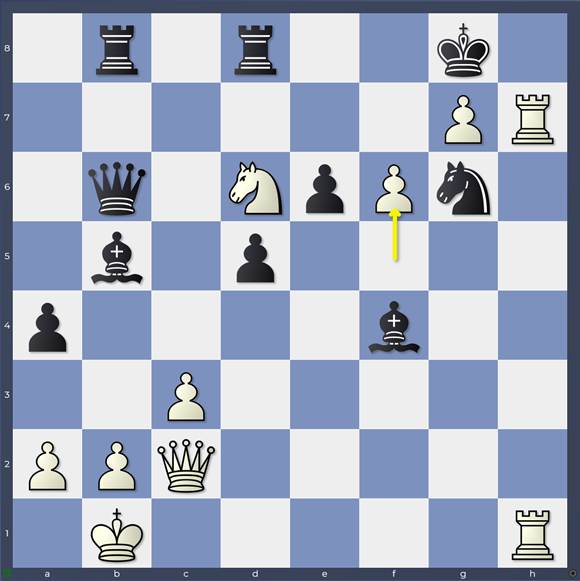
28. gxf5
Game: 28.gxf5
White’s threat here is quite surprising as is Black’s best defence!
28… Bxb5 looks pretty decent, threatening …Bd3 and keeping the black queen in touch with the defence of the kingside along the 3rd rank. White has a lovely win however! 29. f6
Game: 29.f6
29…Qxf6 when the win is pretty cool: 30. Rh8+ Nxh8 (30… Kxg7 31. R1h7# Beautiful!) 31. Qh7#
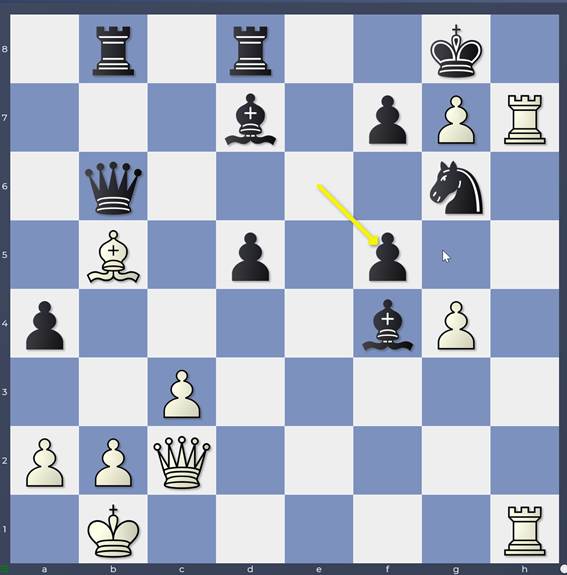
28…Qf6 is Black’s defence. What’s the point: f6 is prevented so White has to struggle to get the white queen into the attack!
29. Bxd7
29. fxg6 Bf5 30. Rh8+ Kxg7 31. R1h7+ Kxg6 turns out to be very safe for Black’s king! See how useful that bishop on f4 is again, covering h6! Black threatens both the white queen and …Rxh8)
29. Rh8+ transposes to the main line.
29… Rxd7 30. Rh8+ Nxh8
(30… Kxg7 31. R1h7#)
31. gxh8=Q+ Qxh8 32. Rxh8+ Kxh8
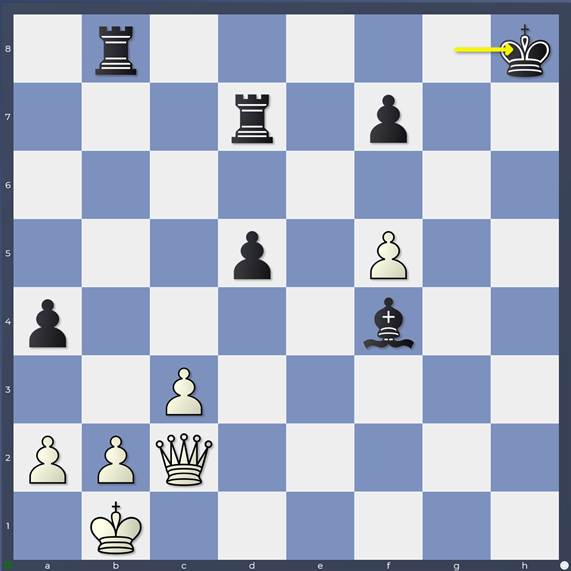
Game: 32…Kxh8
You could easily visualise this position from afar and assume that Black is winning due to the material balance. But there’s still some take stuff and hit stuff to come
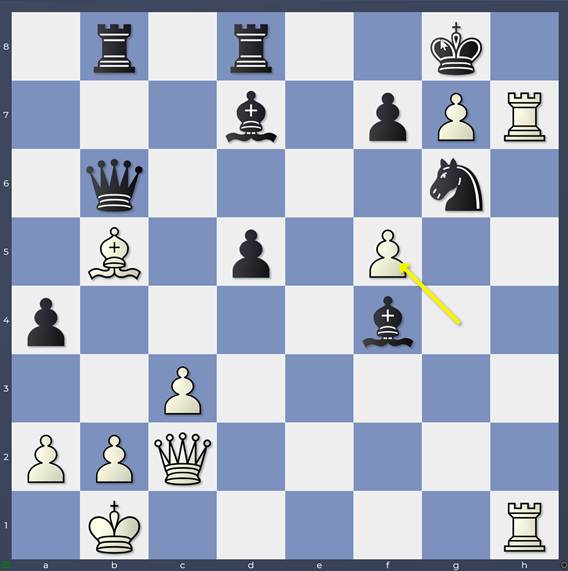
33. Qxa4
Amazing! The queen hits the rook on d7 and the bishop on f4 and Black cannot cover both! Even more amazingly, Black still has resources!
33…Rdb7
That move 25…Rb8 has been worth its weight in gold!
34. Qxf4 Rxb2+ 35. Kc1
(35. Ka1 Rb1#)
35… Rb1+ 36. Kd2 R8b2+ 37. Kd3 Rd1+ 38. Ke3 Re1+
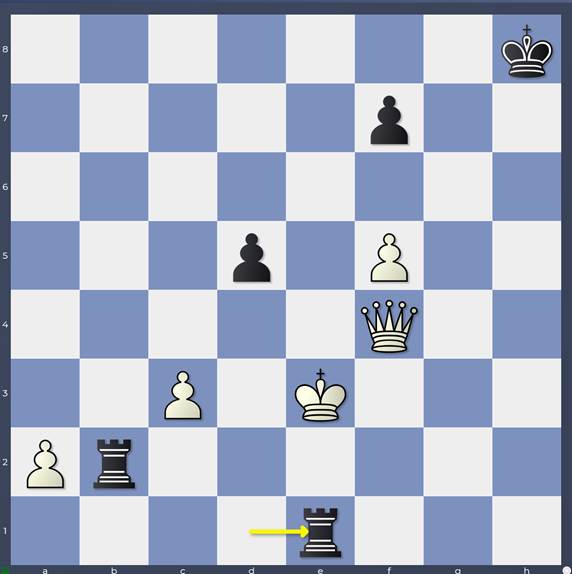
Game: 38…Re1+
and there is no better than a draw by repetition for both sides as any attempt for white to escape costs the queen!
39. Kd3
(39. Kd4 Re4+)
(39. Kf3 Rf1+)
39… Rd1+ Amazing tactics!
In subsequent blog entries, I’ll probably go deeper into some of the earlier phases. But at least we know now that the position at move 24 is indeed equal!