
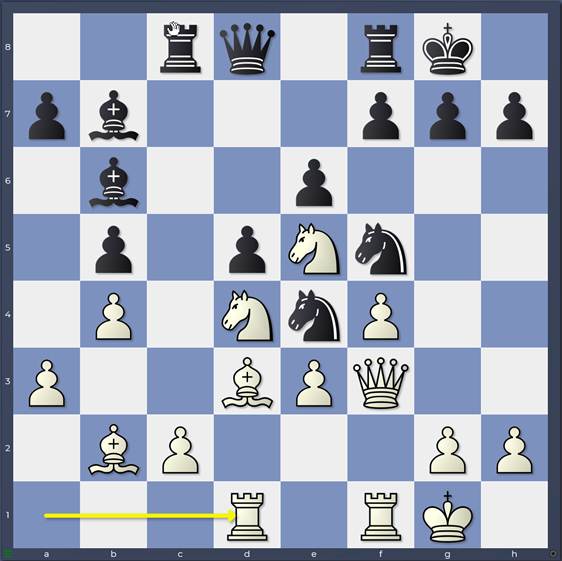
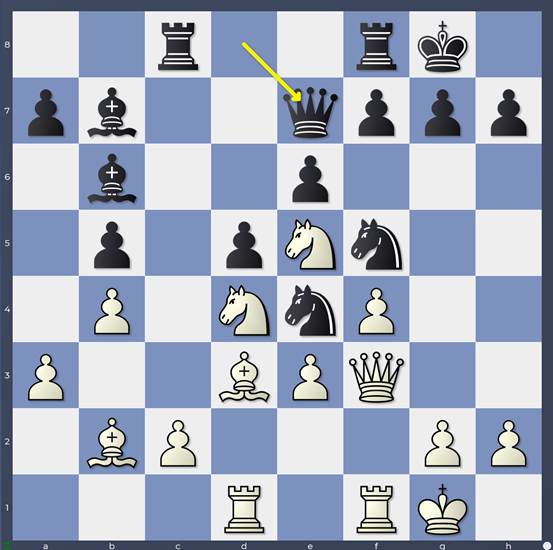
We saw in previous blog entries that Black’s best line on move 20 was to capture the knight on d4 with 20…Bxd4.
Line: 20…Bxd4
In fact, an exchange on d4 could have been played at multiple occasions between move 16 (when White played 16.Nd4) and move 20: at what moments would this have been a good plan for Black?
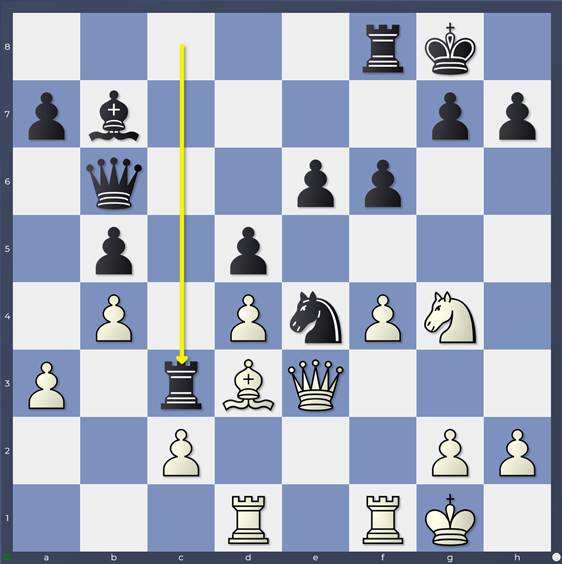
Let’s start with 16.Nd4 Bxd4
Line: 16…Bxd4
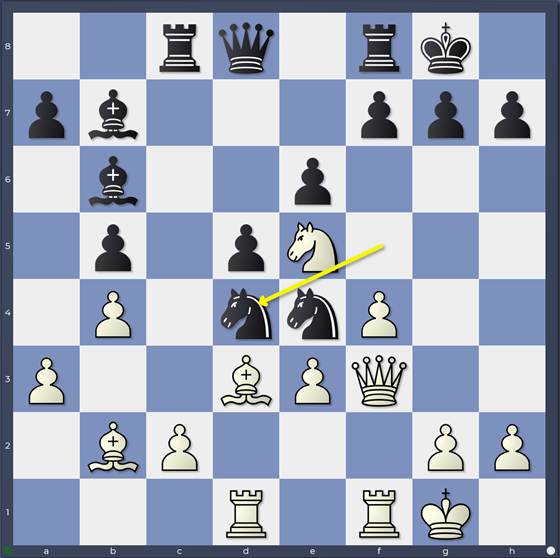
That’s a little shocking isn’t it? Just giving up the bishop pair for no reason? Well it’s not actually for no reason. In fact as we shall see, exchanging on d4 works very well together with Black’s main idea of driving away the powerful white knight on e5 with …f6. In this case, the pressure the knight on d4 exerted on e6 is gone which means Black is free to follow up with …f6 on the next move.
16… Bxd4 17. Bxd4
This is clearly the move that White *has* to want to play as 17.exd4 entombs the dark-squared bishop behind the b2-pawn.
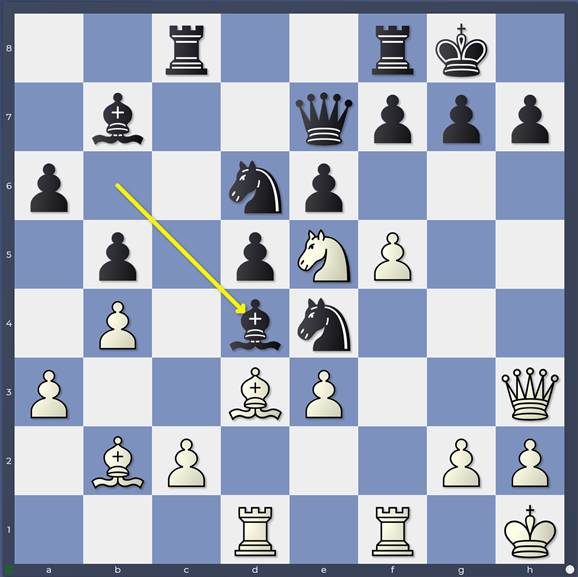
17…f6 18. Ng4 Nf5
Line: 16…Bxd4
covering the b1-h7 diagonal and threatening …Nd2. Black looks in good shape here: he’ll most likely exchange off the dark-squared bishop for one of his knights after which c3 will provide a nice soft outpost for a black rook or knight, while the formerly mighty white knight struggles to find a relevant post. The engines assess it as -0.49 which is a slight advantage for Black which is fair enough. It’s not a disaster for White, but it’s far from attractive. It’s also a very simple option for Black, requiring no calculation whatsoever.
Let’s take a look at another moment when capturing on d4 was possible:
After 16…Nf5 17.Rad1
Game: 17.Rad1
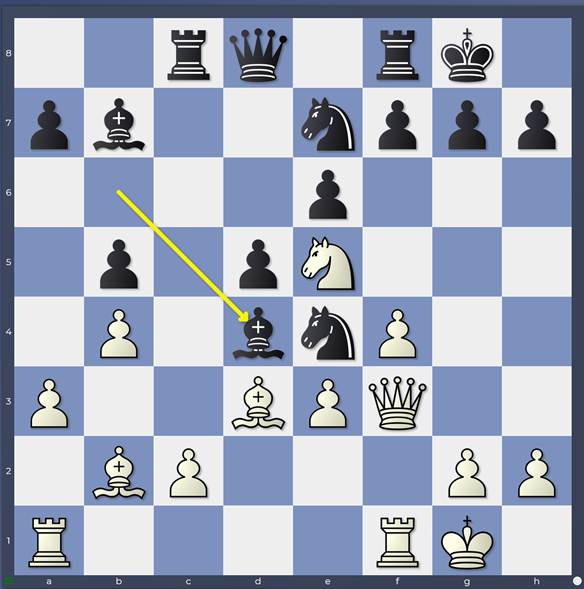
Let’s take a look at a different capture: 17…Nxd4
Line: 17…Nxd4
White most natural recapture is with the bishop: 18.Bxd4.
18.exd4 leaves the bishop on b2 passive behind the d4-pawn.
18…Nxd4 19.exd4 f6
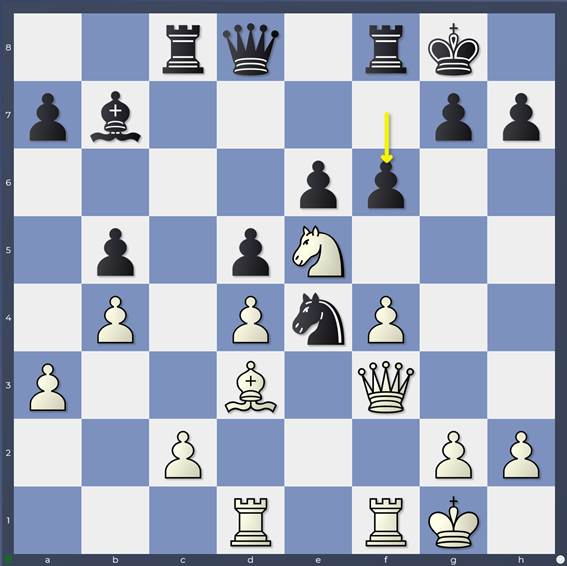
Line: 19…f6
Exchanging on d4 has once again made it easy for Black to achieve the key move …f6, driving away the knight from e5.
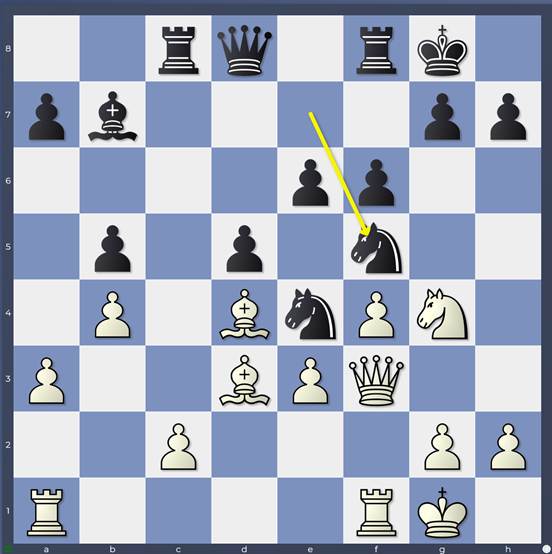
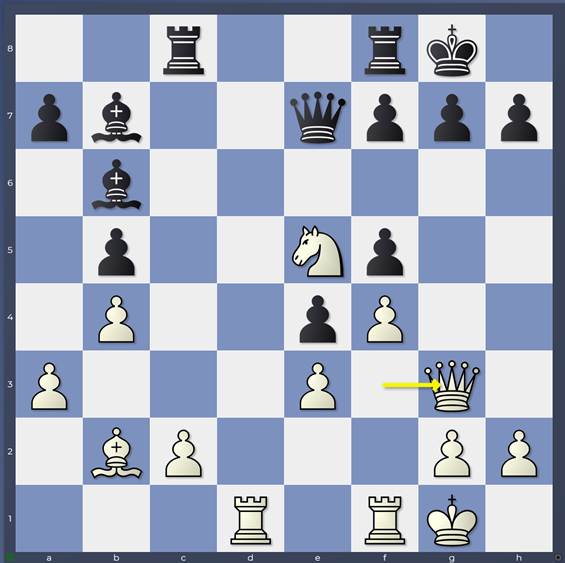
20.Ng4 Qb6
Attacking the d4-pawn
21.Qe3 Rc3
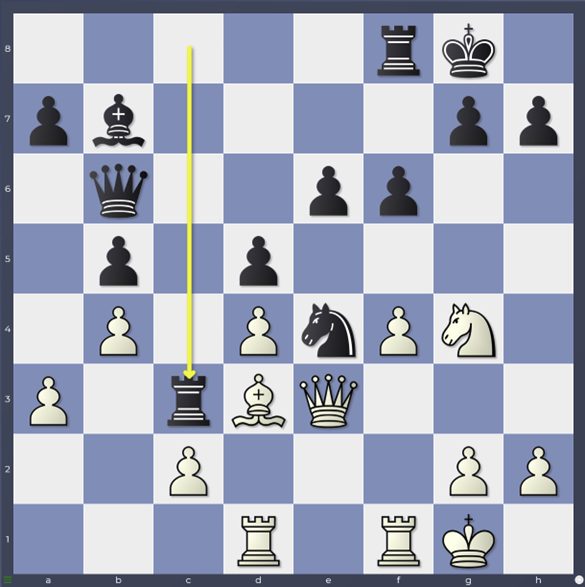
Line: 21…Rc3
Making good use of the “soft” dark squares on White’s queenside. White’s position is hardly lost, but it isn’t pleasant and it’s very hard to see anything really positive for him to do.
The more you look at the positions, the more you realise that capturing on d4 was the key resource at a number of points. For example, it struck me all of a sudden that after
17…Qe7 in the game
Game 17…Qe7
White could actually try 18.Bxe4
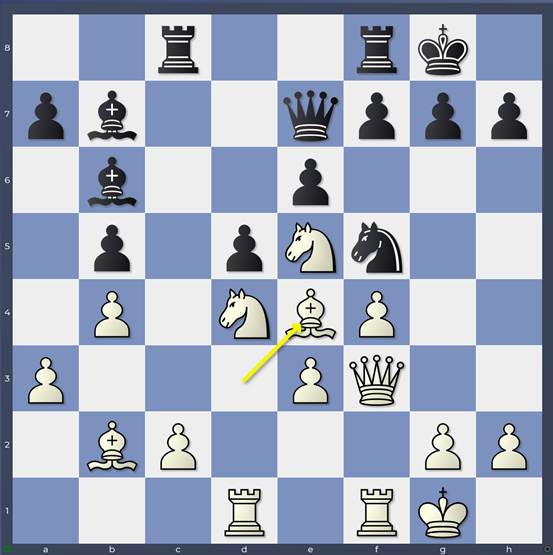
Line 18.Bxe4
White’s clever tactical point is to exploit the position of the queen on e7 as 18…dxe4 can be met by the (Natasha Regan-patented 😉) Zwischenzug 19.Nxf5

Line 19.Nxf5
After 19…exf5 20.Qg3
Line 20.Qg3
White has many horrible threats including Rd7 and Nc6! There’s no reason for Black to even contemplate going in for this because he has the earlier Zwischenzug 18…Bxd4!
Line 18…Bxd4
when 19.exd4 dxe4 followed by …f6 and …Bd5 is very pleasant for Black.
In general, you will see that all of Black’s captures on d4 at various moments between move 16 and 20 give Black the better game. From a theoretical perspective however, it seems that 16…Bxd4 immediately is enough to cast doubt on the strength of 16.Nd4. It’s not the engine evaluation that bothers me – I’m happy to accept a slight objective disadvantage if I can see good practical chances – but more the type of position White ends up in. Black is so firmly entrenched on the central light squares and White’s queenside weaknesses are so fixed, I can’t see many good chances for White to worry Black.
In the next blog we’ll take a look at White’s options starting on and looking back from the 16th move and see whether he can produce any more excitement!