
In this second blog about the wonderful Stockfish-Torch game, we take a look at an amazing alternative on move 26!
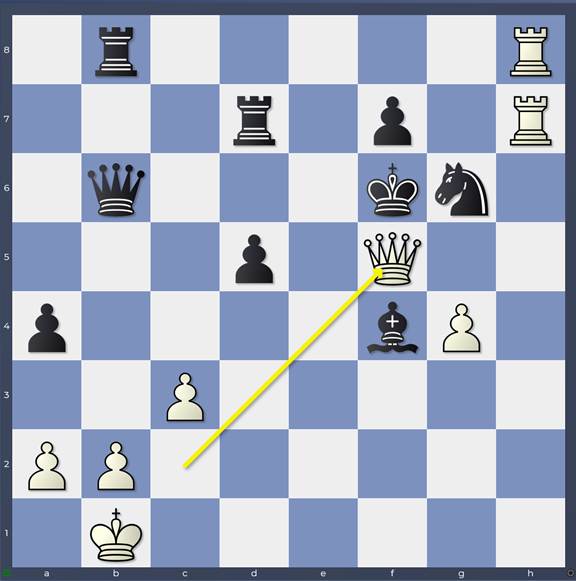
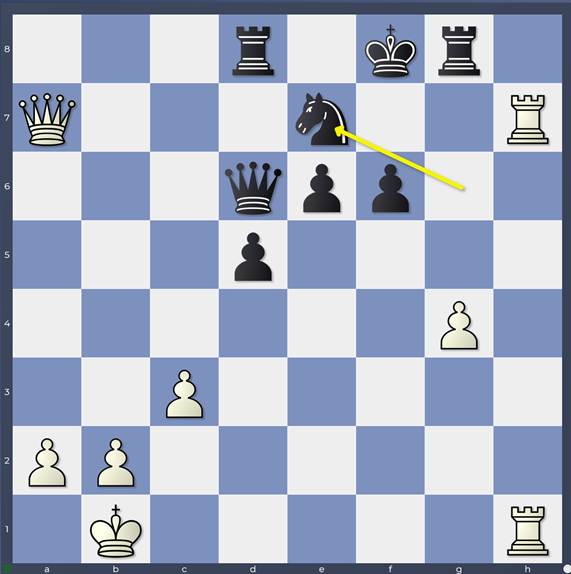
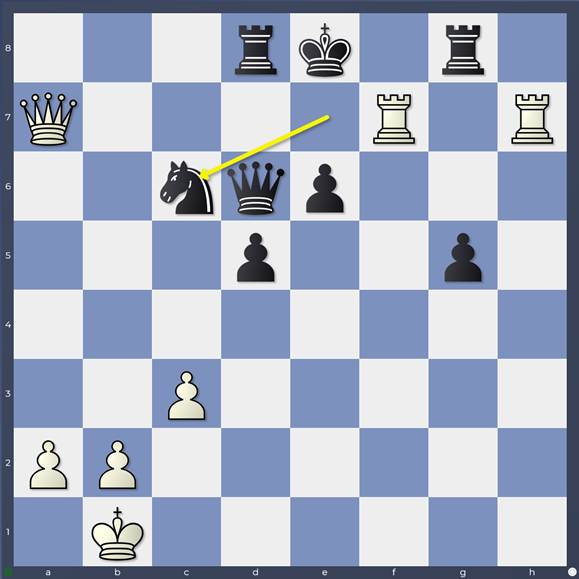
1. e4 e6 2. d4 d5 3. Nc3 Nf6 4. e5 Nfd7 5. f4 c5 6. Nf3 Nc6 7. Be3 a6 8. Ne2 Be7 9. c3 a5 10. dxc5 a4 11. Qc2 O-O 12. O-O-O b6 13. cxb6 Nc5 14. h4 Qxb6 15. Bxc5 Bxc5 16. Ng5 g6 17. h5 Be3+ 18. Kb1 Nxe5 19. Nd4 Bxf4 20. Nxh7 Kxh7 21. hxg6+ Kg7 22. Rh7+ Kg8 23. g7 Rd8 24. Bb5 Ng6 25. Rdh1 Rb8
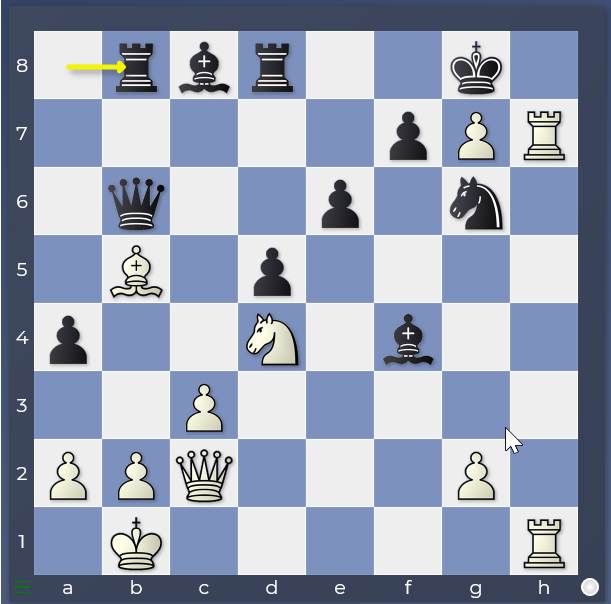
Game: 25…Rb8
Since 25…Rb8 deals – very subtly – with the danger posed by 26.g3, we should look for other White attempts. Can you think of anything else? I came up with 26. Bd3 which looks quite tempting, hitting the knight on g6. However now 26…e5 *is* strong for Black as only a white bishop arrives on f5, not a white queen after 27. Nf5 Bxf5 28. Bxf5
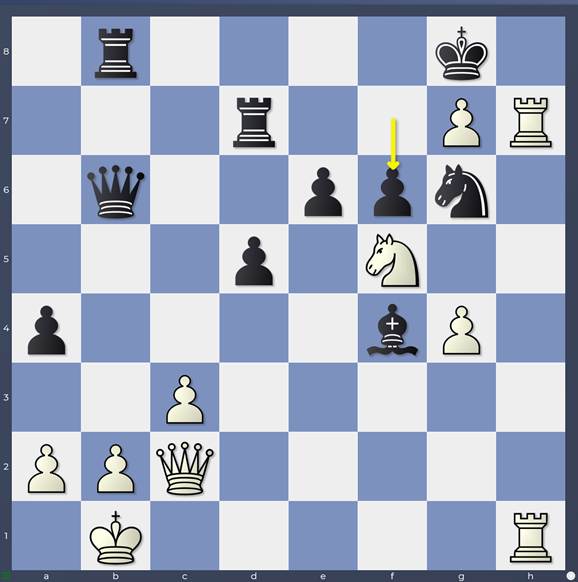
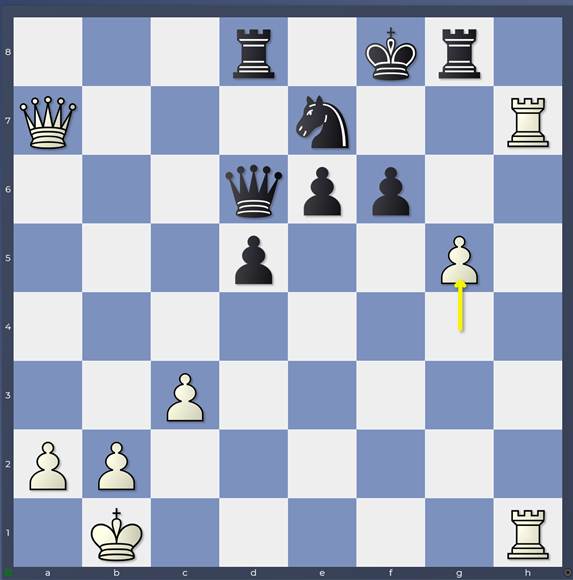
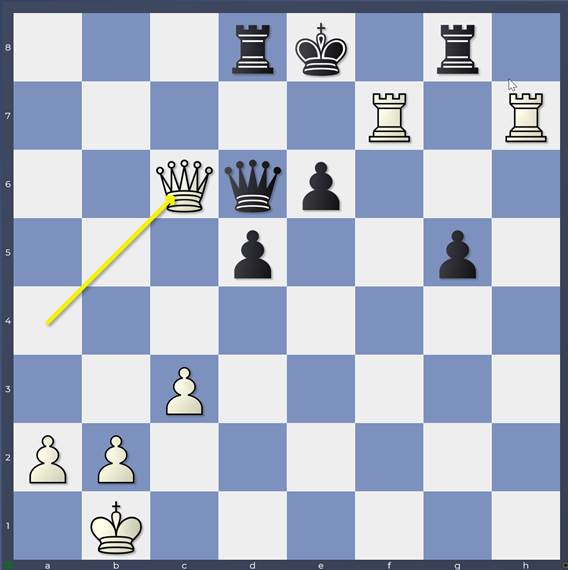
Well if you guess the second main engine move, then you’re doing amazingly well! The engines played many games with 26. g4
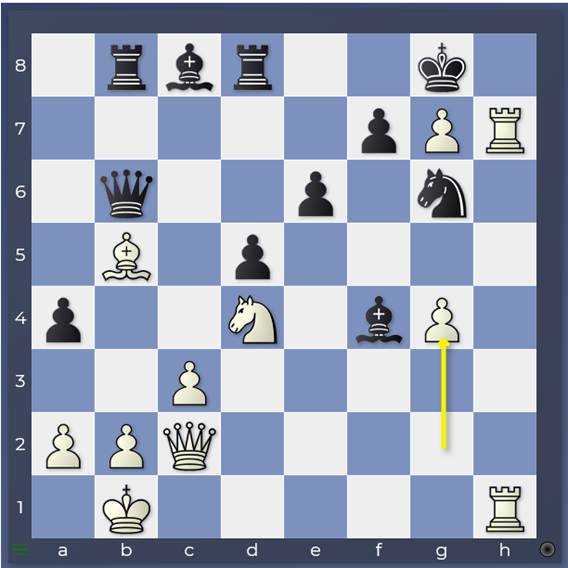
Game: 26.g4
I confess to some vigorous head-scratching (very bad for the hair!) after seeing this one! I understand that 26.g4 (like 26.g3) opens the second rank for the white queen. However, unlike 26.g3, 26.g4 does nothing to mask the h2-square from Black’s bishop on f4 so Qh2 is no more possible now than before. I wondered whether 27.g5 was the threat, taking away the f6-square from the black king to escape to after which Rh8+ …Kxg7, R1h7+mate is a threat. However, the engines think Black can defend easily just with 27…Bxg5! So what is White’s threat then after 26.g4?
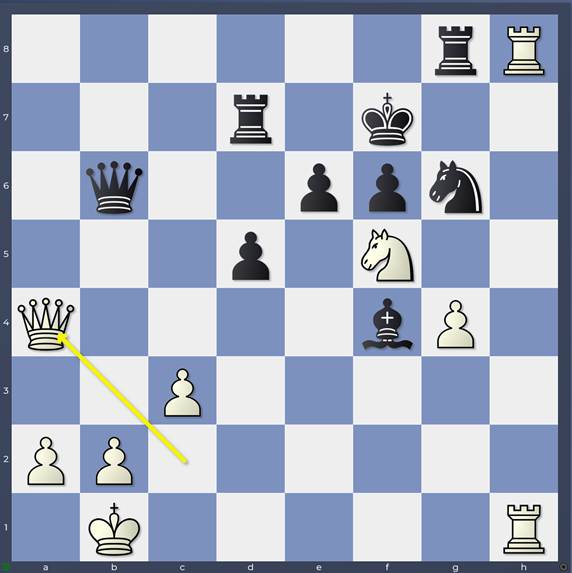
If we give White the move then the engines consider 27. Bxa4 to be pretty much winning!

Variation: extra move for White 27.Bxa4
Essentially, White intends to stifle Black’s counterplay along the b-file, either with b3 or Bb3, before focusing his energies on the kingside again! So why wasn’t 26.Bxa4 possible to start with?

Variation: 26.Bxa4
Well 26…e5 would have been very irritating for White because 27. Nf5 Bxf5 28. Qxf5 allows mate on b2! Qxb2# That move 25…Rb8 coming in handy again! Of course, after 26.g4 and then 27.Bxa4, 27…e5 can be met simply by 28.Nf5 Bxf5 29.gxf5 with a winning position for White! That’s one of the points of 26.g4!
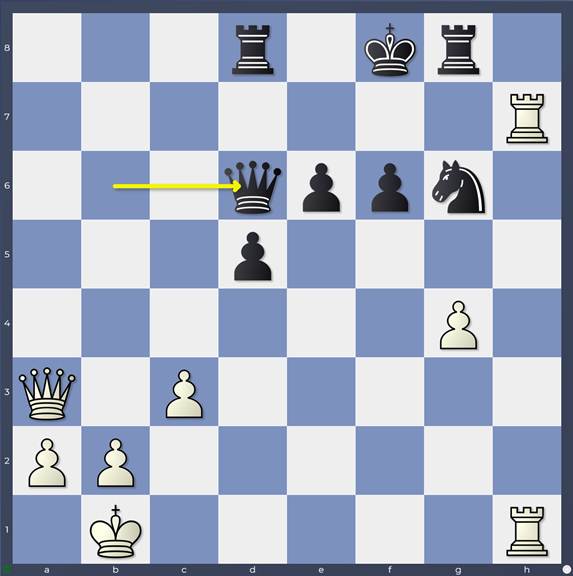
After 26.g4, the only move considered by the engines is 26…Bd7
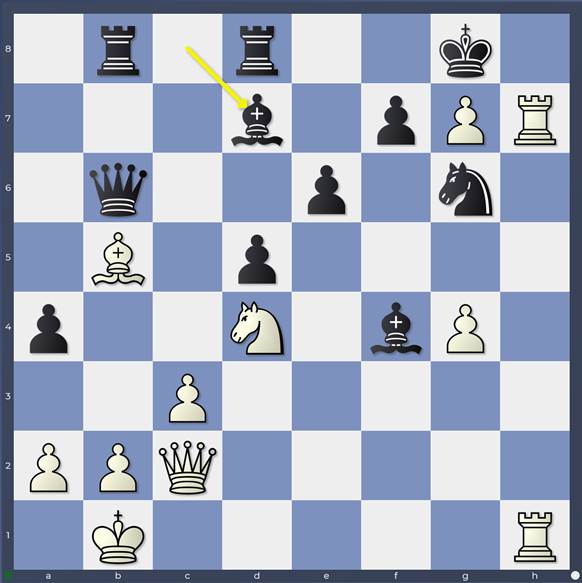
Game: 26…Bd7
and you can understand the logic! If White’s idea is to barricade the queenside starting with Bxa4, let’s prevent Bxa4 and remove the barrier on the b-file. Black’s counterplay looks much quicker if Black’s pieces are already pointing at b2. And there’s also the mundane point of completing development and connecting the black rooks! Now can you guess what White plays? The engines consider 2 ideas! We’ll consider the first in this blog and look at the second in the next post!
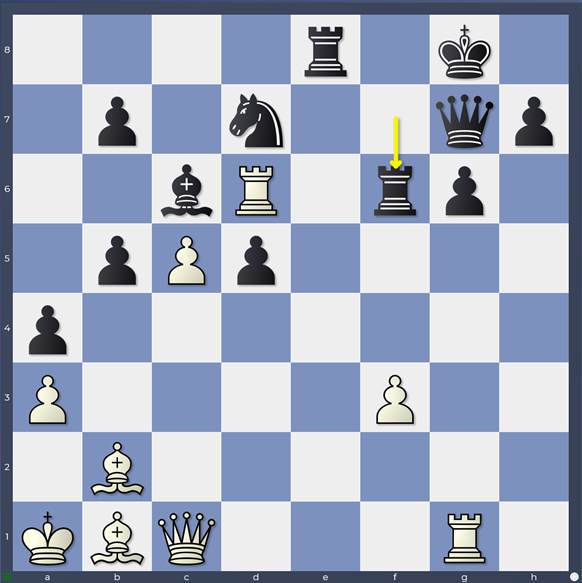
27. Bxd7 is the first idea we’ll consider
(27. Bxa4 Bxa4 28. Qxa4 Qxb2#)
27… Rxd7 28. Nf5
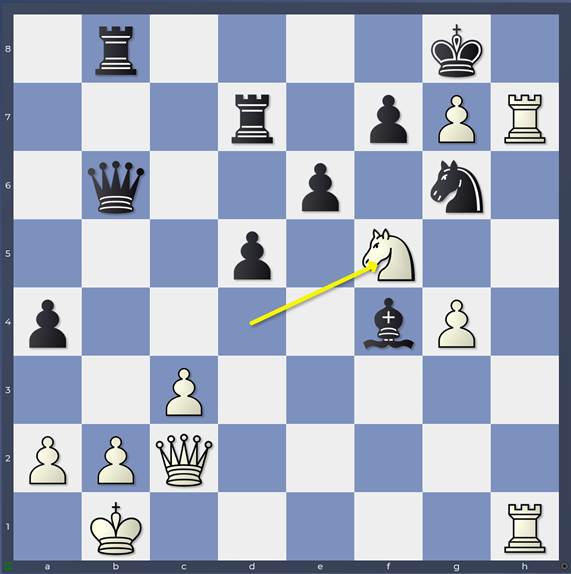
Game: 28.Nf5
The second idea of 26.g4! It wasn’t just to prepare Nf5 against …e5: it was to go Nf5 anyway!
All of a sudden it isn’t easy to find a defence for Black against White’s threat of Rh8+!
28… exf5 allows – slightly surprisingly – a forced mate! 29. Rh8+ Kxg7 30. R1h7+ Kf6 31. Qxf5+
Variation: 31.Qxf5+
f5 is a key square for the queen in these attacks and 26.g4 supports it – another surprising point of this move! 31…Ke7 32. Rxf7+ Kd6 33. Rxd7+ Kc5 34. Qxd5#
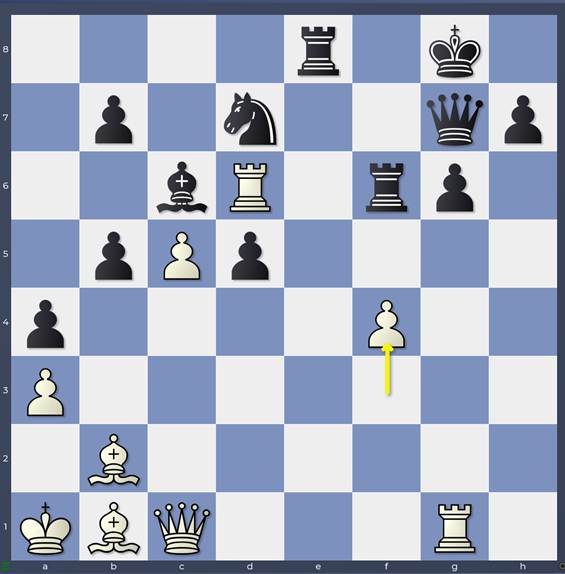
28…f6
Game: 28…f6
freeing an escape square on f7 for the king is the only way. Note how useful the bishop on f4 is, covering the h6-square against ideas like Nh6+.
The next sequence reminds me forcibly of a core piece of attacking wisdom I learned by analysing Tal’s games: attacking momentum comes by taking stuff, hitting stuff and checking stuff!
It’s not easy to explain the following moves except for a relentless attempt by White to harry Black by taking, hitting and checking from any angle possible! You can’t reason such stuff logically: you simply have to see it and somehow string it together. Obviously for humans, it’s very difficult to anticipate that such possibilities will exist in a position from a distance, let alone whether they will lead anywhere. Now the engines give us
29. Rh8+ Kf7 30. g8=Q+
Always surprising to give up a pawn on the seventh for nothing but White’s best chance of harrying Black turns out to be along the seventh rank rather than the eighth rank. Of course queening with check gives Black no respite to strike back at White so the attacking tempo is kept high.
30…Rxg8
The rook has been distracted from the combined attack on b2 which frees the white queen for action! Note however that the rook on h8 is en prise to 2 pieces.
31. Qxa4
Hitting Black from both wings! The rook on d7 is en prise and R1/8h7+ will double the pressure on it.
31…Rdd8
It’s very important to cover the e8 square and also to sidestep the threat of R1h7+
(31… Rxh8 32. Qxd7+)
32. R8h7+
32. R1h7+ Kf8 simply allows Black to force the exchange of a pair of rooks.
32… Kf8 33. Qa3+
Keeping up the checks, not giving Black a breathing space, and hoping that it leads somewhere!
33…Bd6
(33… Ke8 34. Re7+)
34. Nxd6 Qxd6
Game: 34…Qxd6
The lines are all forced. Note how narrow the path is for Black. In some ways, this makes such a sequence possible for a human player to calculate because alternatives can be thrown away after a one-move analysis. However, what you never know of course is whether the position you reach at the end is worth anything!
(34… Rxd6 35. Rd7 exploiting the pin on the a3-d6 diagonal is very neat!)
35. Qa7
Threatening Qf7+mate to avoid the threatened exchange of queens with tempo
35…Ne7
It looks like White’s attack has exhausted itself somewhat but one soldier can still make a difference!
Game: 35…Ne7
36. g5!

Game: 36.g5
This moment reminds me strongly of a famous AlphaZero game which in “Game Changer” Natasha and I christened “Exactly how to attack”. Just when you think the attacking side has thrown everything it has at the defender, the engine reaches into its back pocket and finds one more trump!
Take a look at it:
AlphaZero-Stockfish 8 “Exactly how to attack”
After so many pawn sacrifices from White (7 in total, not all of which were accepted), AlphaZero broke Black’s position with a final pawn thrust
43. f4
AlphaZero-Stockfish 8 “Exactly how to attack”
when the threat of f5 finally overwhelmed Stockfish 8’s superhuman defences!
Back to our game now after 36.g5!
Game: 36.g5
The key to such moves is that the opponent shouldn’t be able to meet them without concessions. Black can’t maintain his pawn structure as it is now since 36… Rxg5 is demolished by 37. Rxe7 Qxe7 38. Rh8+ Kf7 39. Rh7+.
36…Rd7 37. Qa8+ Rd8 38. Qa7
is a draw by repetition since abandoning the attack on a7 with the queen allows simply 38. Qa5 Rxg5
Black can also ask White to prove his attacking resources once more with
38… fxg5
which gets rather spicy!
39. Rf1+
Using the newly-opened f-file at once.
39…Ke8
Once again, Black’s path is very narrow
(39… Nf5 40. Qf7#)
40. Rff7
3 white major pieces on the 7th rank!
40…Nc6
Game: 40…Nc6
It’s astonishing that White doesn’t have some way to get his queen closer to Black’s king in some forcing way! However, White isn’t out of ideas yet!
41. Qa4
What’s the threat? 42. Qxc6+!!
Variation: White’s threat 42.Qxc6+!!
of course forcing mate after 42…Qxc6 43. Re7+ Kf8 44. Rhf7#)
Black has only one good defence:
41…Rh8
Black offers the exchange of rooks and also cleverly frees g8 as an extra escape square for his king!
Now
42. Qxc6+ Qxc6 43. Re7+ Kf8 44. Rhf7+ Kg8
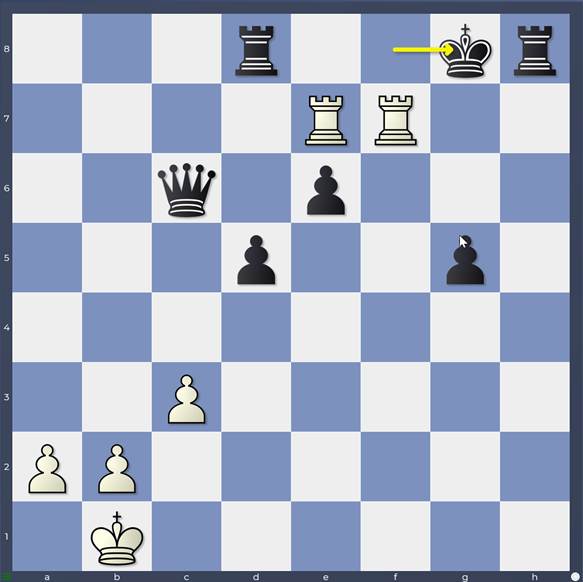
Game: 44…Kg8
is only a draw by repetition!
In the next blog we’ll take a look at White’s other alternative on the 27th move which is the engines’ preferred choice. If you haven’t read it yet, take a look at the previous post about this game: Explaining complex tactics – Part 1 » Matthew Sadler