
In the previous blog, we made some general observations about the Adams-Royal game from round 6 of the 2025 English Championships. In this blog entry, I’d like to examine some of Black’s better defensive opportunities and to reflect on the lessons we can draw about the correct method of defence in such situations.
We identified two key moments which shaped the game:
16…f6 fixed the pawn structure early
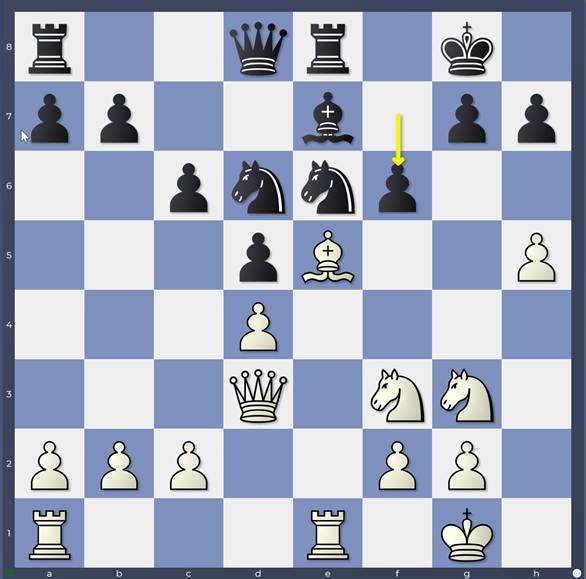
Game: 16…f6
and 19…Nf8 withdrew the knight to a passive position
Game: 19…Nf8
However, just because both these moves influenced the course of the game significantly, it doesn’t necessarily mean that both were bad. I mentioned in the last blog post that I had come across multiple examples where Black played …f6 and emerged with a reasonable game. I think it will be very instructive to show you a number of these:
1. e4 e5 2. Nf3 Nf6 3. Nxe5 d6 4. Nf3 Nxe4 5. d4 d5 6. Bd3 Bf5 7. O-O Be7 8. Re1 O-O 9. Nbd2 Nd6 10. Nf1 c6 11. Bf4 Bxd3 12. Qxd3 Na6 13. Ng3 Nc7 14. h4 Ne6 15. Be5 Re8 16. h5
Let’s start with one of the moves which the engines prefer to 16…f6: 16… Bf8 (16…Qd7 is the other)
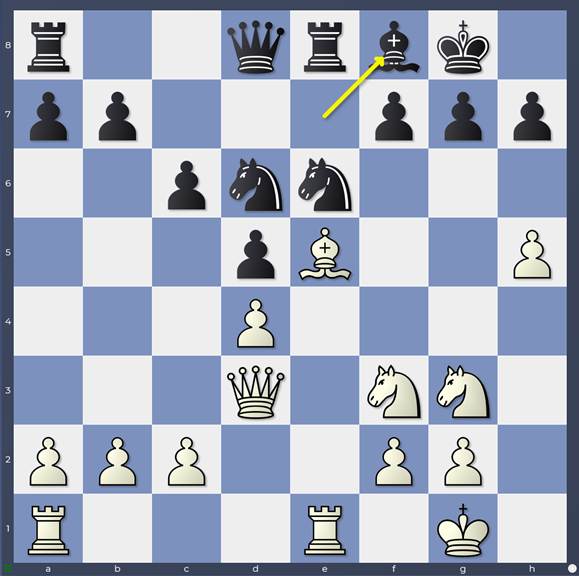
Line: 16…Bf8
17. c3
and now let’s force Black to play
17… f6
which isn’t in the engines’ top 3 moves. After
18. Bxd6 Qxd6
let’s continue as Mickey did with
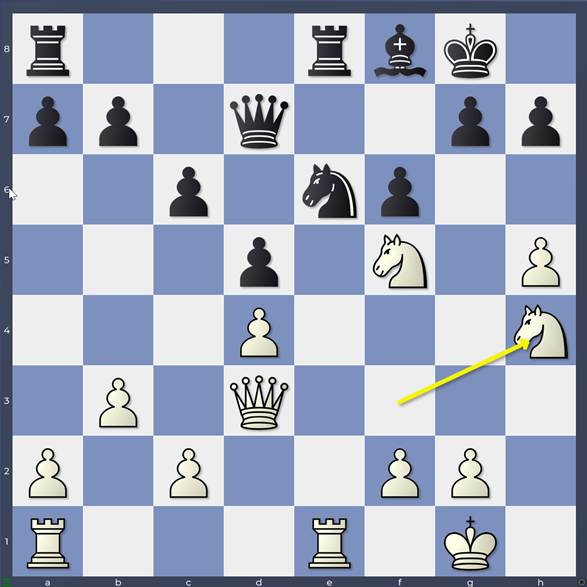
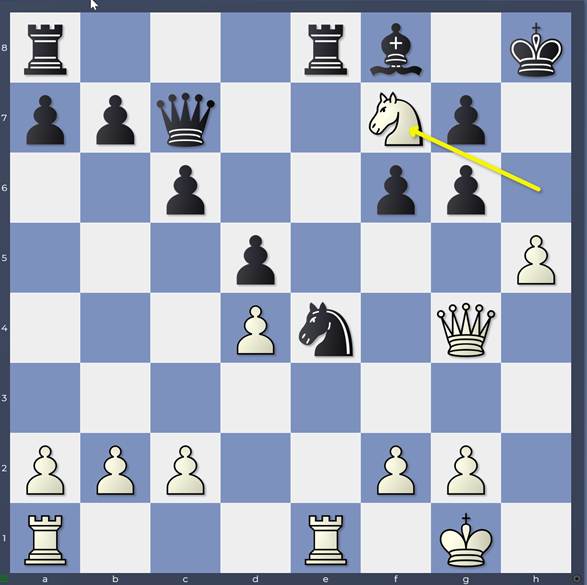
19. Nf5
and now the engines throw out
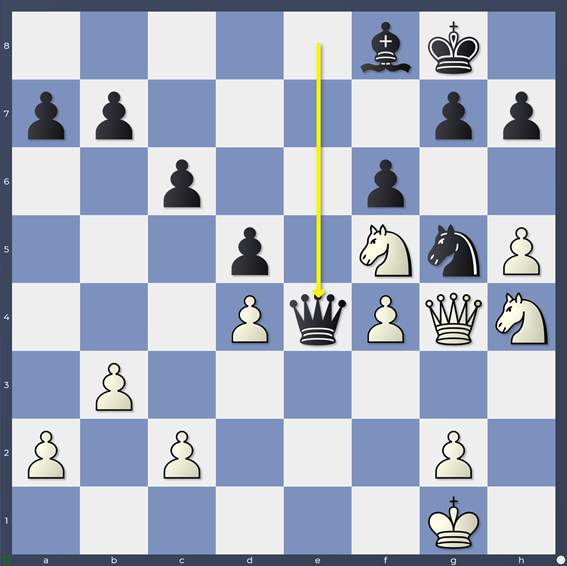
19…Qf4
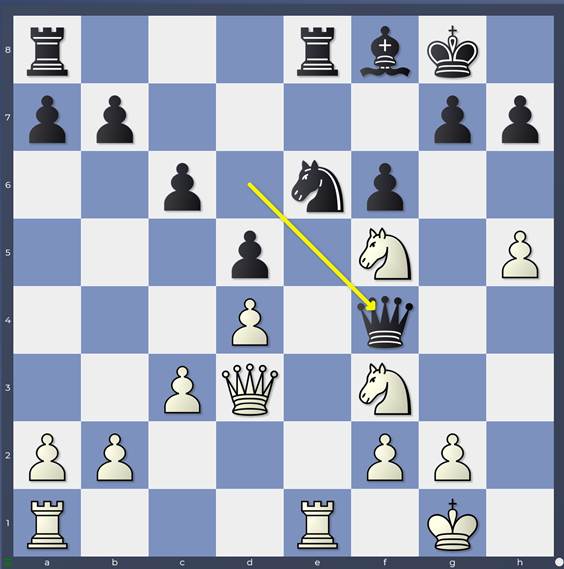
Line: 19…Qf4
That’s an active move! The queen is interfering with White’s kingside plans. If we try Mickey’s setup in the game with
20. N3h4 then 20…Qg5 is extremely unpleasant as 21. Qf3 g6 simply wins a piece now!
Let’s now take a look at another typical possibility: b3 with the idea of pressuring the black centre with c4 while keeping the black knight from an active outpost there.
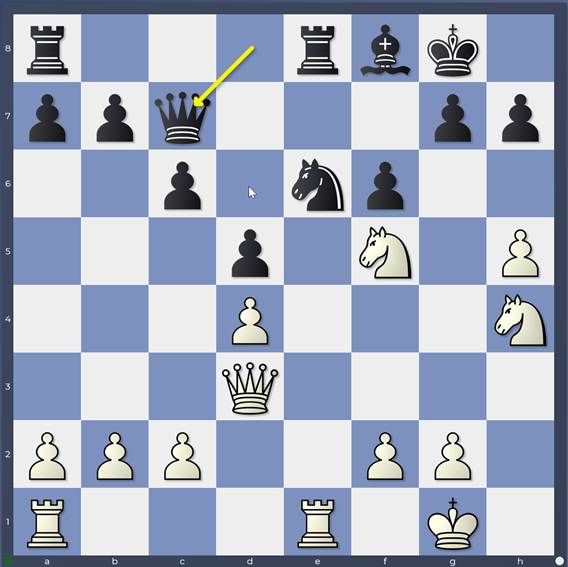
17. b3 and now once again let’s make Black play the forcing 17…f6 18. Bxd6 Qxd6 19. Nf5 Qd7
19…Qf4 would also be good here, but let’s look at an approach that resembles the game more.
20. N3h4
Line: 20.N3h4
Just like Mickey played and now there are 2 interesting lines:
- 20… Rad8 21. Qg3 Ng5
Line: 21…Ng5
The knight interferes with White’s kingside initiative, blocking the queen’s pressure on g7.
22. Rxe8 Rxe8 23. f4 Nf7
Line: 23…Nf7
The safest and a very good square for the knight, covering h6, intending …Qe6 grabbing hold of the open-e-file and preparing …Nd6 to challenge the white knight on f5. Oddly enough 23… Ne4 24. Qg4 is a touch awkward for Black with the threat of Nh6+ in the air.
- 20…Qf7
Line: 20…Qf7
Hitting the pawn on h5 and thinking about …g6 to challenge the knight on f5
21. Qf3
Defending h5 and preparing Qg4. 21. Ng6 is a spectacular idea but the engines have a response (of course) 21…Ba3 22. Rab1 a5 23. c3 Ng5 24. Nf4 Rxe1+ 25. Rxe1 Re8
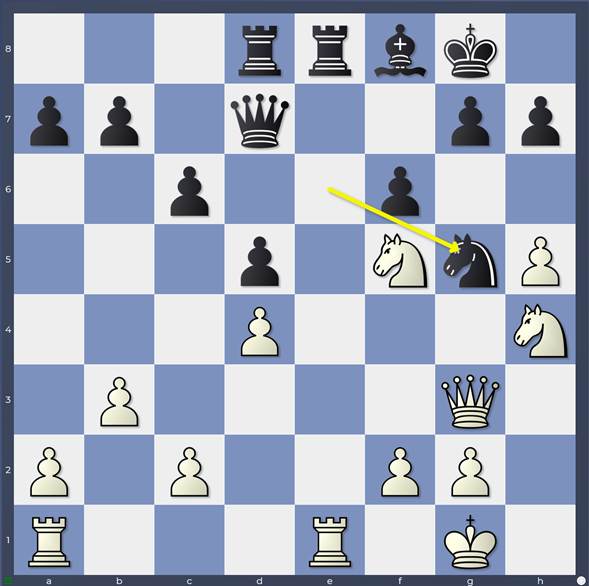
21… Ng5
Interfering with the white queen once more
22. Qg4 Rxe1+
Since the knight is shielding the g-file, Black has the opportunity to fight for the e-file and also reduce White’s attacking potential.
23. Rxe1 Re8 24. Rxe8 Qxe8 25. f4 Qe4
Line: 25…Qe4
Another sharp move, making White fight for every single gain!
26. Kh2 Ne6 27. Nh6+ Kh8 28. Nf7+ Kg8 and the engines saw nothing better than a draw by perpetual.
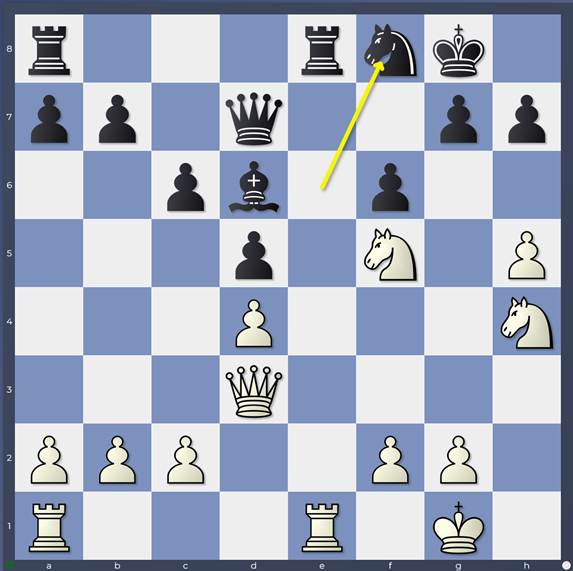
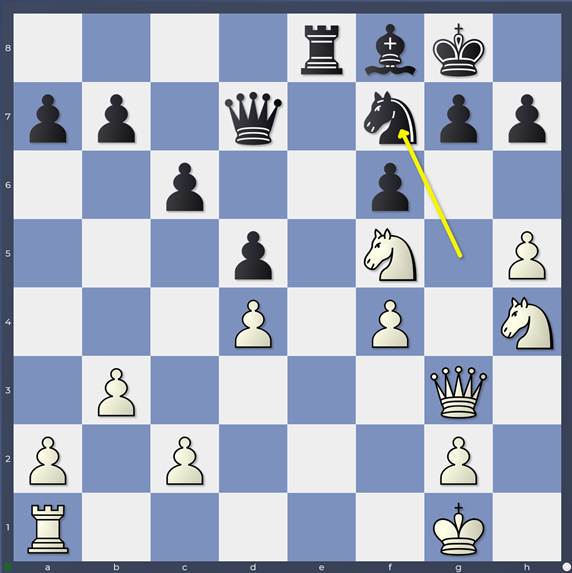
Now let’s go back to the game continuation 16…f6 17.Bxd6 Nxd6 18.Nf5 but instead of Shreyas’ 18…Qd7, the engines suggested 18…Bf8.

Line: 18…Bf8
Let’s see what difference that makes if White plays as Mickey did in the game.
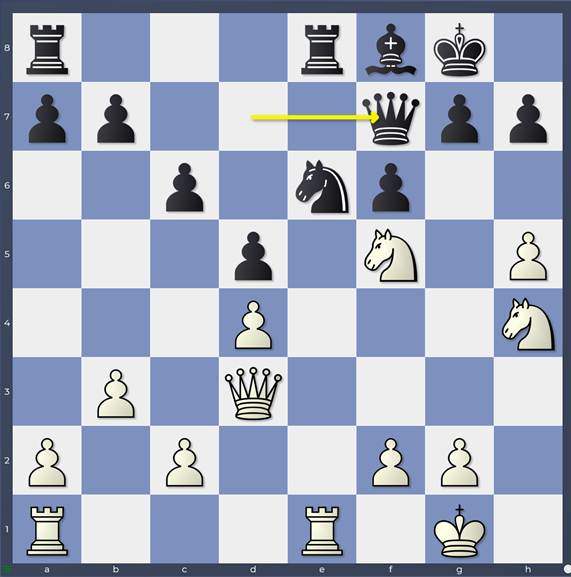
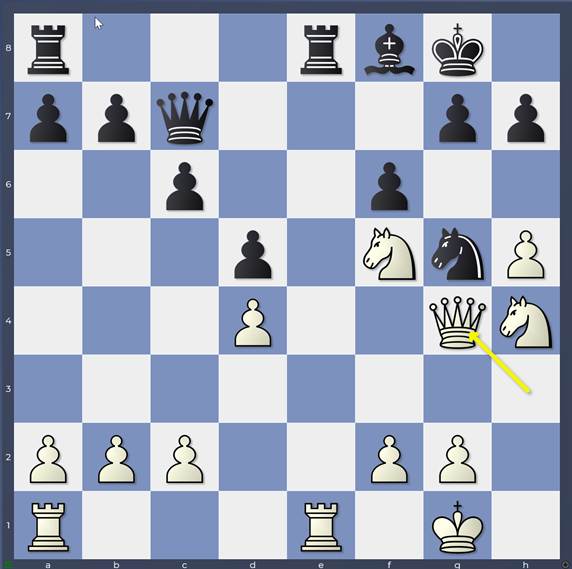
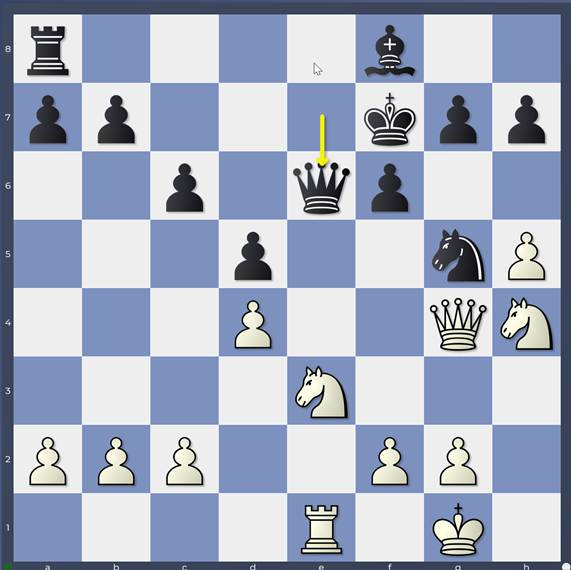
19. N3h4 Qc7
Line: 19…Qc7
We’ve seen that queen going to the b8-h2 diagonal before!
20. Qh3
Threatening Rxe6 and now Black has 2 possibilities.
20… Ng5 21. Qg4
Line: 21.Qg4
21… Ne4
has nothing to do with our theme, but is a nice tactical puzzle for you 😉 How should White play?
22. Nh6+ Kh8
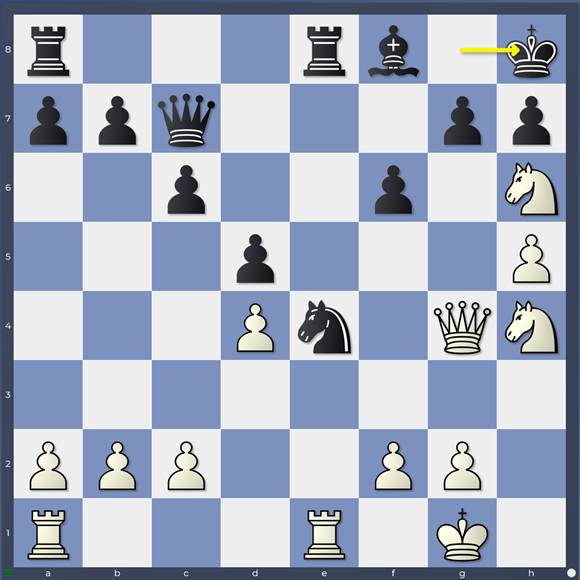
Line: 22…Kh8
23. Ng6+ hxg6 24. Nf7+
Line: 24.Nf7+
Really neat!
24…Kg8
24… Qxf7 25. hxg6
25. hxg6
and Black can only stave off mate by giving back material:
25… Bd6 26. Qh3 Bh2+ 27. Qxh2 Qxh2+ 28. Kxh2 Nxf2 29. Nd6 Rxe1 30. Rxe1 Kf8 31. Kg3 Ne4+ 32. Nxe4 dxe4 33. Rxe4
which led to wins in all my engine games.
21…Re4
is however what we really want to see
22. Rxe4 dxe4
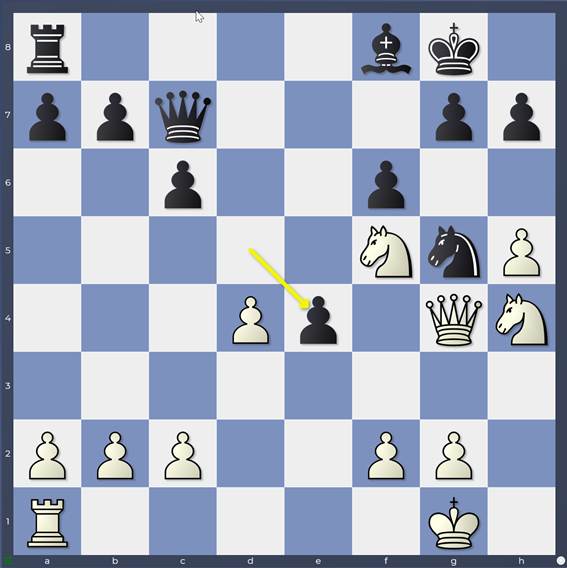
Line: 22…dxe4
A really clever idea, maintaining Black’s block of the white queen on the g-file by a cunning pawn structure change. One set of engine games continued
23. Ng3 Qf7 24. Nxe4 Nxe4 25. Qxe4 Qxh5 26. Re1 Rd8 27. Nf5 Qf7
with a perfectly fine position for Black.
We’ll just round this off with Black’s other reasonable move at move 20: 20…Kf7
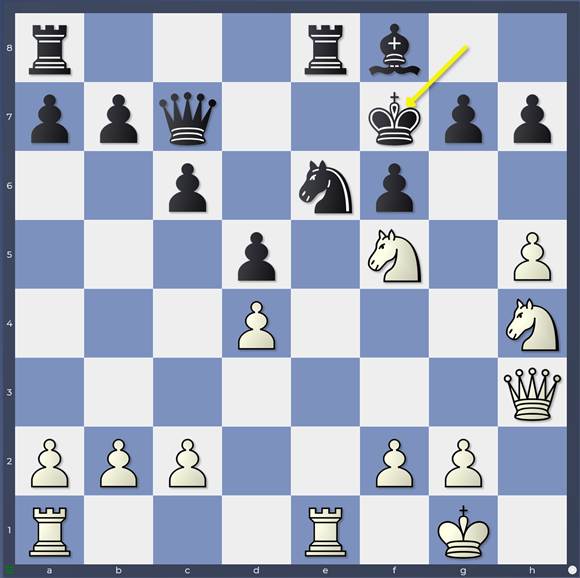
Line: 20…Kf7
This is the more “manual” way of nullifying Rxe6! The black queen is of course always ready to jump into f4 to interfere with any White attempts on the kingside.
21. Re3
21. Qd3 Kg8 22. Qh3 Kf7 was often inserted in engine games.
21. Qg4 Qf4
21… Ng5 22. Qg4 Rxe3 23. Nxe3
and now
23…Qe7
23… Re8 is also good
24. Re1 Qe6
Line: 24…Qe6
lead to a good position for Black.
So what do we make of these successful defences compared to the game continuation? It’s clear that in the successful defences, Black managed to “get in White’s face” while White was trying to set up his attacking structure. While Mickey was able to play his knights to f5 and h4 and his queen to g4 without any hindrance, here a variety of ideas like …Qf4, …Ng5 and …Qf7 kept White on his toes continually. Playing through these lines, you get a real sense of why 19…Nf8

Game: 19…Nf8
in the game was so mistaken. As I described in the previous blog entry, “it doesn’t interfere in any way with White’s build-up which makes you very nervous about what White might achieve given a free hand.”
So what might Black have done here instead? Well put on your “getting-in-White’s-face-defensive-thinking-cap” and find Black’s unusual (engine) idea:
19…Bf4 20.g3 Bg5
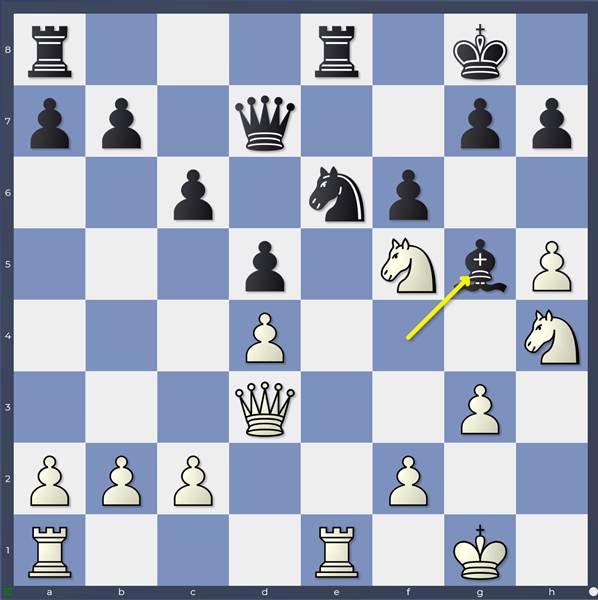
Line: 20…Bg5
There it is! The bishop interferes with White’s plans on the kingside. It’s definitely risky – the bishop might get trapped with f4 if you’re not careful – but it’s definitely preferable to waiting for White to point all his pieces at your king!
21.Nf3
and now some good calculation is required
21…g6 22.hxg6 hxg6 23.Ngh4 Qh7 24.Qxg6+ Qxg6 25.Nxg6 Kh7 26.Ngh4 Bxh4 27.gxh4 Kg6
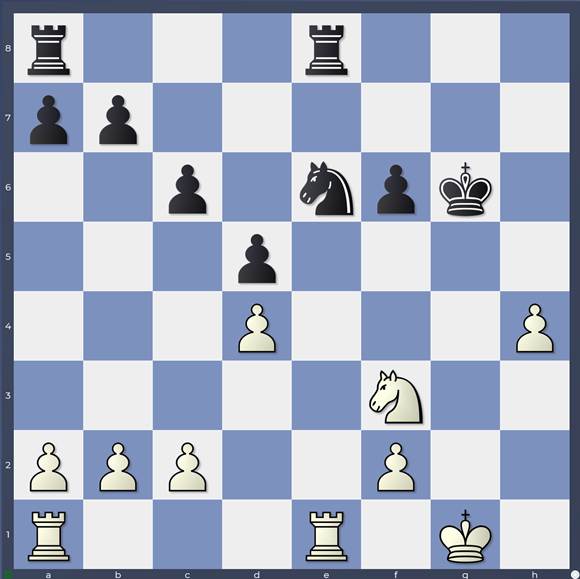
Line: 27…Kg6
Black’s activity will make it difficult for White to realise the extra pawn. It’s much better than the game in any case!
Why did Black miss these chances and end up in such a passive situation? I think the psychology of playing symmetrical positions against very strong players like Mickey is more difficult than you might imagine. There is a tendency – at least I have noticed it in myself – to try too hard to “keep” the position as it is. It all looks quite bland – even the position after 19…Nf8 might not seem too bad at a first casual glance – so your only goal is not to upset the balance and play safe, “solid” moves. In so doing, you miss all manner of little active chances that make life harder for your opponent… and when it all goes wrong, you look back on a ruin of a position and wonder what on earth you did that was so wrong! Nothing really, but in fact, it was what you didn’t do that was so costly.
Hope you enjoyed that analysis! Stay tuned for plenty more!