
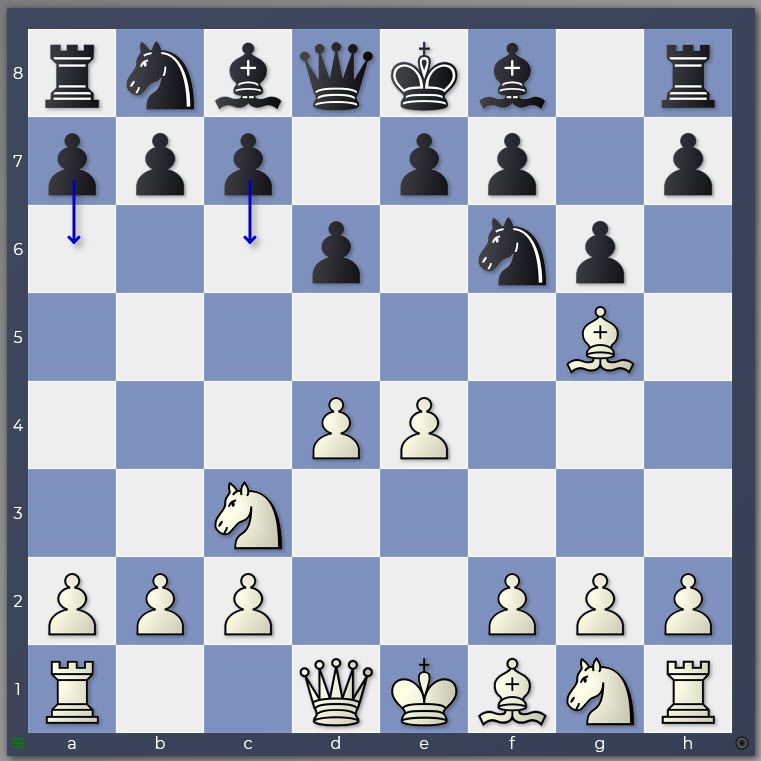
The ex-World Champion Mikhail Tal once wrote that he enjoyed reading books for beginners because he always learnt something new from them. Actually, truth be told, I think he said that but I haven’t been able to find this quote back anywhere! I may have imagined it… which would be slightly comical as I used this insight to develop an important technique for playing and learning openings better! I’ve mentioned this technique before in both “Tips for Young Players” and “Study Chess with Matthew Sadler” but it’s still not very well-known so I’d like to revisit it and illustrate it with a modern example.
I always prepared heavily as a professional, developing quite a few openings where I knew the first 15 or 16 moves. It was natural to play those moves quickly and start thinking only once my theoretical knowledge ran out. However, I noticed that I was struggling to reach my normal intensity in such games. You’d think that whipping out 15 moves of theory would have given me a buzz and a psychological edge over my opponent, but instead I was looking dully at the board as if someone else had played those moves! I came to realise that the build-up of the chess struggle from the first move to the end of my book knowledge was a crucial psychological phase for me. During that phase, I established my focus and concentration and settled into the struggle that was awaiting me. Rattling out my book moves disrupted this process. I developed the habit of spending a minimum of 15-30 seconds per opening move. To maintain this discipline and prevent my hand from automatically making a move, I forced myself to list the basic properties of each opening move I played. For example:
1.e4
Occupying e4, attacking d5, freeing the f1-a6 diagonal for the light-squared bishop and the d1-h5 diagonal for the queen, while also freeing the e2-square for the knight.
1…d6
Attacking e5, opening the c8-h3 diagonal for the light-squared bishop and freeing the d7-square for a black knight.

Position after 1…d6
2.d4
Occupying d4 and attacking e5 and establishing a double pawn centre. The c1-h6 diagonal is opened for the dark-squared bishop and d2 is freed for the white knight on b1.
2…Nf6
Developing the king’s knight to attack e4 and d5 while bringing kingside castling one move closer.
Position after 2…Nf6
3.Nc3
Developing the queen’s knight and defending the e4-pawn. Queenside castling is now one move closer.
3…g6
Freeing the g7-square for the dark-squared bishop from where it will eye White’s d4-pawn from afar along the h8-a1 diagonal. Black is now just 2 moves away from castling kingside.
Position after 3…g6
4.Bg5
Developing a second minor piece, attacking the knight on f6 (threatening to double Black’s f-pawns with Bxf6) and putting pressure along the h4-d8 diagonal. White is now just 2 moves away from queenside castling and can link up his queen and bishop along the c1-h6 diagonal with a subsequent Qd2.
Position after 4.Bg5
The goal was only to exert discipline and slow my tempo in the opening moves during a practical game but I achieved much more. By describing the moves in this basic way, I perceived simple patterns and trends in the opening of which I had not been consciously aware. For example, by describing the development flow of both sides, it becomes clear that White can castle queenside very quickly and that Black’s king must head to the kingside to get to safety quickly. I liked this knowledge, so I incorporated this reflection into my home preparation. When starting to learn an opening, I reserved time to think “like a beginner” about the new plans and openings I was coming across.
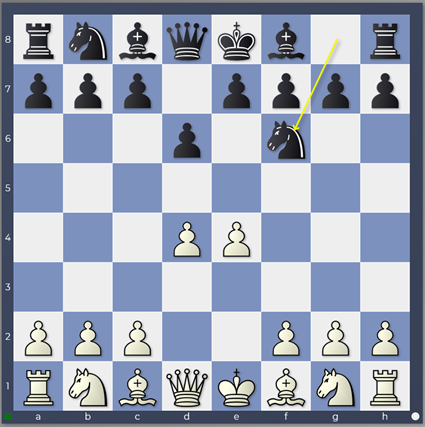
Let me illustrate this with an example. In the Pirc, you sometimes see Black play …c6 and sometimes you see Black play …a6. At times the engine recommends one, and at other times the other. What would a simple analysis of these moves reveal?
Let’s start with …c6 and to make things easy we’ll stick with the 4.Bg5 variation.

Position after 4…c6
…c6 is HyperModern in spirit, keeping an eye on the centre (d5) without occupying it directly. It is cruel to the knight on b8 by taking away the developing square c6, but it combines well with the knight on f6
providing a comfortable flight square on d5 if chased by e4-e5 while also covering d5 if the knight retreats elsewhere.
…c6 also frees a development / activation route for the black queen to c7, b6 or a5.
The latter two moves are somewhat loose but can also prove disruptive to the white position (particularly b6 which hits b2 and d4). Developing the queen in this way also facilitates queenside castling which is not as unusual as you might think!
…c6 is not particularly kind to Black’s bishops. …c5 is less likely after …c6 so the dark-squared bishop developed to g7 is not directly helped while the c6-pawn blocks the a8-h1 diagonal if the light-squared bishop is developed to b7 after …b5. However …c6 supports the disruptive and undermining push …b5-b4, rewarding the knight’s second “risky” move to f6 which drew the white knight to c3, as well as the …d5 central break.
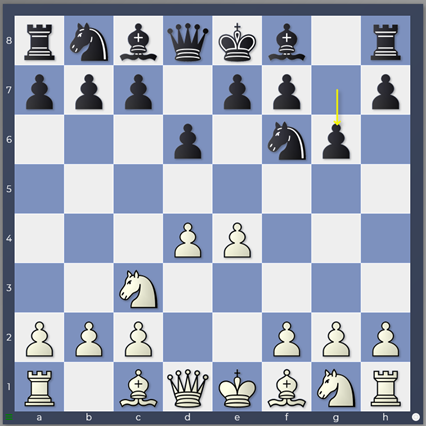
Now let’s move onto …a6
Position after 4…a6
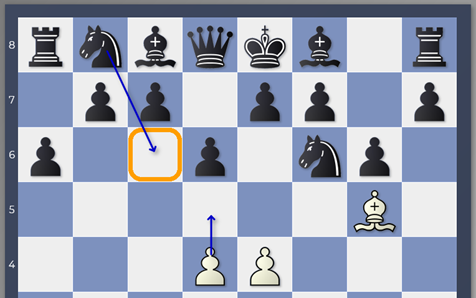
…a6 by contrast asks the knight on f6 to fend off the e4-e5 break on its own.
Position after 5.e5
The later potential of Black’s play after …b5 and …Bb7 is quite significant however. The bishop on b7 attacks e4, combining with the knight on f6, the b-pawn push to …b4 is powerful
while the c-pawn can move to c5 in one move combining with Black’s dark-squared bishop by clearing the long h8-a1 diagonal.
The black knight on b8 can even move to c6! (though it must be noted that when facing a double pawn centre, …Nc6 is risky due to d5 chasing it away.)
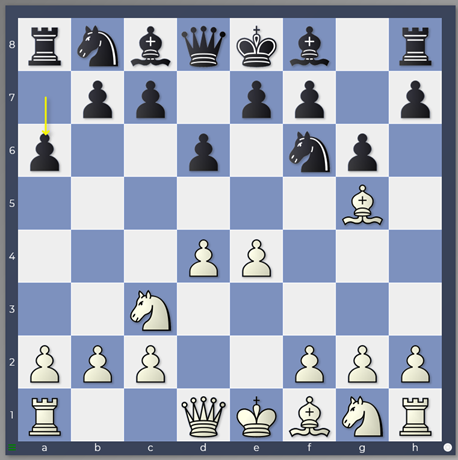
However, compared to …c6, there is clearly a window of uncertainty during which the e4-e5 break can prove disruptive for Black. For that reason, you more commonly see …a6 and …b5 plans in the Modern (e.g. the Tiger Modern)
Position after 1.e4 g6 2.d4 Bg7 3.Nc3 d6 4.f4 a6 5.Nf3 b5 6.Bd3 Bb7
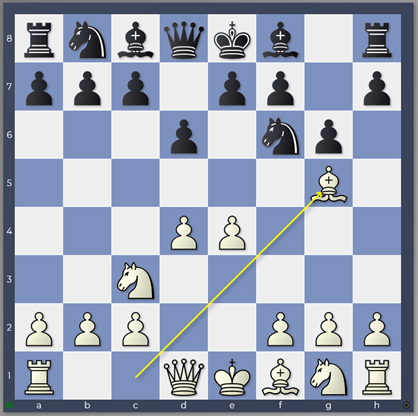
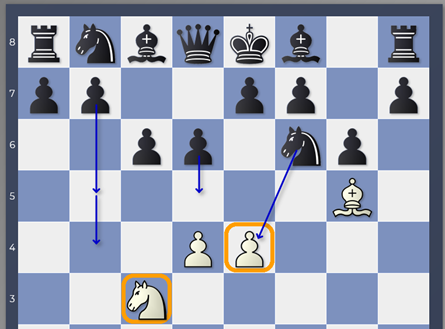
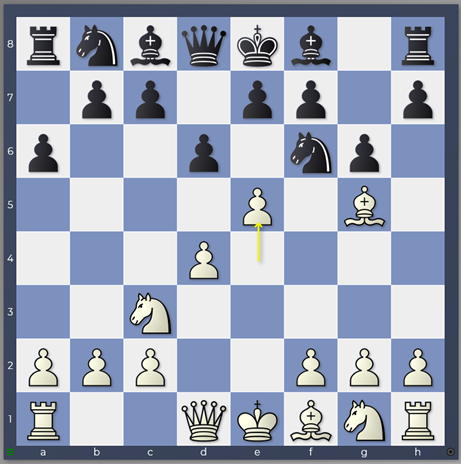
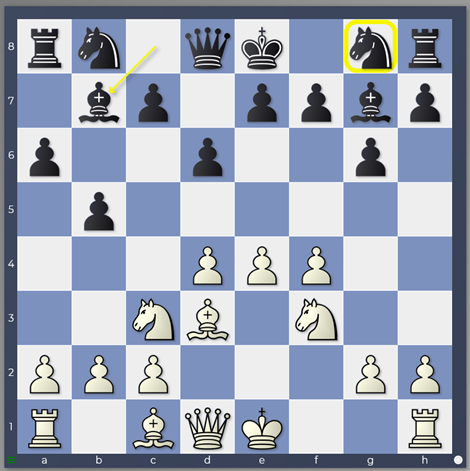
where the knight remains on g8 for a long time (it’s often the last minor piece to be developed) safely out of reach of e4-e5. That said, the engines now recommend …a6 in many lines of the Pirc. …c6 is clearly the more solid option whereas …a6 is the risky one and this specific position after 4.Bg5 demonstrates this quite nicely. The engines prefer 4…c6 to 4…a6, meeting 4…a6 with 5.e5 Nfd7 6.f4 Nb6 7.Qf3 followed by 0-0-0 with a significant advantage.
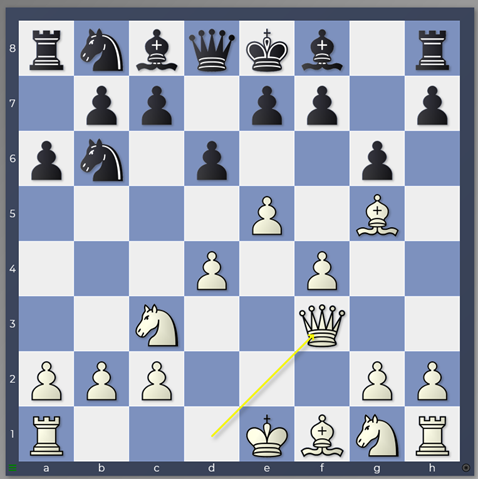
Position after 7.Qf3
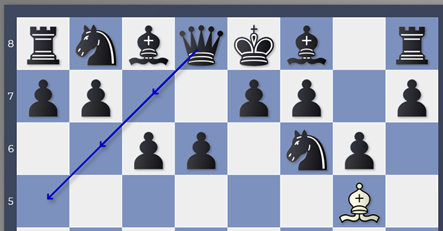
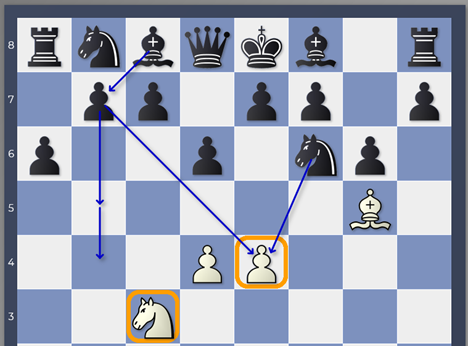
4…c6 5.e5 is easily parried by 5…dxe5 6.dxe5 Qxd1+ 7.Rxd1 Ng4
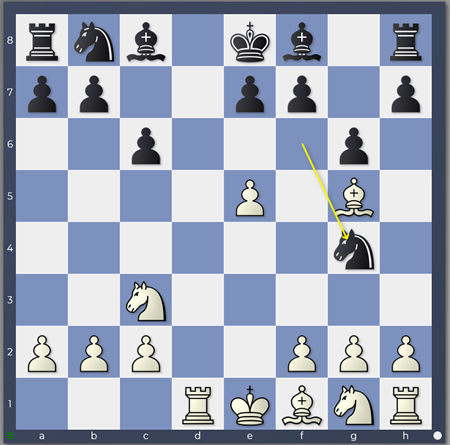
Position after 7…Ng4
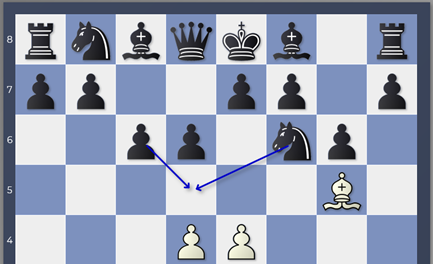
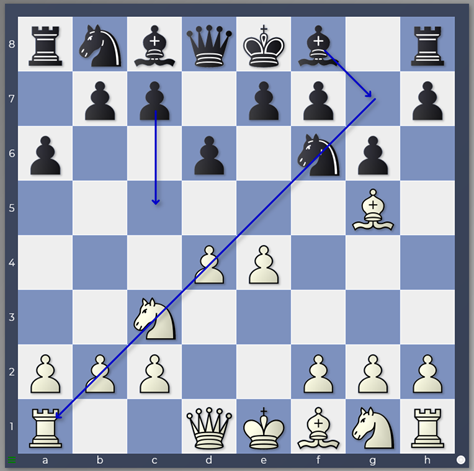
when after 8.f4, Black has a nice choice between 8…Ne3 netting the bishop pair or 8…h6 9.Bh4 g5 undermining the white e5-pawn. This line shows the safety that 4…c6 confers on Black’s position by covering the d5-square because 4…a6 5.e5 dxe5 6.dxe5 Qxd1+ 7.Rxd1 Ng4 8.Nd5
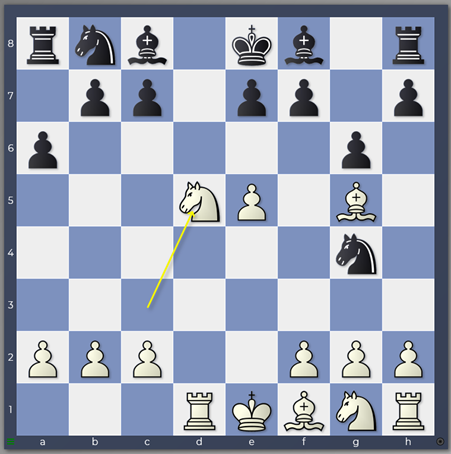
Position after 8.Nd5
would be a total disaster for Black!
I hope you’ve found this explanation of this simple analysis technique useful. I find it to be very rewarding and often a stimulus for discovering new ideas. Most of all, it’s easy and a lot of fun!
E4 also frees e2 for the king. Just saying.
Honestly! Grumble, grumble 😉
Thanks Matthew, i’ll try to apply this method with my different works. Starting with the one i’m working on presently (my 4 … Qb6 move on the Caro-Kann advance variation after 3 … Bf5 4.h4)
Ah nice! Always good to try things out like that for your own openings! Best Wishes, Matthew
You are not alone about Tal learning from beginners.
See
https://www.chess.com/forum/view/chess-equipment/help-me-choose-best-tactics-book-please
“There is an anecdote where Tal said he watched children’s chess programs on television whenever he had the chance because you can never get enough of the basics.”
Ah phew! Glad it’s not only me! 🙂