
Watching engine chess nowadays is often a feast of amazement at the ideas they come up with, but from time to time something happens where you think: “I could have done better!” Such a surprising moment occurred in the massive Viewer Submitted Openings bonus event run by the TCEC in Season 21 in a game between Stockfish and Leela.
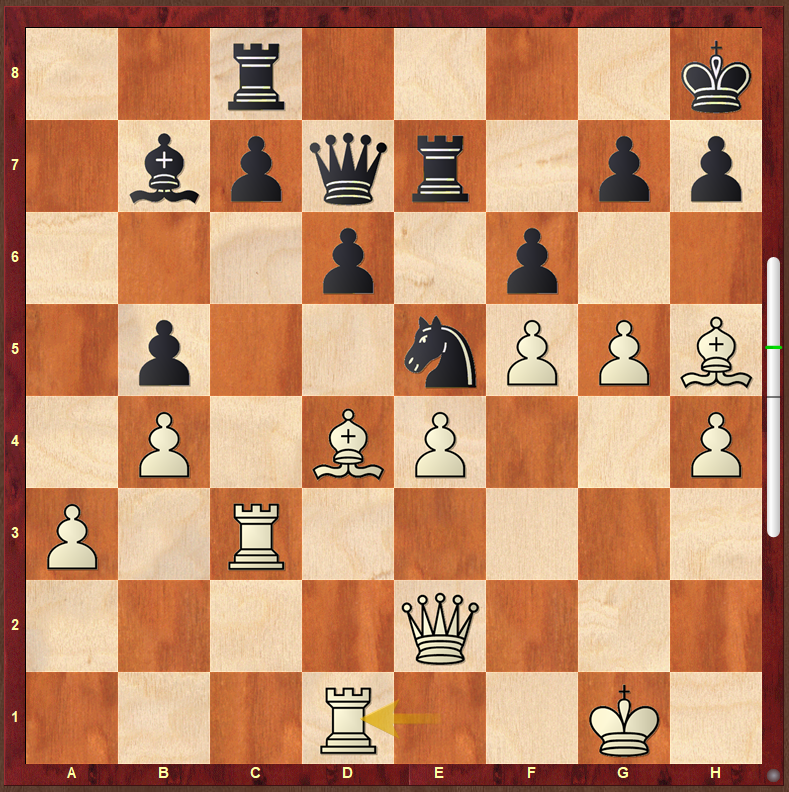
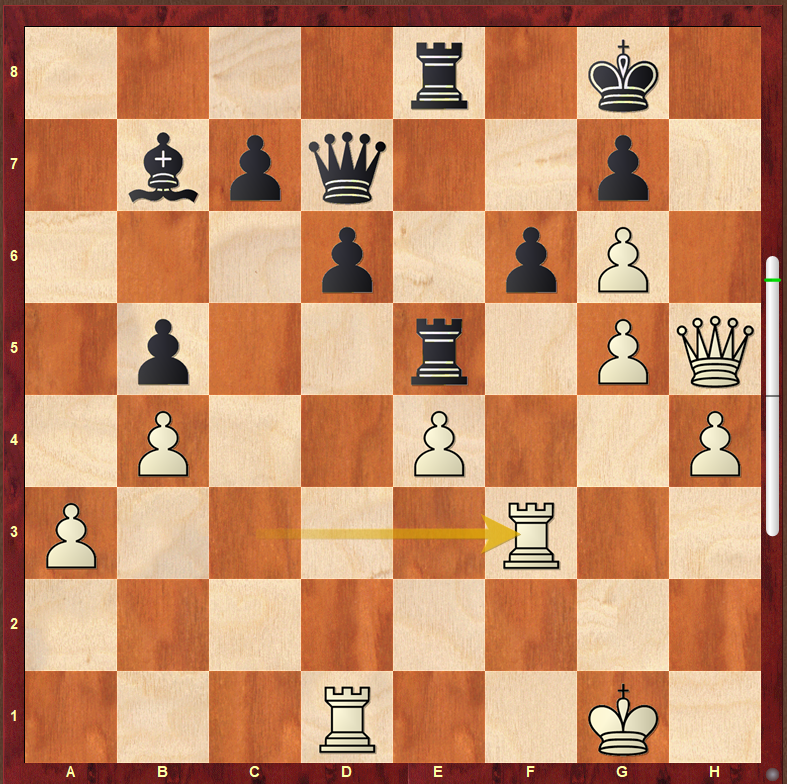
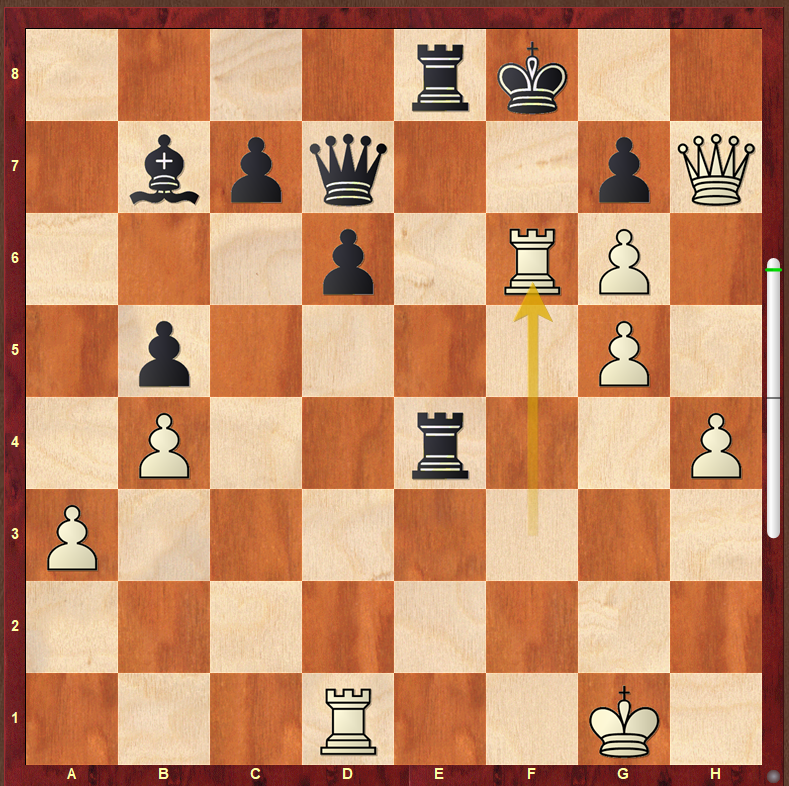
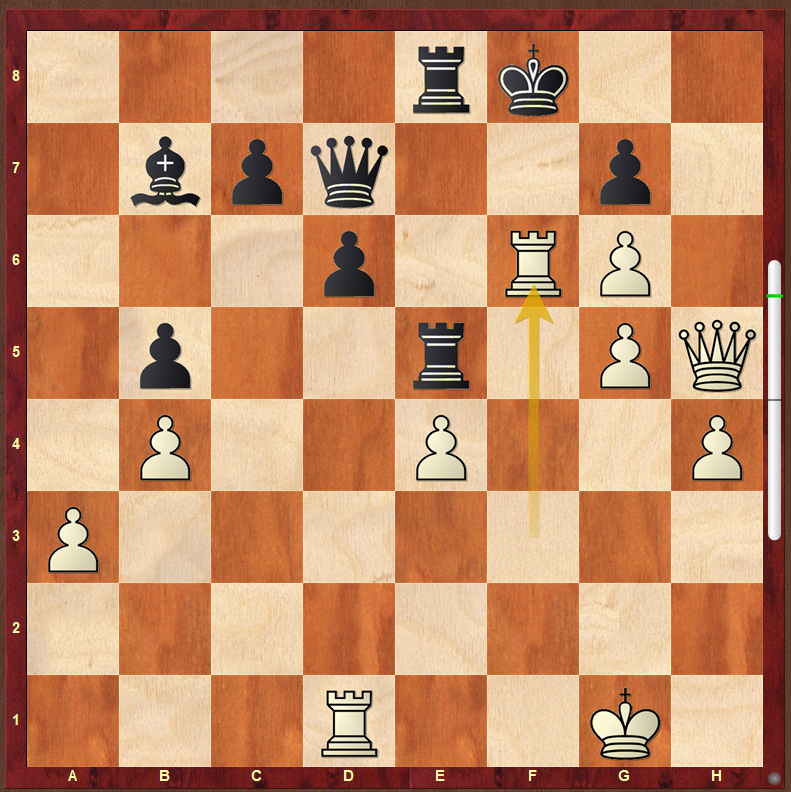
We join the game after White’s 36th move. Stockfish was at a confident 1.28 but Leela was at a fairly cool 0.35 which seemed slightly odd to me.
White has the 2 bishops, a massive kingside space advantage with the black king there as a target, and plenty of space to transfer major pieces to either wing. In principle, there is a tempting target on e4 which Black can attack with the light-squared bishop and all its major pieces, but it seems unlikely that the knight can safely leave e5 where it blocks the attack of the dark-squared bishop against the f6-pawn.
All in all, lots of plusses for White and not much counterplay for Black which makes me doubt Leela’s evaluation.
36…Rf8
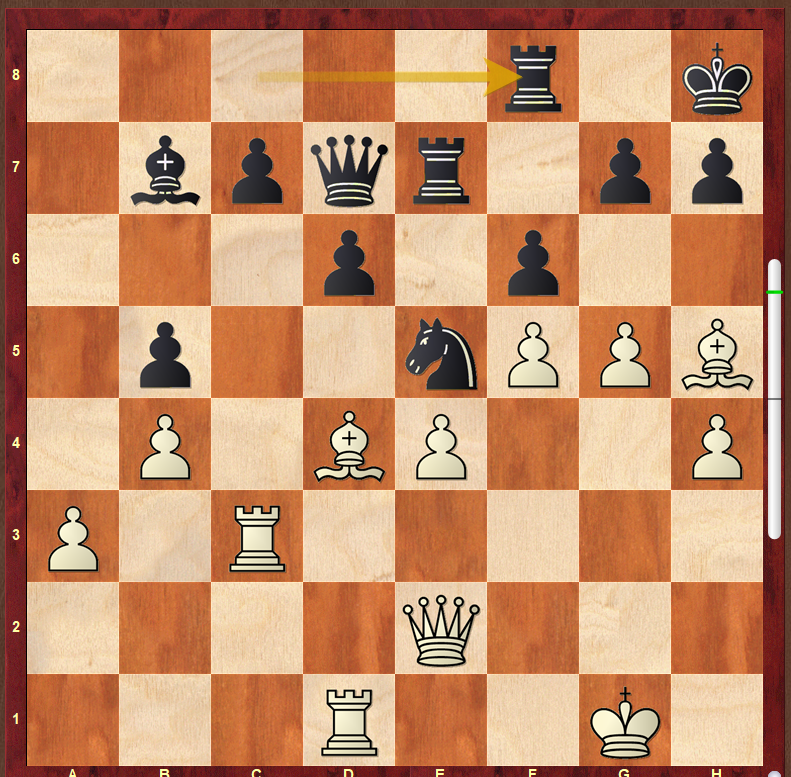
Leela was down to 0.32 now and Stockfish was…excited! The tactic that Leela missed was relatively simple – I’d expect to find the first moves myself in a rapid game, though I couldn’t rule out getting tricked in one of the sub-variations later 🙂
37.Bxe5 Rxe5 38.Bg6
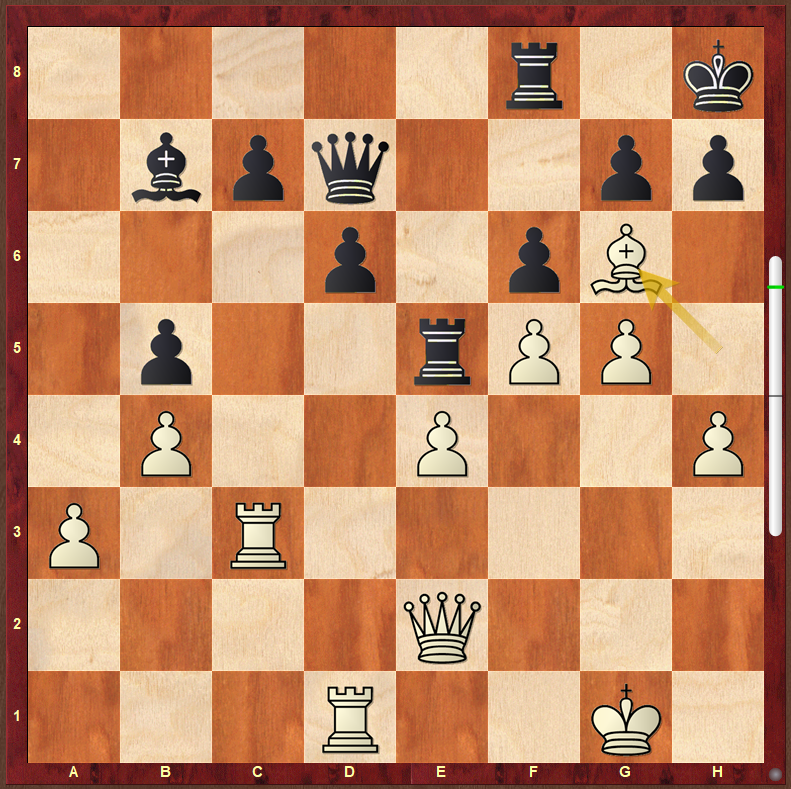
One of my revelations when I spent a few weeks analyzing attacks by Tal was that Tal basically took stuff and attacked stuff in his attacks. Which is to say that you shouldn’t be fixated on complicated ideas when attacking and also leave room in your combinative vision for simple, forcing continuations (an occasional blind spot of mine). Here White removes a defender of g6 with 37.Bxe5 and then attacks the h7–pawn with 38.Bg6 (threatening Qh5). Simple chess and indefensible! One key reason for this is that Leela’s last move 36…Rf8 blocked the escape route from the corner for Black’s king. Black must waste a tempo moving this rook again to free its king… and this is the tempo White needs!
38…hxg6
38…Rxe4 39.Qh5 h6 40.gxh6 Kg8 41.Rg3 is curtains for Black.
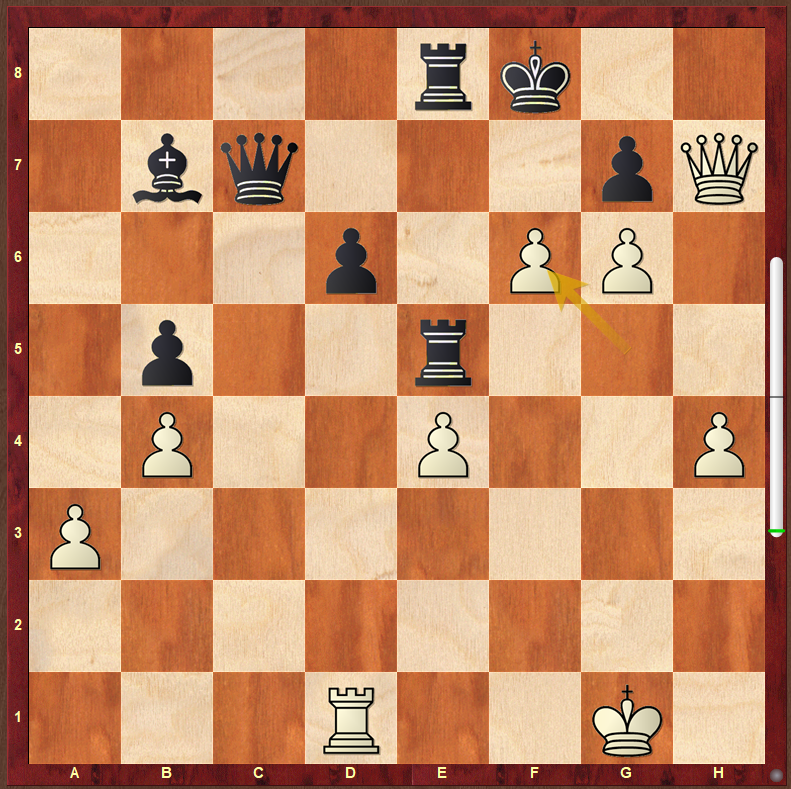
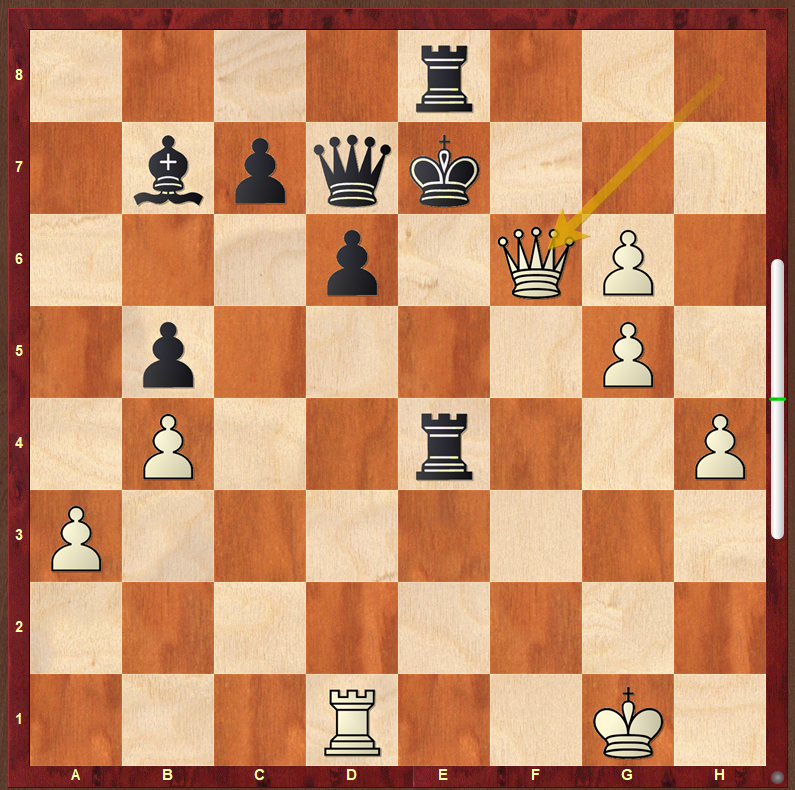
39.fxg6
With the threat of Qh5+ and Qh7+mate
39…Rfe8 40.Qh5+ Kg8
Now White needs to catch the king before it escapes to d8 via f8–e7! Pressure against f6 is the key, and White has one clear best way to achieve this
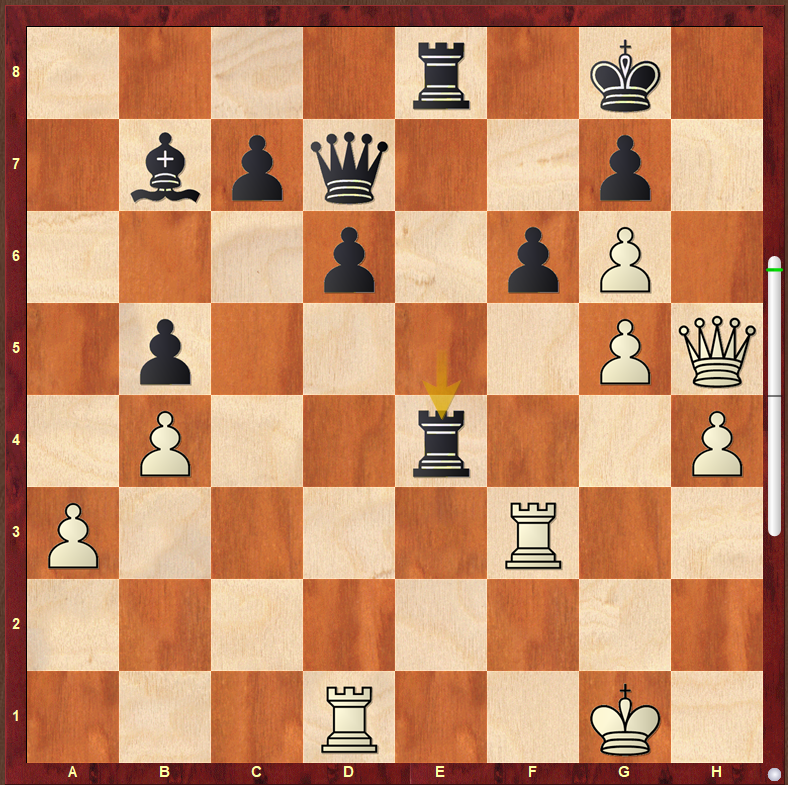
41.Rf3
Not the first rook that would occur to me: intuitively I would move the rook on d1 to the f-file, leaving the rook on c3 attacking c7 and (hopefully) tying down the black queen. We’ll see soon why keeping a rook on d1 is important.
Let’s have a look at a couple of the alternatives I tried to make work!
i) 41.Qh7+ Kf8 42.gxf6 doesn’t work due to the amount of free space in front of the white king 42…Qg4+ 43.Kh2 Qf4+ 44.Kg1 (44.Rg3 Qxf6) 44…Qg4+ with perpetual (44…Qxf6 45.Rf1) ;
ii) 41.Rxc7 Qxc7 42.Qh7+ Kf8 43.gxf6
was my refinement of this idea, but Black has a lovely desperado riposte
43…Qb6+ 44.Kf1 Rf5+ 45.exf5 Bg2+
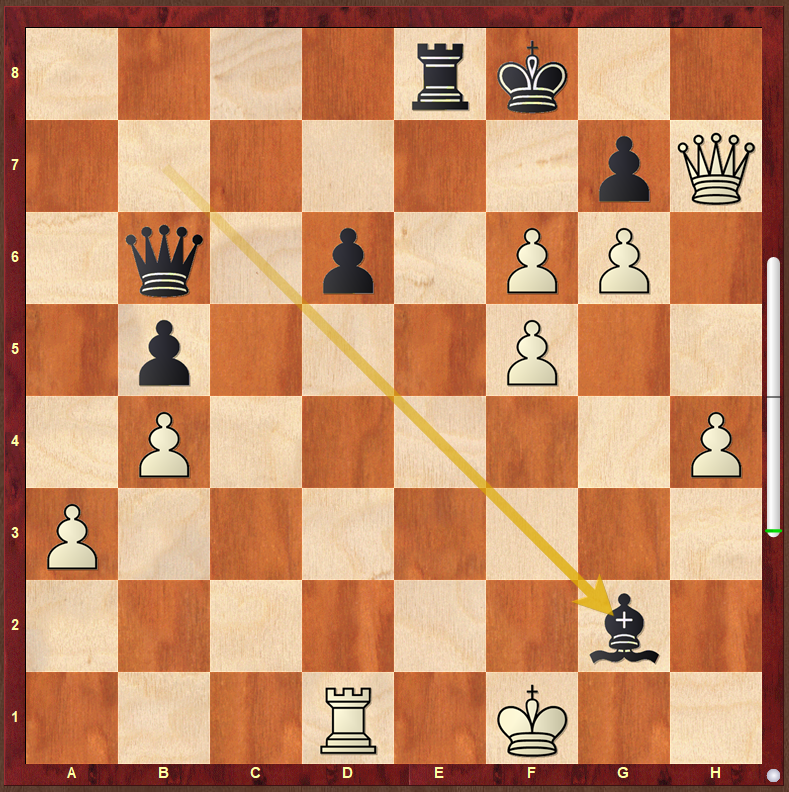
46.Kxg2 Re2+ and mate is inevitable.
Back to 41.Rf3
Leela chose to run immediately with 41…Kf8. We will look how that turned out later. Let’s first look at some important lines:
i) 41…Rxe4
allows White to demonstrate the key tactical point of bringing a rook to the f-file! 42.Qh7+ Kf8 43.Rxf6+
43…gxf6 (43…Ke7 44.Rf7+ Kd8 45.Rxd7+ Kxd7 46.Qxg7+ R8e7 47.Qf6 Rg4+ 48.Kf2 when a human in a rapidplay finish might stumble but an engine never will!) 44.Qh8+ Ke7 45.Qxf6#
is the beautiful justification of White’s sacrifices)
ii) 41…f5
is the most challenging defense looking to block the f-file with a white pawn to give the black king a chance to escape to the queenside. 42.Rxf5 Rxf5 43.exf5
We see the value of keeping a rook on d1 now: Black cannot play 43…Bd5 to cover the g8–square with its bishop against Qh7+ and Qh8+! That’s not easy to spot! 43…Qc6 with counterthreats of mate against g2. (43…Be4 44.Rf1 Bd3 45.Qh7+ Kf8 46.Qh8+ Ke7 47.Qxg7+ Kd8 48.Qxd7+ Kxd7 49.Rf4 and Black is helpless against the onrushing mass of kingside pawns; 43…Qxf5 re-opens the f-file to bad effect! 44.Rf1) 44.Qh7+ Kf8 45.Qh8+ Ke7 46.Re1+ Kd8 47.Qxe8+ Qxe8 48.Rxe8+ Kxe8 49.h5
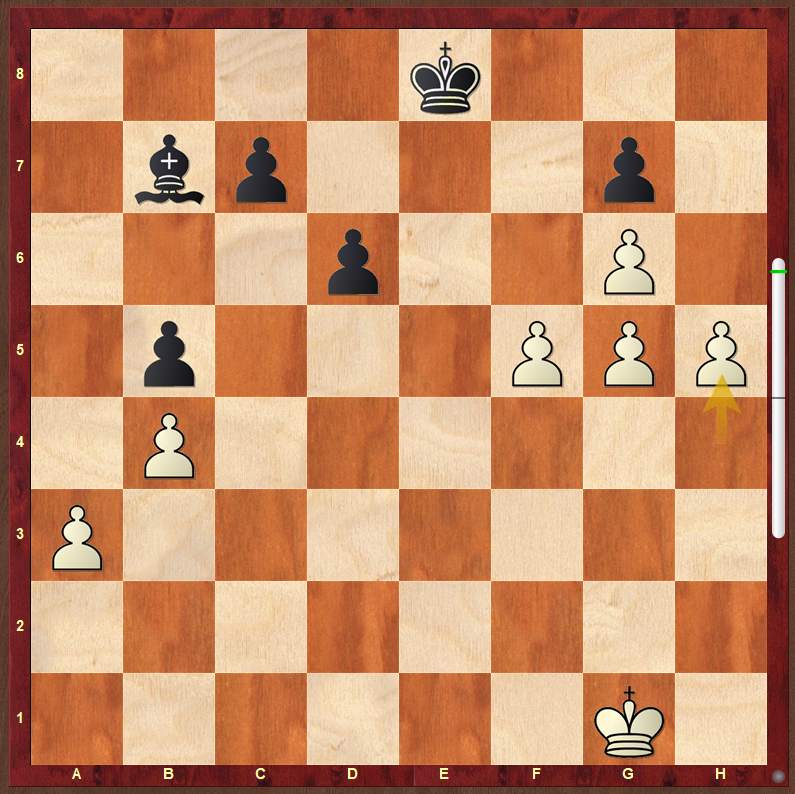
is the most difficult line for a human player to visualize from afar. Yes that little hill of pawns really does queen! 49…Be4 50.h6 gxh6 51.gxh6 Bxf5 52.h7 Bxg6 53.h8Q+
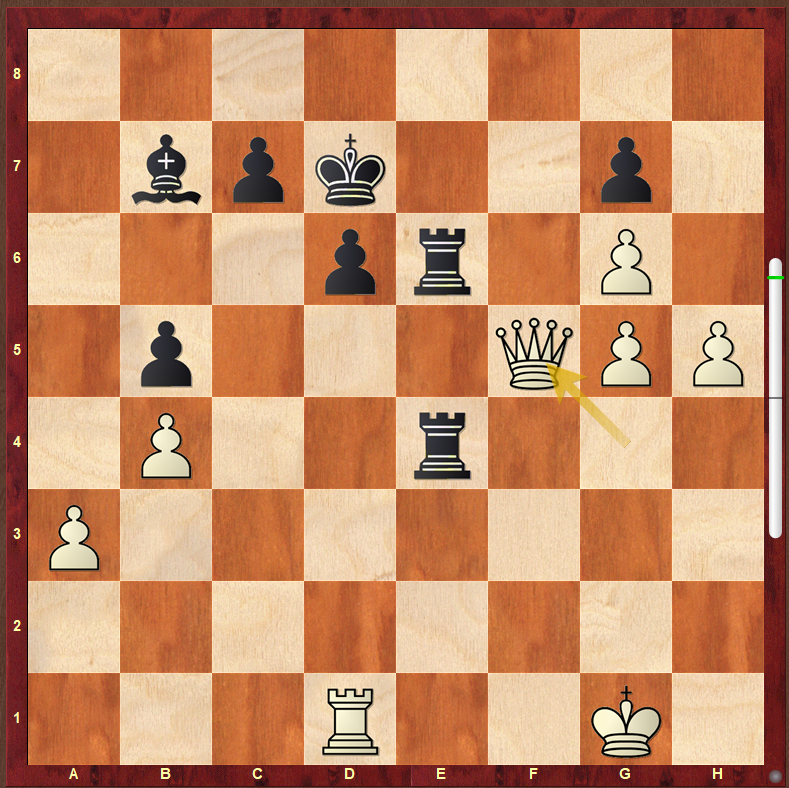
Back to the game, Leela ran with 41…Kf8 but again got hit by the killer tactic 42.Rxf6+
42…Ke7
42…gxf6 43.Qh8+ Ke7 44.Qxf6#
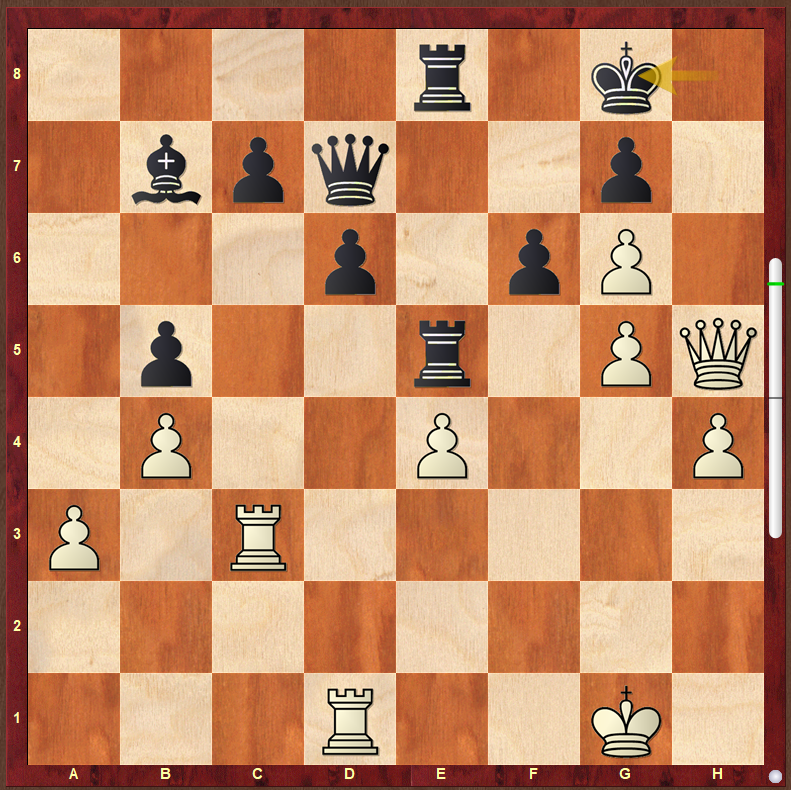
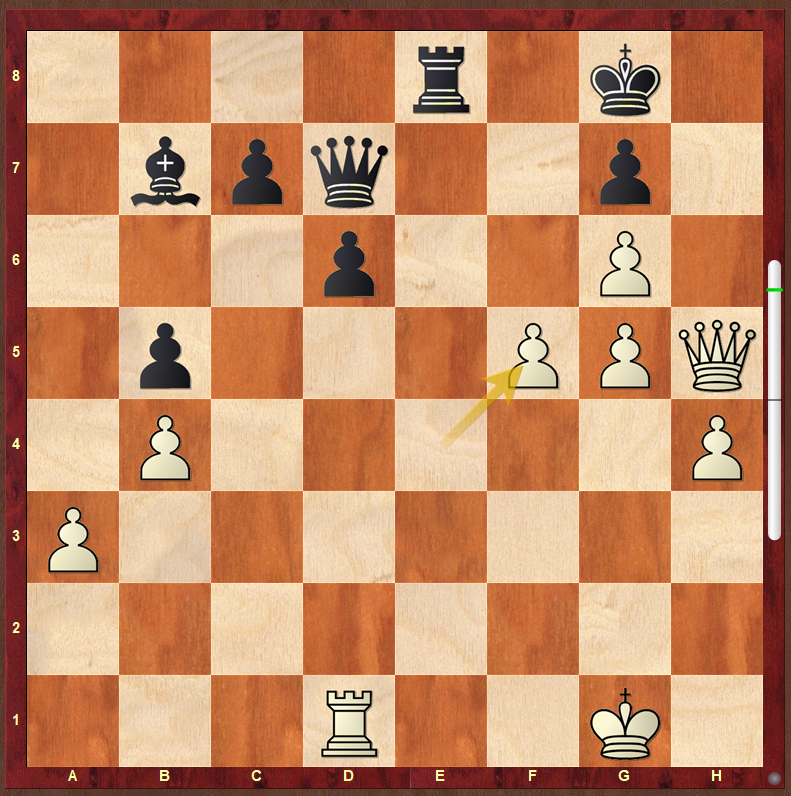
43.Rf7+ Kd8 44.Rxd7+ Kxd7 45.Qg4+ R8e6 46.h5 Rxe4 47.Qf5
Again, I’d be slightly nervous to win this as White in a quickplay finish, but Stockfish has no fear!
47…R4e5 48.Qf4 Be4 49.Re1 Rf5 50.Qh4 Rfe5 51.Kh2 Re8 52.Qf4 R8e7 53.Qg3 Ke8 54.h6 Bxg6 55.hxg7 Kf7 56.Qf3+ Bf5 57.Rxe5 Rxe5 58.Qc3 Kxg7 59.Qxc7+ Kg6 60.Qxd6+ Re6 61.Qd8 Kh5 62.Kg3 Re4 63.Qf6 Rg4+ 64.Kf3 Be4+ 65.Ke3 Bg6 66.a4 bxa4 67.Qh8+ Kxg5 68.Qd8+ Kh6 69.Qa8 Rg3+ 70.Kf4 Ra3 71.b5 Kg7 72.b6 Bf7 73.b7 Ra1 74.b8Q Kg6 75.Qe4+ Kg7 76.Qbe5+ Kf8 77.Qa8+ Be8 78.Qaxe8# 1–0