
There are many difficult things about learning a new chess opening, but unresolved contradictions are perhaps the most painful. Unresolved contradictions typically arise in a student’s mind when opening courses praise a strategy in one chapter and then show it leading nowhere in another!
In the Pirc, White’s plan of exchanging dark-squared bishops with Be3/f4/g5, Qd2 and Bh6
is a good example. It’s a core part of some dangerous opening lines, but play through some games and all sorts of frustrating questions pop into your head.
If Bh6 is the plan, why isn’t everyone always playing it as soon as they have the chance? If Bh6 is so dangerous, why isn’t Black stopping it – actually, Black even seems to be provoking it in some lines?! If Bh6 is so good, why is Black drawing all these games comfortably?
In this post we’ll zoom into the logic behind the plan of Bh6 in the Pirc and hopefully also learn to manage unresolved contradictions in general. This post is accompanied by some pgns from the usual location (http://cloudserver.chessbase.com/MTIyMTYx/replay.html)
For our examples, we’ll examine White’s 4.Bf4 against the Pirc: 1.e4 d6 2.d4 Nf6 3.Nc3 g6 4.Bf4

Position after 4.Bf4
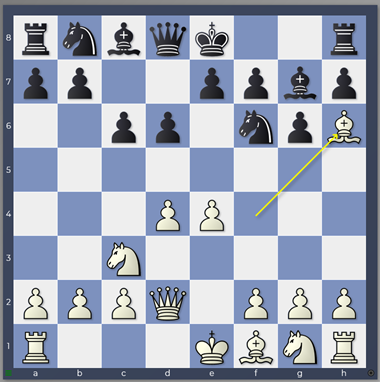
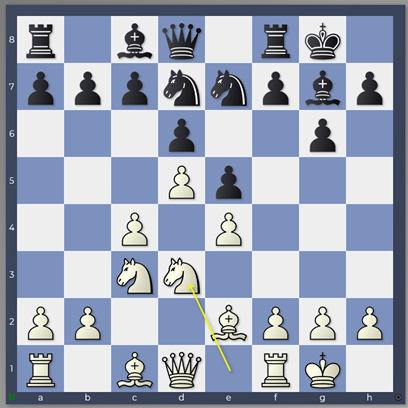
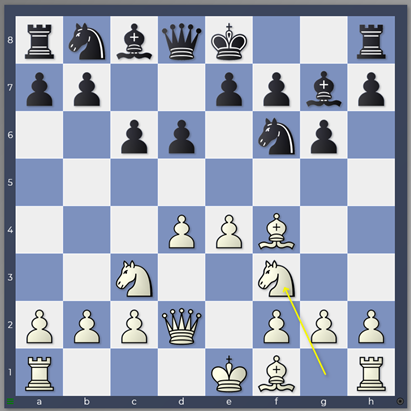
and follow Stockfish’s best line for Black up to Black’s 8th move: 1.e4 d6 2.d4 Nf6 3.Nc3 g6 4.Bf4 c6 5.Qd2 Bg7 6.Bh6 Bxh6 7.Qxh6 e5 8.0–0–0 Qe7
Position after 8…Qe7

Let’s start with a couple of general comments about strategy. Firstly, every plan from a relatively balanced position has positive and negative facets. The task of each player while the plan is in execution is to accentuate the positive aspects for himself and negate the negative aspects. Secondly, the execution of a good plan does not necessarily lead to a clear advantage. The size of that advantage can be suppressed or reduced to a minimum by a good reaction. These comments are obvious, but as a young player I achieved this balanced view of the normal course of the game only with great difficulty – which is why I mention them explicitly!
Let’s examine the position at move 8 bearing these comments in mind.
This position is the result of Stockfish’s recommended move order for Black against White’s 4.Bf4 against the Pirc. Black signalling his intention to fianchetto the dark-squared bishop with 3…g6
Position after 3…g6
triggered White to initiate and execute the plan of exchanging the dark-squared bishop with Bf4, Qd2 and Bh6. One curious point: Black did not oppose this or prevent this; Black rather invited it by playing …Bg7
Position after 5…Bg7
and ensuring that a subsequent …Bxh6 would cost two tempi (…Bf8–g7xh6) instead of just one (…Bf8xh6).
What does White envisage achieving by exchanging off the dark-squared bishops? The exchange of dark-squared bishops weakens Black’s kingside dark squares – h6, g7 and f6. This is graphically demonstrated by the threatening presence of the queen on h6 which also eyes g7.

Position after 7.Qxh6
Obviously, the weakness of the kingside dark squares might potentially be even more serious for Black were his king already castled there. You can argue that Black has mitigated some of the potential advantages of White’s plan by not committing his king early to the kingside.
What does Black envisage by allowing the exchange of bishops? The exchange of the dark-squared bishops means that when Black stakes a claim to central space and establishes his central pawns on the dark squares (e5 and d6) none of his minor pieces are blocked behind them.
Position after 7…e5
Moreover, exchanging a set of minor pieces helps relieve the slightly cramped nature of Black’s position.
You can see the unresolved contradiction inherent in these two viewpoints. An author might easily explain a position from White’s perspective (attacking chances!) in one chapter and from Black’s perspective (positional approach!) in another! In fact, rather than being contradictions, these represent complementary view of the position, the truth of which will only be resolved by further moves. Note that we can go even further and argue that exchanging a bishop that will be blocked by a central pawn is not always a clearly good decision. The infamous King’s Indian bishop
Gligoric-Fischer Bled 1961 Position after 10.Nd3
is a very good illustration of this: miserable for hours and then glorious *if* the centre opens!
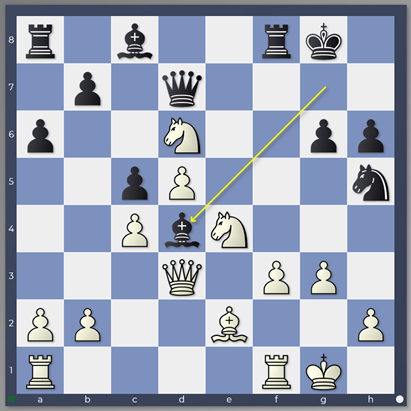
Gligoric-Fischer Bled 1961 Position after 21…Bd4+
And in that *if* lies all the glorious uncertainty of the opening. But let’s not go too far down these rabbit holes 😉 For our purposes in this opening, from the black perspective we will view the exchange of dark-squared bishops as a positional achievement. So we can’t make a clear rule about whether the plan with Bh6 is always or never good: that is context-dependent. However, using the engines to investigate, we can flesh out that context a little more.
One clear rule that emerges from engine games is that the exchange of bishops MUST be met by …e5 (well there is one exception to keep things spicy, but chess wouldn’t be chess without the odd exception ;)) …e5 prevents White from playing e4–e5, driving away the last Black minor piece defending the kingside which would be a disaster.
Position from RubiChess-Stoofvlees TCEC Season 22 Swiss. See https://youtu.be/iesoC_aWg74 for some rather nice analysis of this spectacular game!
If Black can play …e5 – or has the ability to play it whenever he wants in the next couple of moves – then he will survive the exchange of bishops. A deepening of this rule is that Stockfish will happily castle short and put its king in the line of danger IF it can meet the exchange of bishops with …e5. If not… forget it! This rule should hopefully remove a large number of unresolved contradictions. It won’t be completely perfect but it will enable you to judge quickly whether e.g., a Black position has any hope of being reasonable after the exchange of bishops, or whether it’s the right moment to castle.
1.e4 d6 2.d4 Nf6 3.Nc3 g6 4.Bf4 c6 5.Qd2 Bg7
Position after 5…Bg7
I mentioned an exception… let’s have a look at it! You might understand better now why White might choose to delay Bh6 and play 6.Nf3 instead.
Position after 6.Nf3
Since 6.Bh6 Bxh6 7.Qxh6 allows Black to play …e5 and avoid immediate disaster, 6.Nf3 looks like an interesting try, doubling down on the e5–square and preparing Bh6 without allowing …e5.
6…0–0
Stockfish is still happy to play this. But why?
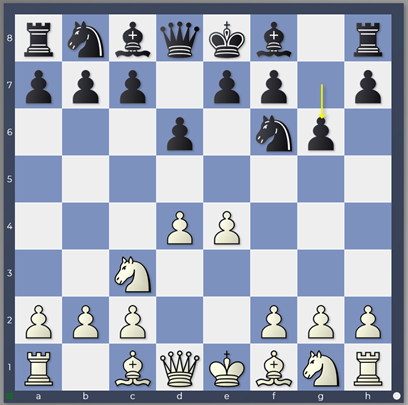
7.Bh6 d5
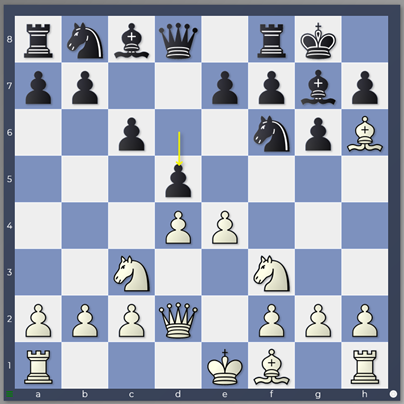
Position after 7…d5
Ah, specifics! Black strikes in the centre, but in an unexpected way.
8.e5 Ne4 9.Nxe4 dxe4
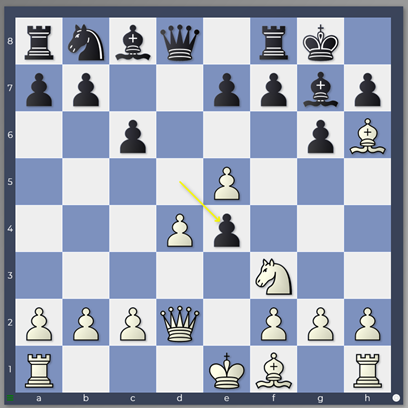
Position after 9…dxe4
This line is conceivable for Black only because of the disruption caused to the specific combination of 5.Qd2 and 6.Nf3 by the idea …d5 and …Ne4. (Note by the way that Pirc expert Moskalenko does not like this line at all for Black but the engines seem to make it work…) If White were to play 6.0–0–0 instead however…
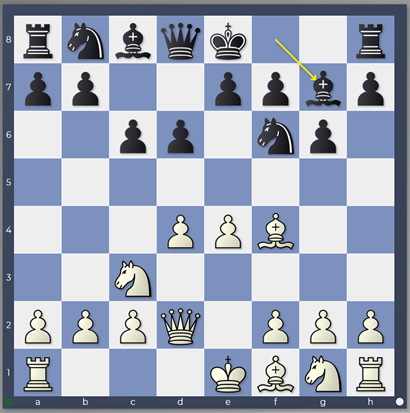
Position after 6.0-0-0
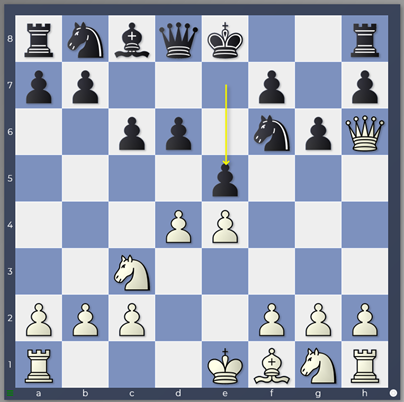
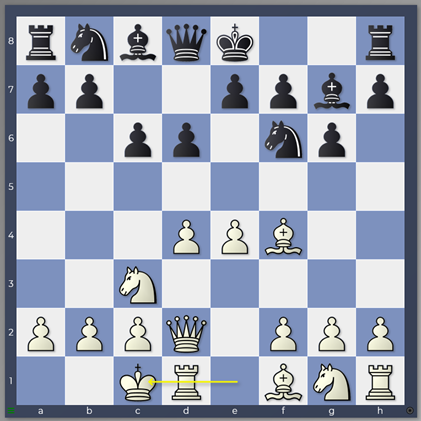
6.0–0–0 0–0 7.Bh6 d5 8.e5 Ne4 9.Nxe4 dxe4
Position after 9…dxe4
then the engines consider this virtually winning for White! …d5, …Ne4 and …dxe4 disrupts White not a jot as the knight is still home on g1! 10.h4 Rook’s pawn march baby and the engines are already at +2.5!
Hope this helps to unravel some of the mysteries of the Pirc!
Great explanations, bravo! Especially the introductory paragraph “Let’s start with a couple of general comments …” is fantastic and applicable to any training. Many thanks for that!
Thanks Ulrich! Glad you enjoyed the article! I’ve always liked trying to learn multiple things at the same time so always enjoyed trying to derive general rules even as I look at specific openings. Glad it appeals to you too! Best Wishes, Matthew
Great piece Matthew. Thank you.
Thanks Simon!
Marvelous. Opening books never give explanations like this.
See the book Jobava London of Simon Williams about the Pirc setup with a white Bf4.
He suggests to play Nf3 when black is planning e5 and f3 when black played a6/c6 and b5.
These setups are OK but there is no explanation when to play Bh6. (which amateurs need)
Hey, thanks !Glad you’re enjoying these blog possts! I try and explain things in a way that makes sense to me so glad that helps too! Best Wishes, Matthew
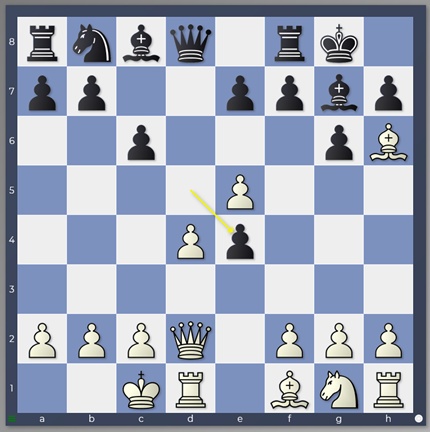
So does this mean that after 1.e4 d6 2.d4 Nf6 3.Nc3 g6 4.Bf4 c6 5.Qd2 Bg7 6.0-0-0 (instead of 6. Nf3) now 6…0-0 is already unplayable? (On account of 7. Bh6, when it will be hard for black to accomplish e7-e5 and without a knight on f3 the move d6-d5 will have lost its bite)
Hi, yes the engines want 6…b5 first to force 7.Bd3 blocking the d-file. After that, Black can play …e5 whenever he wants!