
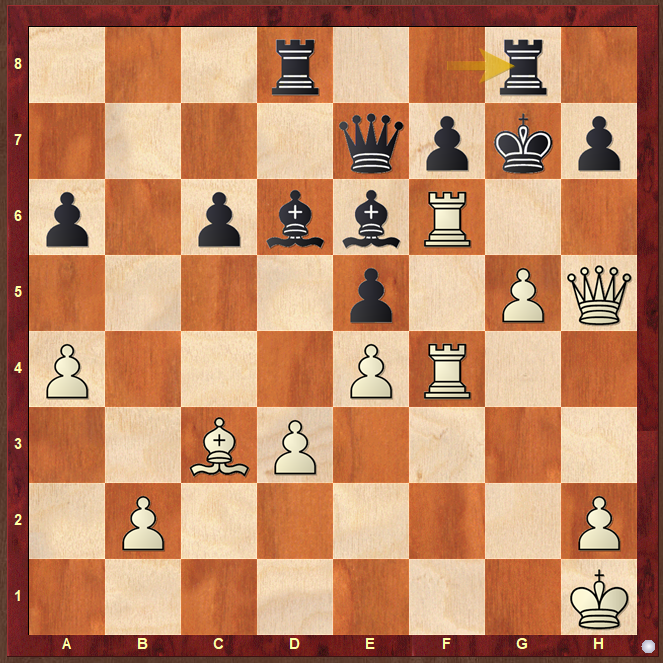
Stockfish sacrifices a piece for compensation that is not clear to a casual glance: the black king is exposed but there are no immediate threats. A series of powerful moves with the major pieces coordinates the white pieces into an unstoppable attacking force!
After reading this article, you will have gained the tools to better assess such long-term piece sacrifices and hopefully be inspired to use them in your own games!
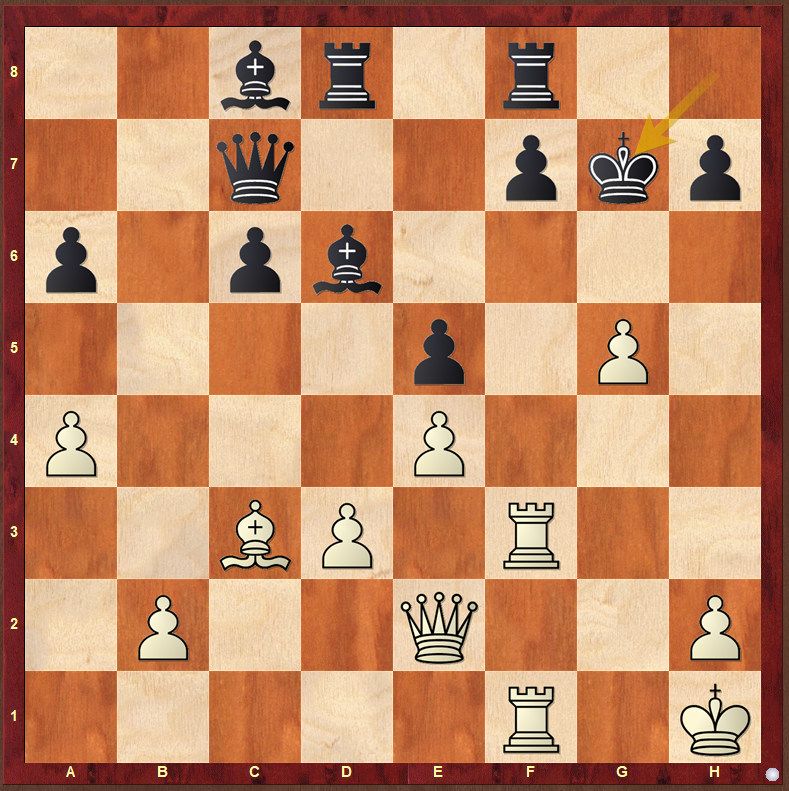
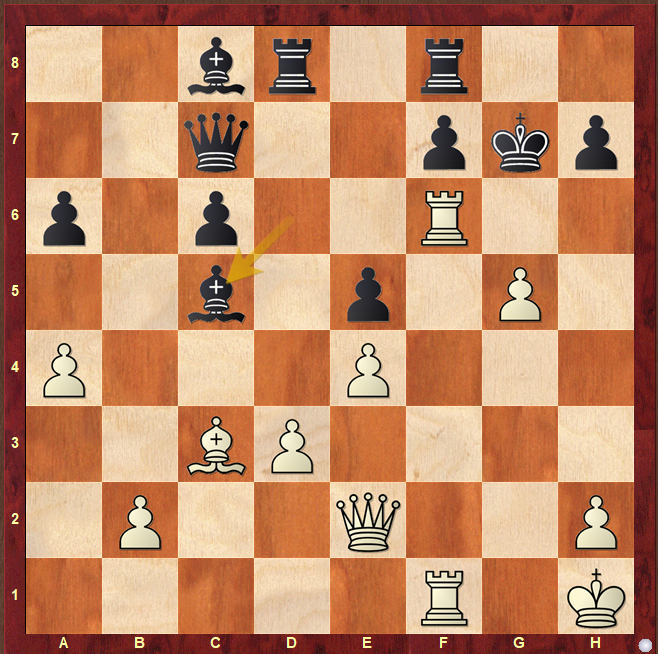
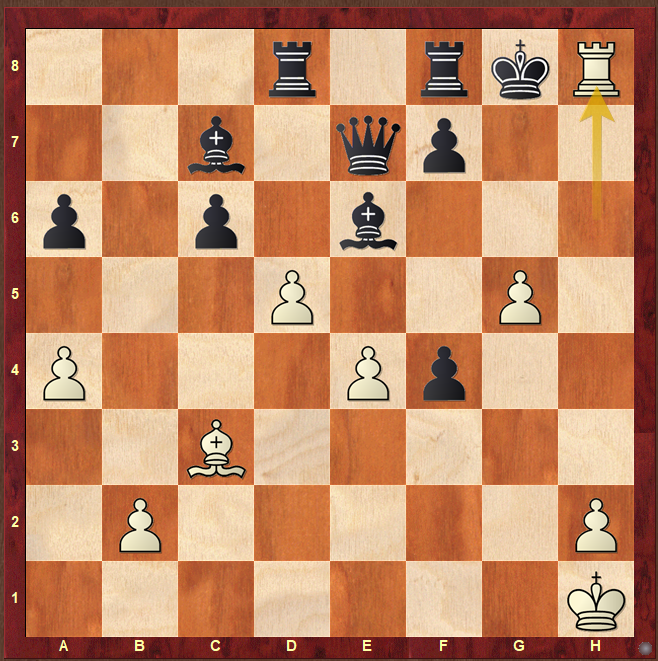
Obviously we are familiar with the idea of a sacrifice for long-term compensation but it’s not always easy to judge at sight which positions offer that. Stockfish has sacrificed a piece for a pawn and doesn’t have any obvious threats. My first thought when seeing this position is not overwhelmingly positive for White; Stockfish is at 3.33!! My only comfort is that Leela is just as blind as me with a 0.43 evaluation!
26.Rf6!
This is an important move and seeing it on the board suddenly opens your eyes to all the white possibilities in the position. White has 3 dangerous targets in the position: the pawns on h7,f7 and e5.
The pawn on h7 is vulnerable to Qh5 and Rh6 after which Black’s only defense is …Rh8. This defense weakens Black’s support of the f7-pawn which may lead to fresh tactical possibilities. Finally the pawn on e5 is a flimsy but crucial barrier to the bishop on c3 pointing towards the king on g7. The importance of this pawn restricts the mobility of the dark-squared bishop on d6. The bishop on d6 also has the important duty of bolstering the rook on f8 in case the f-file gets opened (by a break like g6 for example)
So we can start to see multiple areas of pressure on the black position and there is one additional and unexpected way in which White can deploy its pieces against them: the rook on f1 can make use of the f4-square to transfer to the h-file as R1f4 …exf4 will allow a discovered check by the rook on f6. This possibility means that White has multiple ways to line up against h7 and can potentially transfer all 3 major pieces to the h-file!
From the Black point of view, there is little scope for “hitting back” at the white position to distract White from the build-up of its attack. In particular, if the bishop needs to remain on d6, then Black will never manage to exert pressure on White’s weakest point: the pawn on d3.
So Black needs to focus exclusively on defense. 2 options are realistically possible. The black king can run to the queenside or the king can hide on h8 with a rook on g7 defending f7 and h7.
In the game, Black played 26…Be6. Let’s see how some of my other attempts turned out first and it will make clear why Black needs to give the f7-pawn some extra cover!
i) 26…a5
Looking for alternatives to the game continuation, I looked for ways of exchanging off the dark-squared bishop on c3 to blunt White’s attacking power. 26…a5 intends …Bb4 and then later …Ba6 attacking d3.
27.Qh5 Bb4 28.Bxe5 is the simple refutation.
28…Qxe5 29.Rxf7+ Rxf7 30.Rxf7+ Kg8 31.Qxh7#
ii) 26…Bc5
was another idea against the powerful bishop on c3 intending …Bd4 blocking the a1–h8 diagonal.
27.Qh5 Bd4 28.Bxd4 exd4 (28…Rxd4 29.Qh6+ Kg8 30.g6
demonstrates the problem with moving Black’s dark-squared bishop from d6: the rook on f8 becomes a tactical liability.) 29.Qh6+ Kg8 and now Stockfish’s 30.g6 hxg6 (30…fxg6 31.Rxf8+) 31.R1f4 is the cleanest meeting 31…Qxf4 with 32.Rxf4 and imminent mate.
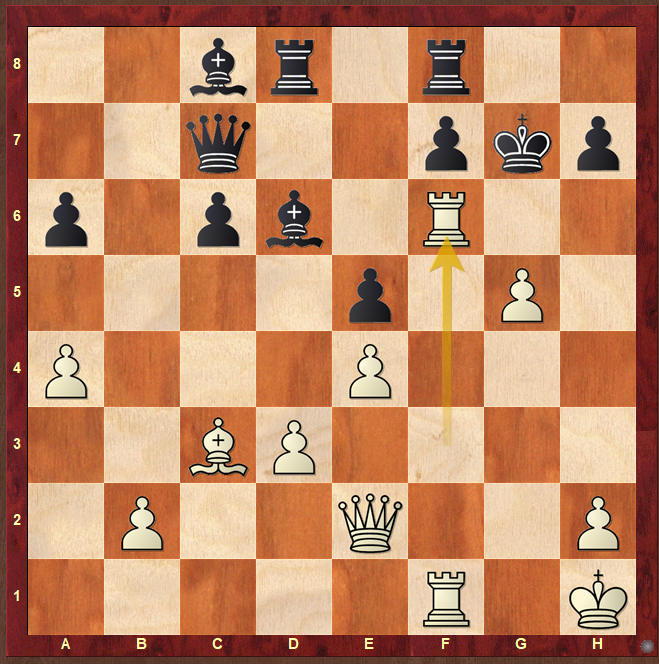
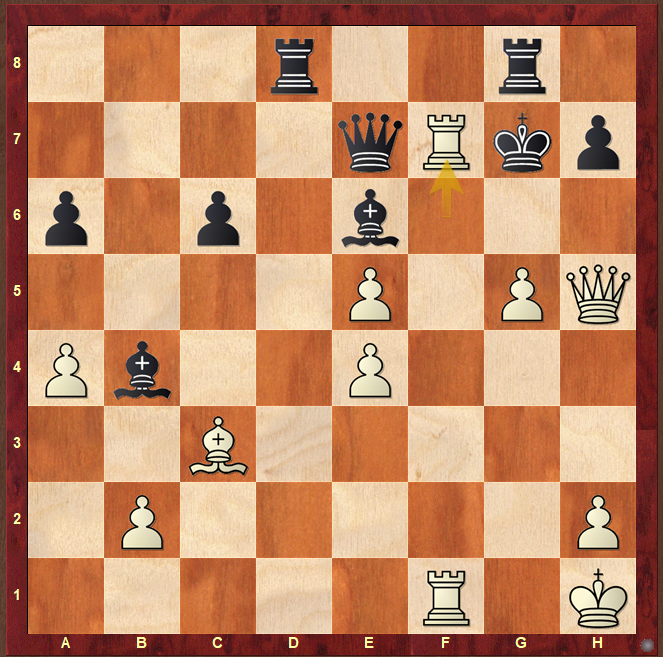
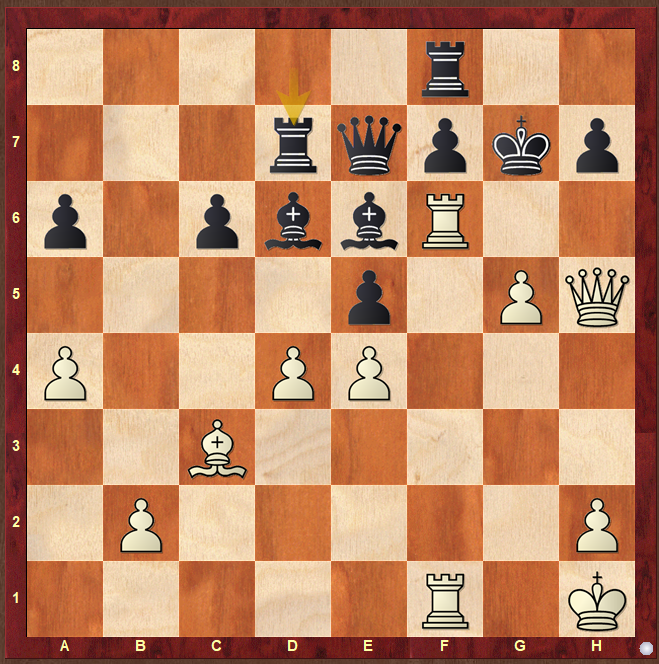
So Leela played 26…Be6 27.Qh5 Qe7
The bishop on e6 needs some support against Rxe6 sacrifices. For example: 27…Rh8 28.Rxe6 fxe6 29.Qh6+ Kg8 30.Qxe6+ Kg7 31.Qh6+ Kg8 and now the evil 32.Ba5 wins!
28.d4
This caught me by surprise: I hadn’t expected this break to be effective as dxe5 blocks the a1–h8 diagonal and seems to relieve the black position. However, this move is prophylaxis against the black defensive idea (…Rg8) we see in the lines below, and if …Rg8 isn’t possible then there is the little matter of finding a decent Black alternative!
28.R1f4 Rg8
is the excellent defense: the king can choose whether to hide on h8 or run to f8 depending on White’s reply. 29.Rh4 (29.Qh6+ Kh8 30.Rh4 Rg7) 29…Kf8 30.Qxh7 Bc7 and d3 is suddenly weak!
Back to the game after 28.d4!
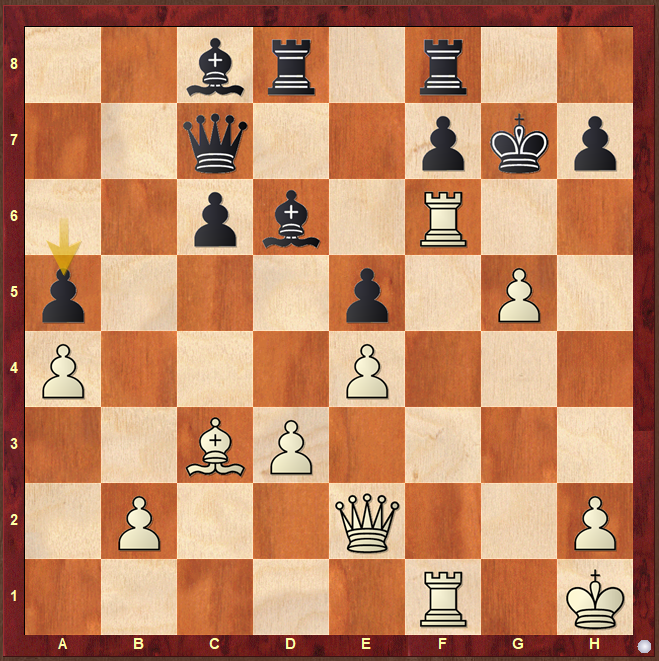
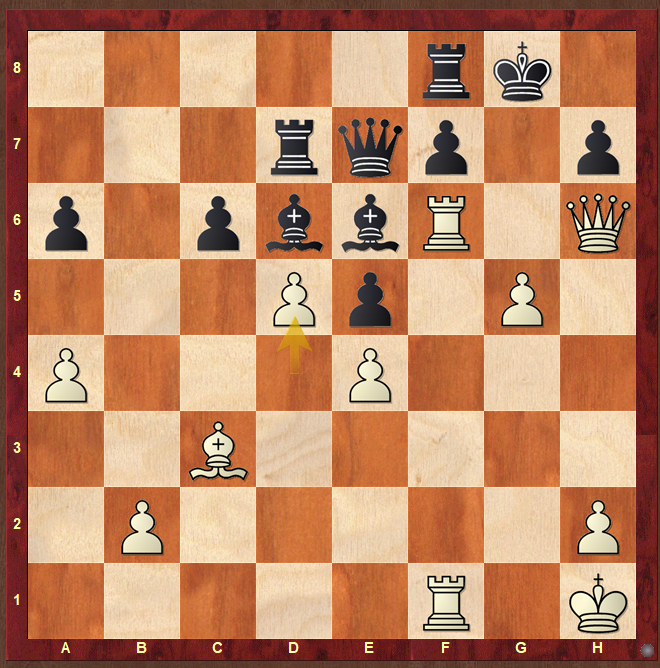
28…Rd7
28…Rg8 29.dxe5 Bb4 30.Rxf7+ is the killer!
30…Bxf7 31.e6+ Bxc3 32.Rxf7+;
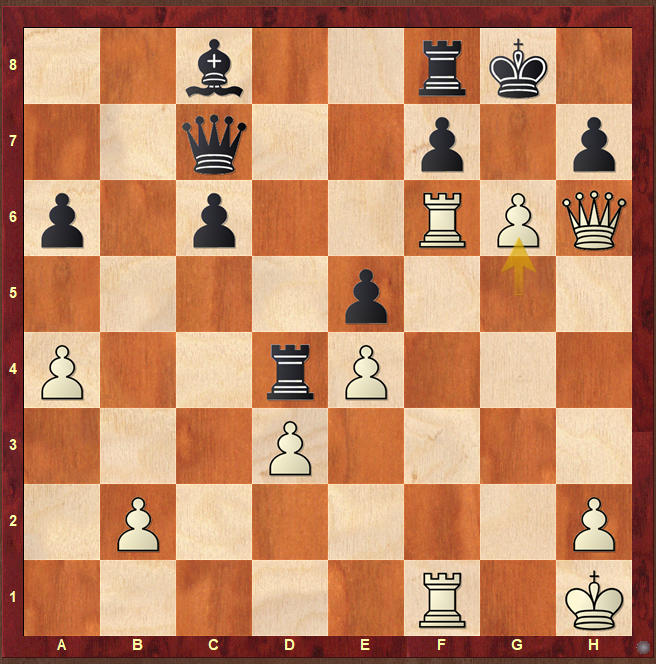
28…Bc7 29.R1f4 Rh8 (29…exf4 30.d5
wins! 30…Kg8 31.Qxh7+!!
31…Kxh7 32.Rh6+ Kg8 33.Rh8+mate
29…exd4 30.Qh6+ Kg8 31.Rh4) 30.dxe5 Kg8 31.g6 is Stockfish’s killer idea 31…hxg6 32.Rxg6+ fxg6 33.Qxg6+ Qg7 34.Qxe6+ Kh7 35.Rh4+ mates
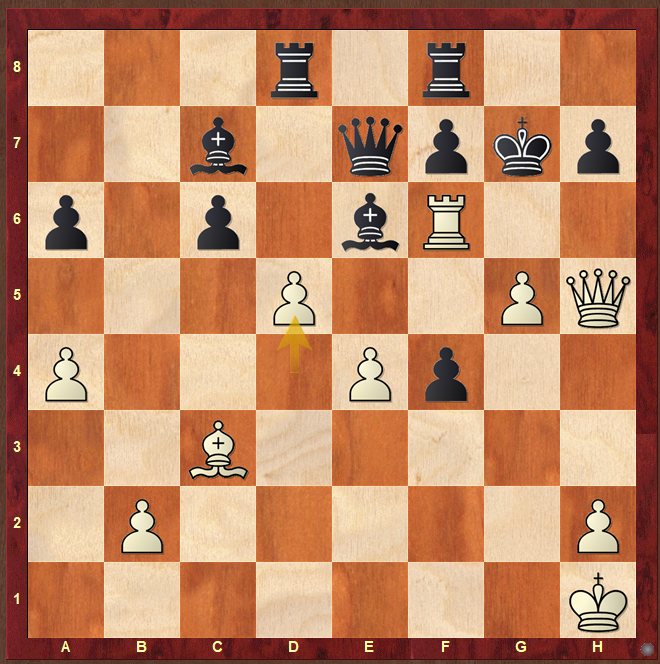
Leela’s move in the game 28…Rd7 ran into some equally powerful attacking play
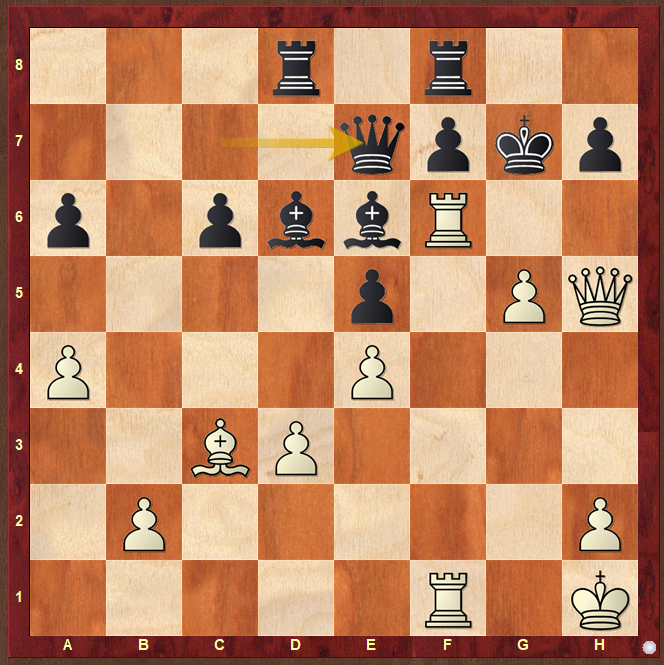
29.Qh6+ Kg8
29…Kh8 30.g6 exploits the poorly-defended rook on f8! 30…fxg6 31.Rxf8+
30.d5
30.R1f4 The move order matters! 30…exf4 31.d5 runs into 31…Bf5.
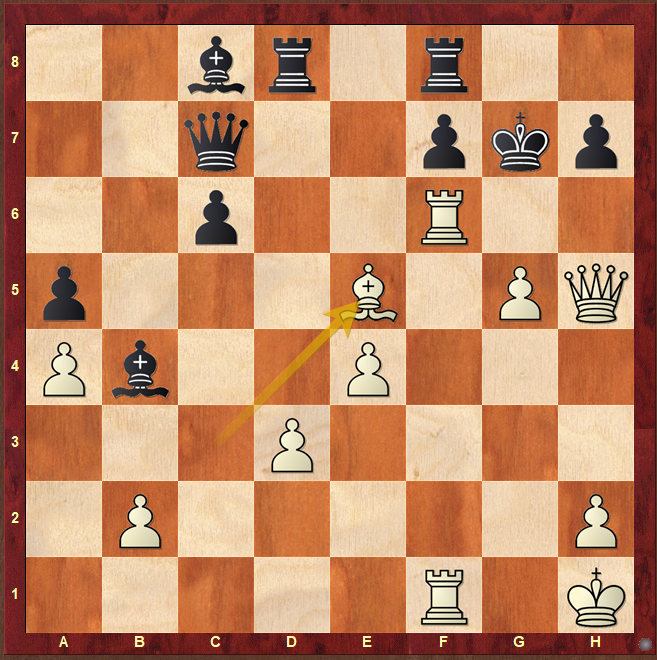
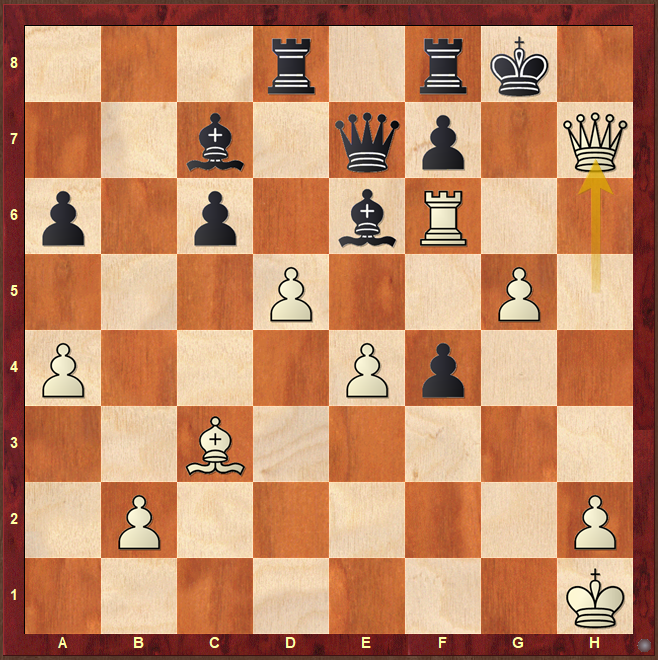
30…Bxd5
Leela gives up a piece but there is no holding back the inevitability of defeat!
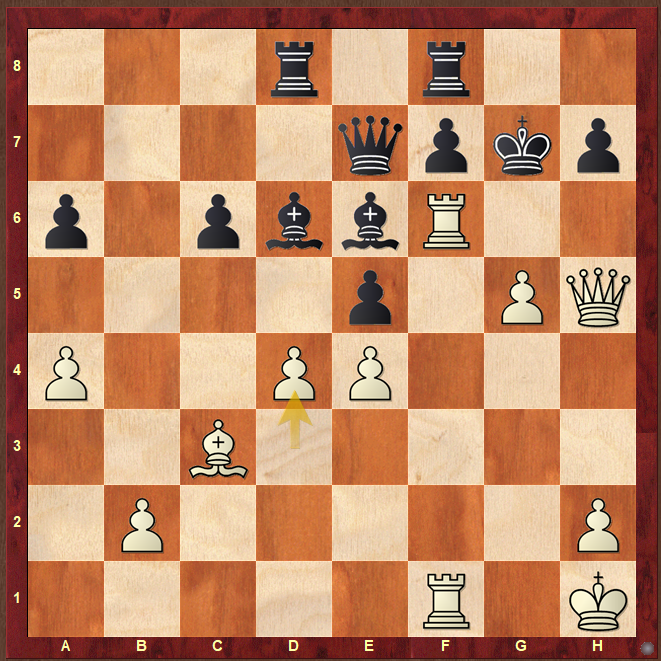
30…cxd5 31.R1f4
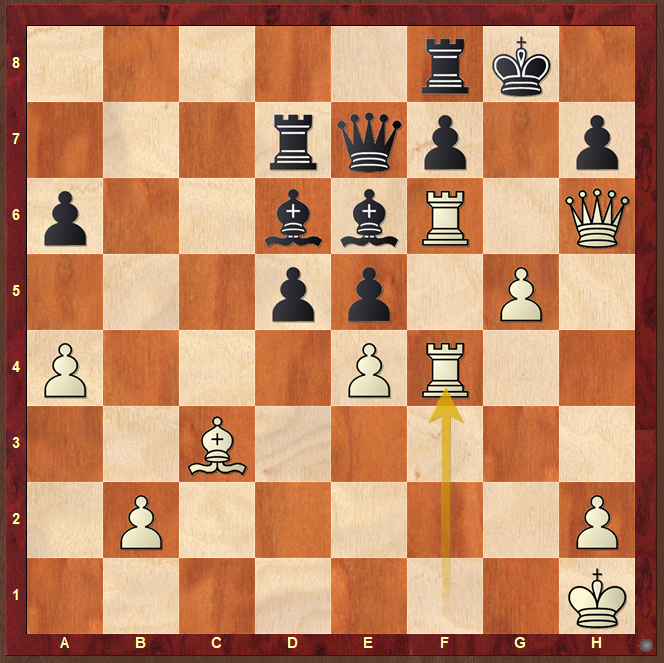
is once again beautiful and decisive 31…exf4 32.Qxh7+ Kxh7 33.Rh6+ Kg8 34.Rh8#
31.exd5 Bb8 32.b4 Rxd5 33.g6 hxg6 34.R6f3 Bd6 35.Rh3 f6 36.Qxg6+ Qg7 37.Qf5 Kf7 38.Rh7 Qxh7 39.Qxh7+ Ke6 40.Qb7 c5 41.bxc5 Rxc5 42.Qb3+ Ke7 43.Bb4 Rfc8 44.Rd1 R8c7 45.Qd3 Rc1 46.Bxd6+ Kf7 47.Bxc7 Rxd1+ 48.Qxd1 Kg6 49.Qd7 Kg5 50.Kg2 Kf4 51.Kf2 Kg5 52.Qh7 Kg4 53.h3+ Kf4 54.Qh4+ Kf5 55.Qg4# 1–0