

The next stop for me through my tour of old books about forgotten players was the Latvian Grandmaster Aivars Gipslis (1937-2000) He is one of many names I had heard of without knowing anything concrete about them. He was ranked 19th in the world on the January and July 1971 lists with a rating of 2580 with only great and famous names above him! He was a player with a sharp style who played plenty of entertaining games. The game that appealed to me however was this nice positional effort played in 1960 on the White side of Bird’s Defence against Vladimir Bagirov. The opening was a surprise to me since I know Bagirov as a major exponent of Alekhine’s Defence (1.e4 Nf6). However, looking at Bagirov’s games, it seems that Alekhine’s Defence only became his main defence against 1.e4 in the late 1960s. Until then he also played a lot of Frenches…and some Bird’s!
Gipslis,Aivars P – Bagirov,Vladimir [C61]
URS-ch28 Semifinal Vilnius (4), 25.08.1960
[https://matthewsadler.me.uk]
1.e4 e5 2.Nf3 Nc6 3.Bb5 Nd4
The Bird’s Opening. Less awful than it looks!
4.Nxd4 exd4 5.0–0 c6 6.Bc4 Nf6 7.Re1 d6 8.c3
A logical plan, trying to remove the only Black impediment to a double pawn centre.
8…dxc3
The confusing 8…Ng4 is the most common theoretical move nowadays.
9.Qb3
9.Nxc3 is the most natural idea and has scored very well for White. 9.Qb3 looks for even more by immediately targeting the sensitive f7–square.
9…Qc7
The most natural way of defending f7, but strangely enough Black has a better tactical way of parrying White’s threats. Also quite strangely, this had already been played in 1952!
9…Qe7 Defends f7 and threatens …d5, exploiting the loose rook on e1. It looks ugly, but just seems to equalise for Black!
a) 10.Nxc3 d5 11.Bf1 dxe4 intending …Be6 followed by moving the queen and developing the kingside.;
b) 10.dxc3 was tried in a correspondence game 10…d5 11.Bd3 dxe4 (11…h6 12.Bf4 Be6 13.Nd2 d4 14.Bc4 dxc3 15.bxc3 b5 16.Bxe6 Qxe6 17.Nf3 Bc5 18.Rad1 Rc8 19.Nd4 Bxd4 20.cxd4 0–0 1–0 (45) Zaklauskis,M-Zdanovs,I Latvia 1990) 12.Bg5 Be6 13.Bc4 0–0–0 14.Nd2 Bxc4 15.Qxc4 Qc5 looks fairly even.;
c) 10.bxc3 Also my engine’s favourite move. 10…d5 11.Bf1 dxe4 12.Ba3 (12.d4 Be6 13.Bc4 Nd5 14.a4 0–0–0 15.Rxe4 Qc7 was my engine line. Fairly sharp, but looks OK for Black.) 12…Qc7 13.d3 Be6 14.c4 Bxa3 15.Qxa3 Qe5 16.Nd2 Ng4 17.Nf3 Qf6 18.dxe4 Qe7 19.Qb2 0–0 was completely fine for Black ½–½ (37) Benko, F-Burgalat,F Buenos Aires 1952]
10.a4
A calm move, stopping Black from alleviating the pressure on f7 by playing …b5. I was looking at more violent attempts!
a) 10.e5 looked tempting but 10…cxd2 (10…dxe5 11.d4 is the idea) 11.Nxd2 dxe5 12.Nf3 Bd6 13.Bf4 0–0 14.Nxe5 is compensation but no more 14…Nd5 15.Bxd5 cxd5 16.Qxd5 Be6 17.Qe4 Rad8 is the easiest way to equalise completely.
b) 10.d4 b5 11.e5
was my favourite idea, and it’s interesting to see that it was also tried in 1950 by the strong attacking player and 10–times British Chess Champion Jonathan Penrose. (11.Bd3 cxb2 12.Bxb2 was a more restrained idea and is greatly liked by the engines. 12…Be7 13.Qc2 Qb7 14.Nc3 with excellent compensation for the pawn: Black must waste a move before castling otherwise e4–e5 wins back the pawn on h7.)
b1) 11…bxc4 12.exf6+ Be6 13.Qxc3 The engine’s favourite move (13.Qxc4 looked promising to me. 13…cxb2 (13…gxf6 14.d5 is a fantastic pin exploitation!) 14.Bxb2 d5 and now my engine recommends (14…0–0–0 15.Qa4) 15.Qc1 gxf6 16.Ba3 with plenty of positional compensation for the sacrificed (doubled) pawn.) 13…d5 14.b3 (14.Bg5 gxf6 15.Bxf6 Rg8 16.Nd2 Rg6 17.Be5 Qb6 18.a3 Bh6 19.f4 Kd7 20.b3 f6 21.f5 Bxf5 22.Bg3 c5 23.dxc5 Qxc5+ 24.Bf2 Qc6 25.g3 Bd3 26.bxc4 dxc4 27.Qb4 Bf8 28.Qa5 Bd6 29.Rac1 f5 30.Nxc4 Bxc4 31.Qxf5+ Kc7 32.Re4 Rf8 33.Qa5+ Kd7 34.Rexc4 Qf3 35.Rc7+ Bxc7 36.Qxc7+ Ke6 37.Re1+ was the topsy-turvy struggle Penrose,J-Phillips,A Hastings 1950 1–0) 14…gxf6 15.bxc4 dxc4 16.Nd2 Rg8 17.Nxc4 is clearly better for White according to my engine.
b2) 11…dxe5 I thought this was best and my engine agrees. 12.Rxe5+ Kd8 13.Be2 (13.Bxf7 Bd6 is surprisingly strong for Black with …Rf8 to follow. White has little development to back up his aggressively-placed rook and bishop.) 13…Bd6
Black’s king is a little awkward but he will develop with tempi (…Be6)and undoubtedly pick up some pawns along the way! (h2) It looked fine to me and my engine gives Black a slight advantage.;
c) 10.Nxc3 b5 11.Bf1 Be7 12.d4 0–0 13.Bf4 would be White’s simplest continuation with a pleasant edge due to the strong centre and easy development.]
10…cxd2
10…Qe7 is the engine recommendation (!) heading back to the 9…Qe7 lines a tempo down!
11.Nxd2 Ng4
This typical Bird’s move again. Black intends …Ne5 to drive away the bishop from c4 and remove the pressure against f7, allowing kingside castling with …Be7
12.Nf3 Ne5 13.Nxe5 dxe5
To the naked eye, it doesn’t seem as if White has that much for the sacrificed pawn. The pawn structure is fairly symmetrical, White’s development advantage doesn’t look overwhelming and although White still has pressure against the f7–pawn, Black is now ready to develop the bishop to d6 or c5 (having opened the f8–a3 diagonal further with …d6xe5) and castle kingside. Appearances are deceptive however, and White has a range of aggressive options in addition to the measured approach that Gipslis adopted in the game.
14.Be3
This development move looked entirely natural, but Leela looked at a completely different idea!
14.Re3
A Leela recommendation 14…Bc5 15.Rg3 is surprisingly awkward for Black as castling leads to disaster 15…f5 (15…0–0 16.Bh6 wins; 15…f6 16.a5 White looks to encroach on the queenside now that kingside castling has been prevented. 16…h5 17.Be3 Bxe3 18.Rxe3 h4 19.Rd3 Bd7 20.Rad1 0–0–0 21.a6 b5 22.Rxd7 was Leela’s main line with advantage for White 22…Rxd7 23.Be6 Rhd8 24.Qd3 is a tough pin to break out of!) 16.exf5 Bxf5 17.Bg5 preventing castling or (17.Be3 Bxe3 18.Qxe3 Intending Rd1 next 18…0–0–0 19.Qxa7 is a pleasant edge for White.)
14…Bg4
An odd move from Black when normal development was within Black’s grasp.
14…Bd6 15.f4
was my idea 15…0–0 (15…exf4 16.e5 Bf8 17.Bf2 is extremely unpleasant for Black.) 16.f5 Should give White good compensation for the sacrificed pawn as Black is in something of a bind. I was looking at freeing the Black position with 16…b5 17.axb5 cxb5 18.Bd5 Bb7 which seemed acceptable for Black. 19.Qxb5 Bxd5 20.Qxd5 Rfd8 21.Rec1 Qb8 22.Rc2 Bf8 It’s more comfortable for White but Black is over the worst.
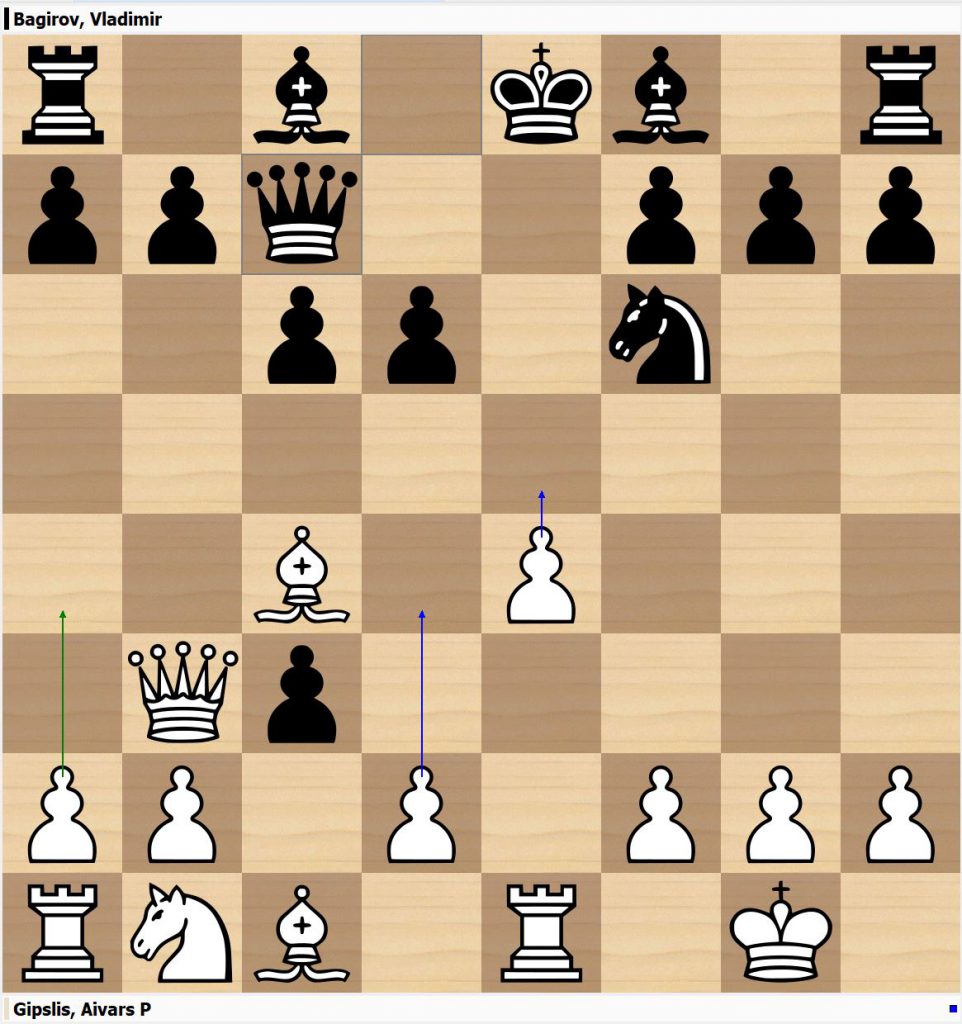
15.a5
Clamping down on the Black queenside. The only place Black can put the king is the kingside, so Black needs to finish his kingside development.
15…Bd6 16.f3
16.f4 Really interested me here and it looks extremely strong now! The threat of f5 not only cramps Black’s position but also threatens to win the bishop on g4! 16…exf4 (16…0–0 17.f5 followed by h3 and g4) 17.e5 is again strong for White
16…Bh5 17.Rec1
Aiming for a6 undermining the support of the c6–pawn followed by Bd5
17…a6
This is far too ambitious from Black: Black cannot prevent all of White’s ideas. By stopping a5–a6, Black saddles himself with a far greater problem.
17…0–0 18.a6 Rfb8 seemed most sensible to me. (18…Rab8 is given by the annotators but this just loses to 19.Bxa7) 19.axb7 Rxb7 20.Qa2 is given by my engine as a slight edge for White. White is a pawn down but the a7 and c6 pawns are weak and it will take some time to bring the bishop on h5 back into the game.
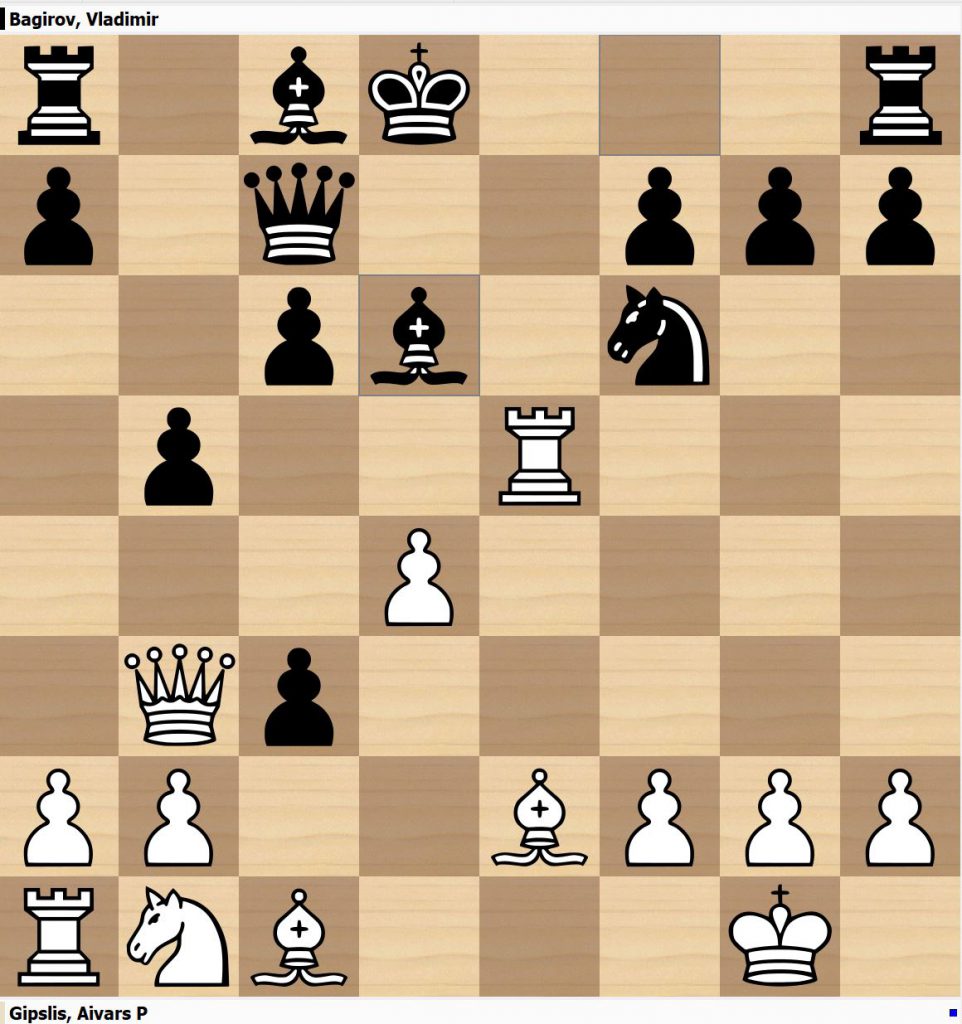
18.Rd1
A neat switchback. Now Black’s queenside has been fossilised and White has gained the powerful b6 square for the bishop, White piles up on the d-file. Between this and the sidelined light-squared bishop on h5, Black has huge difficulties covering entry squares on the d-file.
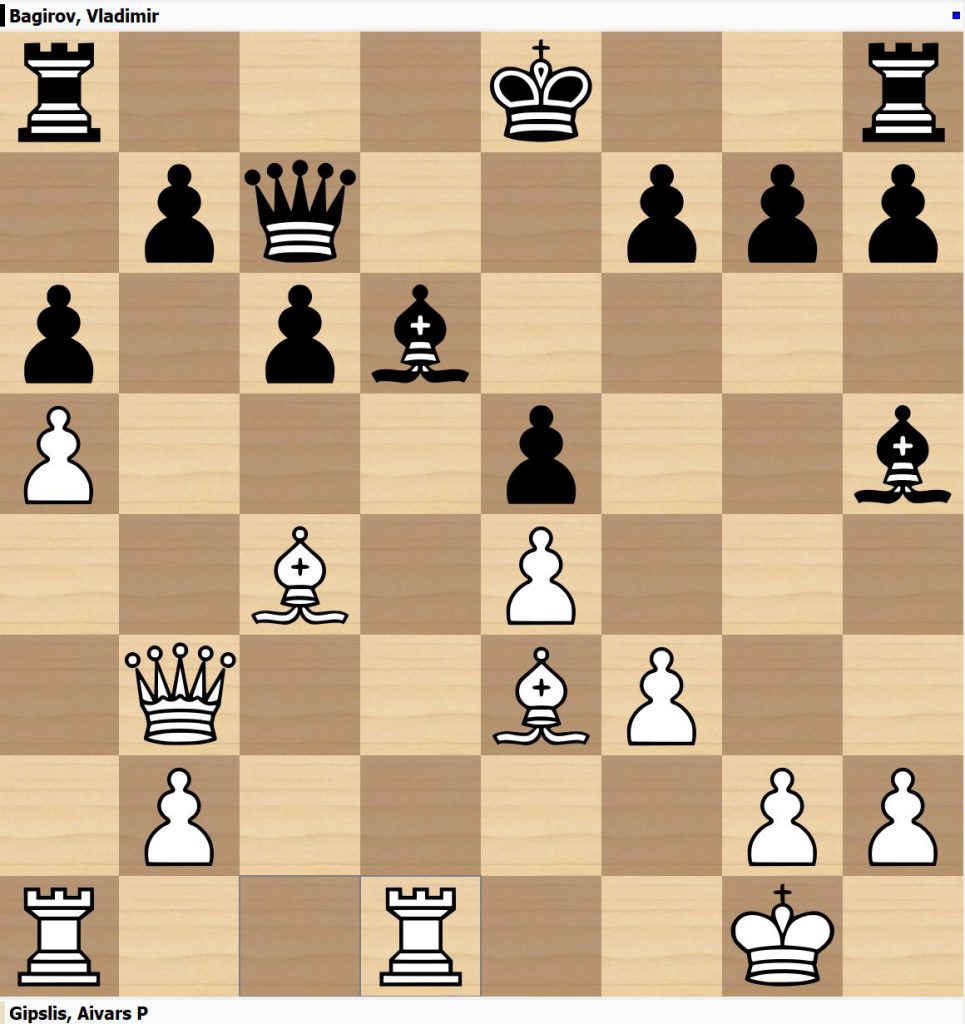
18…0–0 19.Rd3
This is a really tough position for Black to play: White will double (or even triple with Rad1–d2 and Qd1) on the d-file, after which Black is unable to hold the Bd6 barrier on the d-file. Black also has no sources of counterplay of his own.
19…Qe7 20.Rad1 Bc5 21.Rd7 Bxe3+ 22.Qxe3 Qb4 23.Qc3
A good move: exchange off the opponent’s active pieces and leave him with passive ones as AlphaZero has taught us!
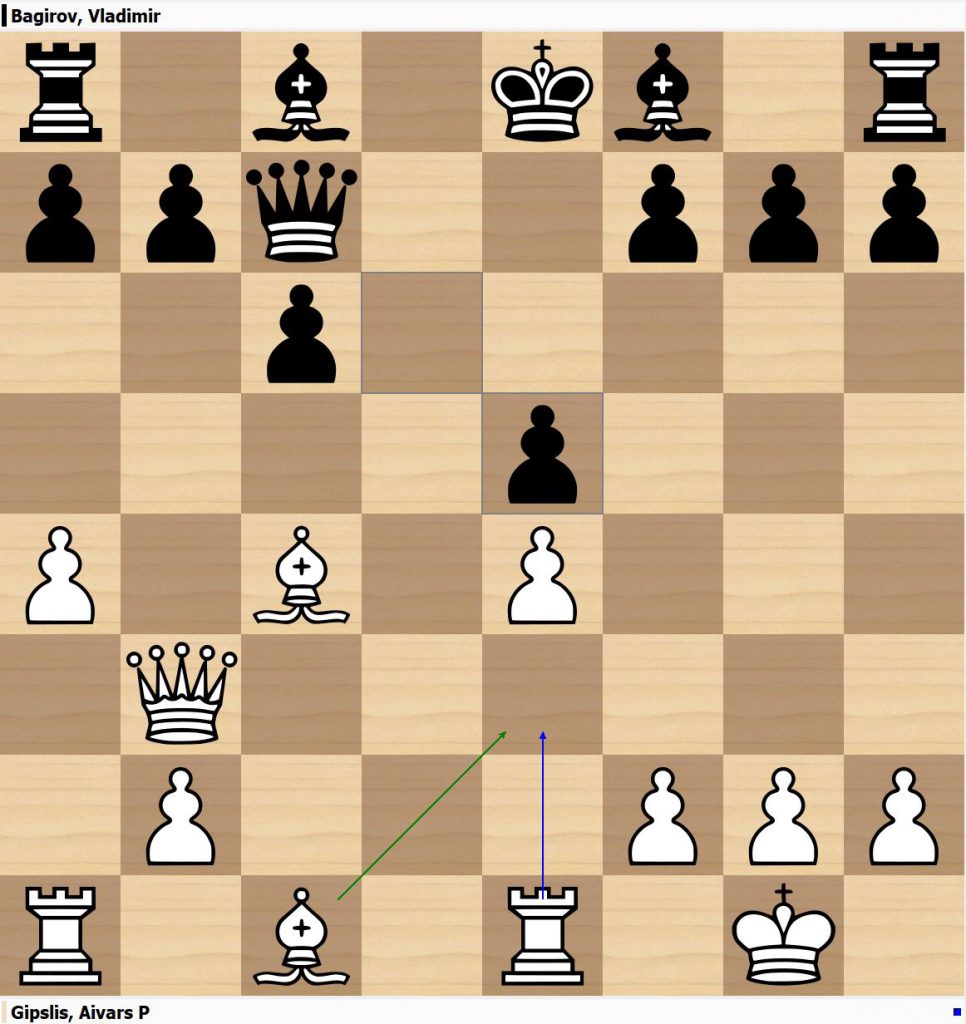
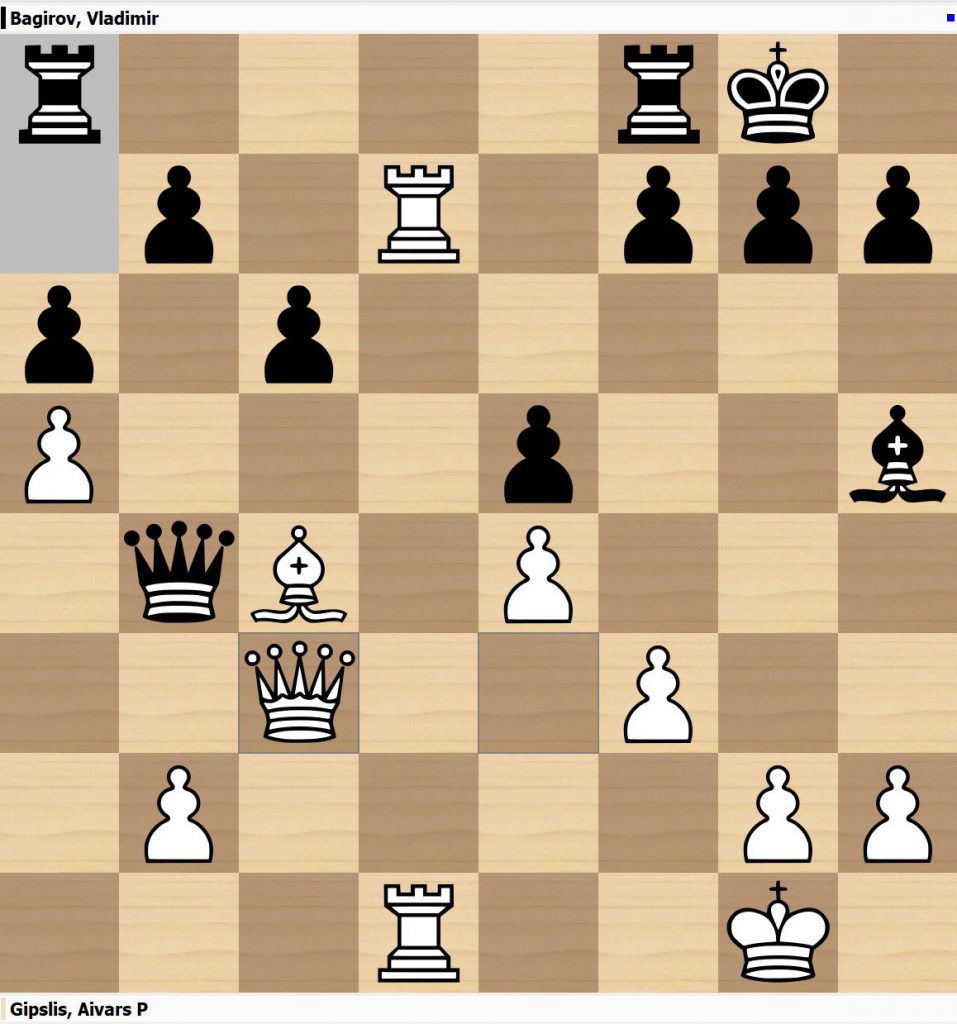
23…Qxc3 24.bxc3
Now the Black queenside pawns cannot be defended. Once again, look how useless the bishop on h5 has become.
24…Rfb8 25.Rb1
Targeting the b7–pawn.
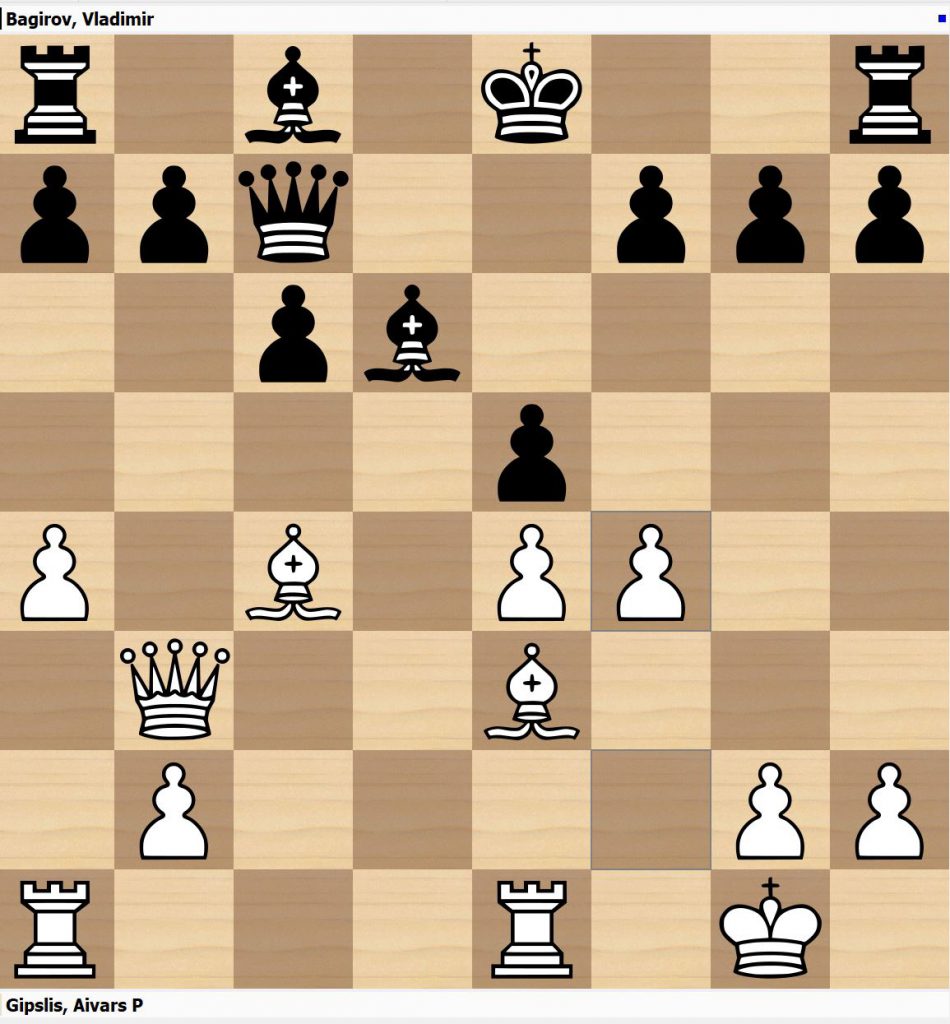
25…Ra7 26.Rb6 Kf8 27.Rxc6
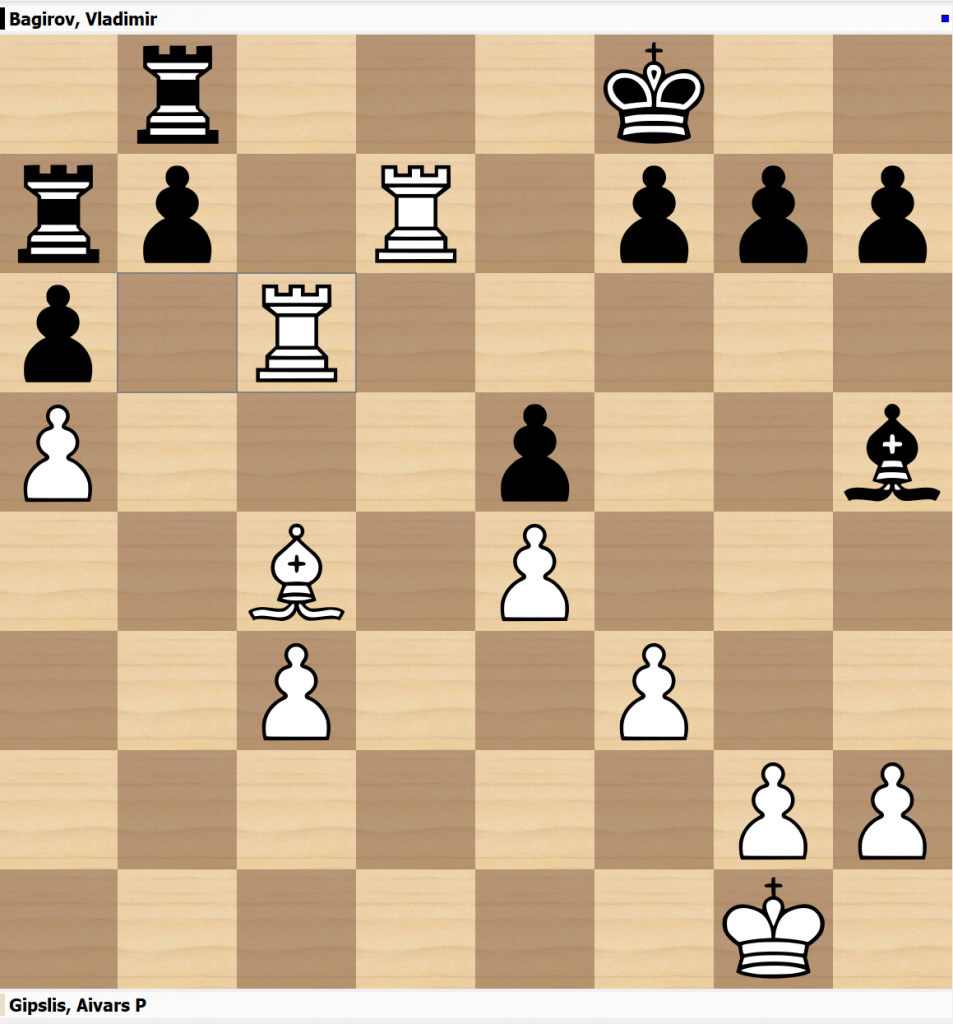
The simplest: White will gain a passed a-pawn that Black can only stop by abandoning his kingside pawns to their fate.
27…bxc6 28.Rxa7 Rb1+ 29.Kf2 Ra1 30.Rxa6 Ke7 31.Ra7+ Kd6 32.g4 Kc5 33.Bxf7 Bxf7 34.Rxf7 Ra2+ 35.Kg3 g6 36.Rxh7
The rest is simple.
36…Rxa5 37.Rg7 Ra3 38.Rxg6 Rxc3 39.h4 1–0